Archive for the ‘Handyman’ Category


Hot Tub Skirting Maintenance

Thursday, September 5th, 2013

Hot Tub Skirting Maintenance - Handyman

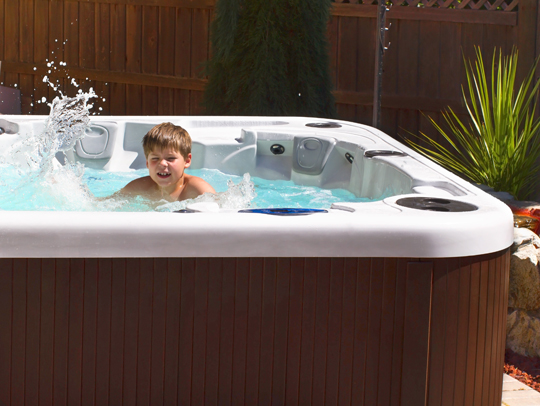
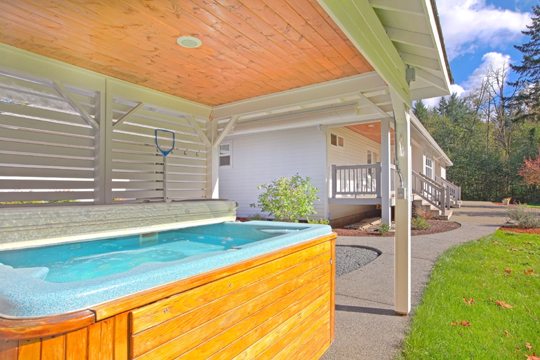
A hot tub can bring you great satisfaction by helping you enjoy a spa treatment and spend quality time with your loved ones in the comfort of your own home. However, just like any other amenity designed and implemented to increase your level of comfort, hot tubs require a more or less complex maintenance routine that will enable you to keep the cabinet looking like new for a longer period of time.

How to Care for Wooden Cabinets

Do you want to discover everything there is to know about correct hot tub skirting maintenance? In this case, you should know that wood cabinets (especially cheap pine cabinets, which are very fragile and exposed to deterioration) should be properly inspected periodically.

Redwood and cedar cabinets should be treated with an oil-based stain – the kind that you would utilize to oil your deck. Use a semi-transparent product, a pair of gloves, a brush, a paint pad, and a canvas cloth to get the job done in no time. Some professionals use marine varnish (also known as Spar varnish) to obtain more than satisfactory results. Light sanding, correlated with a coat of Spar varnish, represent the most effective hot tub skirting maintenance secret that could easily help you keep your hot tub in excellent condition for many more years to come.

How to Care for Non-Wooden Cabinets

Numerous homeowners choose to invest in so-called maintenance-free hot tub skirting materials, like polymers or plastic. Plastic cabinets are extremely affordable, but can easily turn yellow as a result of extensive sun exposure. Furthermore, potential buyers should know that polymer cabinets are available in different shapes, colors, and sizes and can even mimic high-quality materials, like wood, stainless steel, and even rocks.

Plastic and polymer-based cabinets can be easily cleaned with water, liquid soap, a soft cloth, and a small amount of baking soda, to eliminate impurities and keep your non-wooden cabinet looking like new. Polymer cabinets represent a great investment because they are highly durable, impact-resistant, and require minimal maintenance.

Find the Best Handyman in Your Area

Worried that you might not have what it takes to perform the correct hot tub skirting maintenance periodically? In this case, TalkLocal can give you a helping hand by putting you in touch with skilled, experienced handymen who could easily improve the aesthetics of your cabinets and even increase the lifespan of your hot tub.

How to Estimate Your Chimney Repair Costs

Wednesday, September 4th, 2013

How to Estimate Your Chimney Repair Costs - Handyman

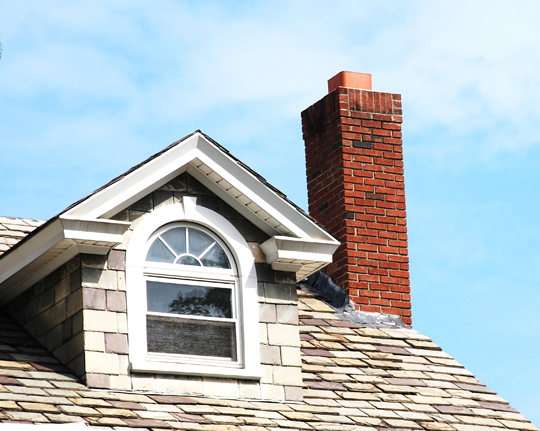
Chimneys are very useful, but they need regular cleaning, otherwise they can be very dangerous. Chimneys eliminate toxic gases from your house if they are in good condition. Unfortunately, they are not invulnerable. In order to save you time and money, all you have to do is have them inspected and cleaned once per year. If need be, you might have to repair them.

How Can You Keep Your Chimney Working Properly?

If you want your chimney to serve you as it should, you need to check and repair it on a regular basis. First of all, to find out if it needs any repairs, you need to clean it. You can do this yourself or you can ask a professional to do it for you.

How Can You Estimate Your Chimney Repair Costs?

If you’re not a do-it-yourself person and decide to pay a professional to do the job, remember that prices vary from region to region and even from company to company, depending on what you need to be repaired. Let’s see what you can opt for and how much an average chimney repair costs.

What Are Your Options?

– Sweeping your chimney. Costs may vary from $150 to $300.

– Chimney flashing repairs. This helps you avoid possible damage caused by water. Any leak that goes unnoticed can cause serious issues. Costs range between $150 and $350. There are also sealants on the market that formulate to provide a waterproof membrane for adhesion on asphalt shingle, brick, metal, and/or other chimney and roofing parts. You can find these products on Amazon and have it shipped for free starting at $81.94.

– Installing a new metal cap on your chimney. This is very important, as the cap prevents water or even little animals from getting into your house. That can cost you $150 up to $300. You can find and purchase a new chimney cap from Amazon and have it shipped overnight starting at $23.04.

– Unblocking your flue. Blockage may happen because of rubbish or even animal nests. If it’s blocked, this metal tube meant to take smoke and heat out of your house will not be able to do this anymore, which is a great risk to your family’s health. You can find different products to help clean and protect your chimney including the flue. Some of those products include a chimney cleaner, brush, and flue stop. You can purchase some of these products on Amazon and have them shipped overnight starting at $7.19.

– Tuck-pointing your chimney. This means inserting mortar between the bricks in order to repair faulty mortar. It will cost you up to $175.

– Repairing the entire chimney. This entails complete rebuilding. Depending on the contractor, that may cost you up to $1,000.


Need Help?

If you decide to entrust your chimney repair to a professional, TalkLocal can connect you directly with local professionals specializing in chimney repairs and maintenance, for free.

The owner of this website is a participant in the Amazon Services LLC Associates Program, an affiliate advertising program designed to provide a means for sites to earn advertising fees by advertising and linking to Amazon properties including, but not limited to, amazon.com, endless.com, myhabit.com, smallparts.com, or amazonwireless.com.

Carpentry Tools List

Tuesday, September 3rd, 2013

Carpentry Tools List - Handyman

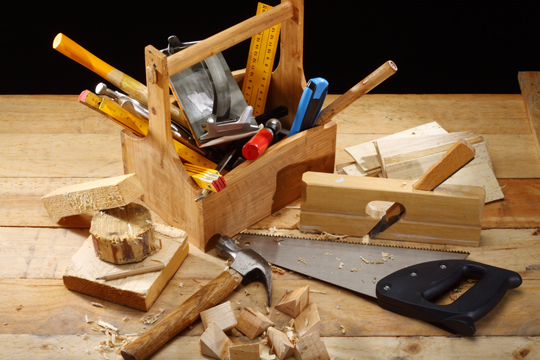
There are ten essential tools that every carpenter will need. This carpentry tools list covers everything that you need in order to jump-start your carpentry. Knowing the basic tools you will need will help you make everything from countertops to other, more complex structures, like treehouses.

1)     Claw Hammer (Finish Head)

Every home needs a hammer for all-around household fixing. Find a hammer that feels good and solid in the hand and that is not too heavy.

2)     6” Layout Square

A layout square is useful for all carpenters, because it can help you make a square, create a 45ᵒ angle, and measure up to 6 inches. This tool is indispensable.

3)     25’ Measuring Tape

A measuring tape is another must-have for the carpenter. The measuring tape should have both standard and metric markings and have a loose hook at the end so you can make accurate measurements.

4)     Utility Knife

A utility knife is useful for making markings on wood and is an all-around tool that you will need in completing your projects. Get one that is sturdy and has a locking mechanism for the blade.

5)     Chisels

A finely sharpened chisel is perfect for cleaning joints. It can also be used to clean out mortises. Different sizes should be at your disposal to provide for a wide range of uses and projects.

6)     Level

You will need a level to make sure that what you are working on is perfectly horizontal or vertical. It is advisable to keep a long level (about 36”) and short one that is about 6”.

7)     Screwdrivers

Every household needs a screwdriver – and not just for carpentry. Try to purchase several screwdrivers of different sizes, as well as both flat heads and hex heads (or Phillips), so you can be ready when you need it.

8)     Sliding Bevel

This tool is much like a 6” square, except that is has a locking mechanism and can be adjusted to different angles. The tool is useful if you want to replicate angles.

9)     Nail Sets

Nail sets are similar in size and shape to chisels, except that they are used to sink nails into wood. It is handy to keep several nail sets at your disposal.

10)  Block Plane

A block plane is another essential for every carpenter. Block planes are used for shaving wood and for cleaning up edges.

Need Help?

Contact TalkLocal today, and we can help you find a professional near you. You may need some help in selecting carpentry tools or finding a carpenter near your area. In this case, we are here to help.

How to Find and Install Bar Window Guards

Friday, August 30th, 2013

How to Find and Install Bar Window Guards - Handyman

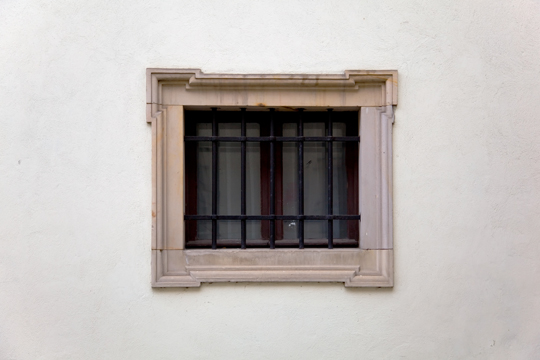
Homeowners who consider their safety a top priority are always interested in finding and applying simple, cost-effective preventive measures guaranteeing superior protection against accidents and burglary attempts. High-quality, durable, extremely resistant bar window guards serve this end purpose, enabling families to rest at ease knowing that their loves ones and their valuable belongings are out of harm’s way.

Furthermore, most people who never want to deal with the emotional trauma and the financial losses triggered by a break-in are probably looking for the best deals on 5-star security bars and window guards. Keep reading to discover how to find and install bar window guards tailored to your real needs, specifications and allocated budget.

Identifying the Right Products

Assuming that you have the skills, the knowledge, and the tools required to start a DIY project and install your window guards without contacting a handyman, make sure you opt for the best product your money can buy. Don’t settle for cheap window guards that could be easily damaged by an experienced perpetrator in a matter of a few seconds.

It is recommended to purchase and install 15-inch, permanently fixed security window bars made from iron by reliable manufacturers well-known for their high quality standards and their remarkable attention to detail.

Apart from the fact that bar window guards can easily stop your children and pets from getting outside the house while also preventing burglary attempts, these highly beneficial products also add value to your property and enhance the curb appeal of your home. Who wouldn’t love to live in a beautiful house, decorated with custom-built bar window guards meeting and even exceeding your highest expectations, in terms of exterior design ideas? Choose to collaborate with a respectable supplier who will bend over backward to show you the best bar window guards designed to beautify and protect your private residence at the same time.

Installing Bar Window Guards

Once you’ve found the right bar window guards for your home, all you need to do is to install them properly.

1. Start by reading the manufacturer’s instructions and always make sure your window guards comply with current building codes and fire codes. When in doubt, call your local fire department and ask for expert guidance.

2. Use the tools and materials recommended by the bar window guard manufacturer.

3. After putting the window guard in place, make sure there are no openings wider than 4 or 5 inches.

4. Also, your window guards should be properly attached to your window frames, which should be in excellent condition. Moreover, keep in mind that most types of bar window guards are unsuitable for areas with inclement weather conditions, as they could easily rust.

Get Professional Installation

You could install the bar window guards yourself, or you could consult TalkLocal, your unique source of problem-solving information, to find the best handymen in your area, who could complete this simple assignment in record time.

Hot Tub Skirting Kits

Wednesday, August 28th, 2013

Hot Tub Skirting Kits - Handyman

Most homeowners would like to relax in a hot tub after a long, stressful day at work. Fortunately for them, hot tubs have become extremely affordable, and now they have the chance to buy, install, and care for this particular type of amenity on their own, or by relying on professional services ensured by a competent handyman. Keep reading to find out how to overcome and fix potential problems impacting the functionality and aesthetic side of your large indoor or outdoor tub by simply using a hot tub skirting kit.

When Do I Need a Hot Tub Skirting Kit?

Is the wooden cabinet rotten, eaten by bugs, and spreading funky odors? Does it display obvious signs of wear and tear that you’d want to mask in a truly effective manner? If you think that your hot tub needs an upgrade as soon as possible, invest in a convenient hot tub skirting kit.

How to Find the Best Hot Tub Skirting Kit

If you want to make the most of your hot tub for many more years to come, don’t make any compromises, and opt for high-quality hot tub skirting kits launched on the market by reputable manufacturers. Some sets come with an extended warranty of 12 years or more and contain the following elements: eight side panels, trim pieces, square corners (or round, depending on your requirements), and premium stainless steel-based hardware.

Hot tub restoration kits are easy to use even by people who have little or no experience whatsoever in this line of work. By purchasing the right kit, you can get your hands on high-quality, low-maintenance materials that do not require staining or painting, like extremely beautiful, natural-looking synthetic wood with enhanced UV protection, an elevated fade resistance, and zero or minimal surface degradation (peeling, cracking, chipping, and so on).

How to Find an Expert in Hot Tub Skirting Kits

You might not have the tools, the time, the technique, or the patience that you need in order to use your new hot tub skirting kit. In this case, it is highly recommended to opt for professional services brought to you by a reliable handyman. Find the best one by consulting TalkLocal, your one and only provider of fresh, accurate information and clever solutions to all of your daily problems.

What You Need to Know About Chimney Flue Repair

Tuesday, August 27th, 2013

What You Need to Know About Chimney Flue Repair - Handyman

The chimney is one of those unassuming, but extremely important parts of the house. Nobody notices the chimney except in two circumstances: during the holiday season when kids are expecting Santa to come through the chimney and when the chimney doesn’t work properly. Chimney flue repair and inspection are a must, because your family’s safety is at stake. Annual inspections are recommended, and if you notice any signs that tell you something is wrong, such as the possible smell of toxic gases, act immediately.

There are two ways to approach your chimney flue repair: You can do it yourself if you are familiar with such tasks, or ask for qualified help. If you decide to do it yourself, it is important to be very confident about the task, as fixing the chimney flue is essential. Your health and safety depend on it.

What Problems Can a Broken Chimney Flue Cause?

Besides safety and health concerns, a damaged chimney flue prevents your heating system from functioning properly and can lead to energy loss. By postponing a chimney flue repair job, you not only put yourself in danger, but also lose money.

What Does a Chimney Flue Repair Involve?

First of all, you need to clean the chimney flue to see exactly what is wrong. During this process, you will have to remove soot and debris and see whether there is a blockage or the bricks have been displaced. If the chimney flue is seriously damaged and you need to rebuild it completely, you might think twice before doing it by yourself.

After cleaning the chimney flue, remove the exterior bricks if they are loose or broken. Work carefully while on the roof. When you’re done, it’s time to replace old bricks with new ones. Try to find similar bricks to match the rest of the chimney. Use mortar to fix the bricks tightly and when the brickwork is ready, waterproof the chimney with caulking. This will prevent water from penetrating it and gas from finding a way out through cracks. The last stage of your chimney flue repair is finishing. Check for mortar chips and apply some more caulk to reinforce it.

Additional Help

Chimney repair is a serious job, and if you’re not experienced in home improvement projects of this kind, you might want to find a qualified professional to do it for you. TalkLocal can connect you with contractors and handymen specializing in chimney repairs in minutes.

Types of Hot Tub Skirting

Friday, August 23rd, 2013

Types of Hot Tub Skirting - Handyman

Hot tubs have become increasingly popular among homeowners who want to enjoy a 5-star pampering spa treatment on their own property. Despite the fact that this idea is received with great enthusiasm by most people, only a few of them know that hot tubs require a mandatory maintenance routine in order to look and function like new for a long period of time. In fact, there are various types of hot tub skirting, and all of them have their unique particularities that you should take into consideration.

First of all, when it comes to building and installing a beautiful hot tub, homeowners are advised to invest in a first-class cabinet, designed to encase their large tubs. One could easily find a generous selection of cabinet materials on the market, including wood and synthetic plastics.

Wood Hot Tub Skirting

If you want to go for the natural-looking alternative, wood hot tub skirting (like cedar and redwood, for instance) could be a perfect choice. However, if you have an outdoor hot tub, you should be aware of the fact that bad weather conditions and excessive moisture can easily deteriorate the wood surface and force you to invest in reconditioning processes. In this particular case, homeowners are advised to apply a water sealant to stop the cabinet wood from rotting. If you don’t have the time, the skills, or the patience to handle this simple assignment on your own, pay the right price for professional services ensured by a skilled handyman operating in your area.

Polymer Materials

Are you interested in discovering the most modern, durable, and cost-effective types of hot tub skirting? If you’re not a big fan of wood and/or you don’t want to spend a lot of time and money on regular upkeep, think about investing in polymer skirting materials, which represent a perfectly viable, maintenance-free alternative. Now you have the opportunity to find resistant, affordable products tailored to your taste, demands, and financial possibilities. Here’s an extra tip: Whether you opt for natural or synthetic hot tub skirting, make sure it is 100% sturdy.

Need Professional Assistance?

Remember that the best types of hot tub skirting serve two different purposes: They improve the aesthetics of your hot tub while masking and protecting the plumbing system. This is the main reason one shouldn’t settle for anything less than first-hand materials.

Are you looking for expert guidance, professional installation, or premium hot tub maintenance work? In this case, rely on TalkLocal, your trusted source of information, to get in touch with the best handymen available in your area. Find the best one today and get the right answers to all of your hot tub-related questions.

Types of Bar Window Guards

Monday, August 19th, 2013

Types of Bar Window Guards - Handyman

These days, homeowners have the chance to profit from affordable home improvements, designed and implemented to turn their properties into an entirely safe, comfortable, incredibly beautiful environment. Bar window guards are used to add value to any private residence while minimizing security risks.

With so many options at hand, provided by some of the most reputable manufacturers currently operating on the market, choosing the right types of bar window guards can be quite challenging and time-consuming. Keep reading to find out exactly what kind of window guards will work best for you.

How to purchase the right bar window guards

The most effective bar window guards will prevent unauthorized entry associated with property damage, financial losses, and emotional traumas while also savings lives. Did you know that approximately 5,000 children get hurt after falling out of the window on an annual basis? Such tragic accidents can be avoided by simply installing one of the best types of bar window guards. Make the best decision after considering 3 important factors:

a)    Materials

Go in favor of products made from highly resistant materials, like aluminum or iron, which can easily support a considerable weight and stand the test of time.

b)    Size

Opt for bar window guards that are at least 15 or 16 inches high, displaying horizontal bars that are evenly distributed to stop children and pets from falling out of your window. A regular ball with a 5-inch diameter (the average size of a kid’s head) shouldn’t manage to pass through your bar window guard.

c)     Window compatibility

Your bar window guards should be a perfect match for your window. There are numerous types of windows, including slider, casement, and hung sash windows, and all of them require different types of bar window guards. Fortunately, homeowners can profit from free advice on this matter by simply conducting an extensive online search, consulting building codes and fire codes, or by contacting a competent handyman who has the best answer to this question and more.

Need More Help?

If you don’t have what it takes identify and install the best types of bar window guards on your own, ask for help today. Use TalkLocal, your number one provider of accurate, regularly updated information, to find the most reputable handymen in your area who will enable you to invest in excellent home security measures.

Cost of a New Countertop

Thursday, August 15th, 2013

Cost of a New Countertop - Handyman

The cost of a new countertop can vary dramatically based on the material you choose and the size of countertop you need. There are, of course, a number of options available in terms of material, and each has its pros and cons. Once you decide on the type of material you want, the next step is to determine price.

Stone Countertops

This is typically the most expensive category of countertop material and includes natural stone products such as granite and marble, as well as engineered stone, which is primarily composed of quartz. Depending on the quality of the marble, granite, or quartzite you choose, the cost could be anywhere from $4 per square foot to a whopping $150 per square foot. Stone slab countertops also fall into a slightly costlier price range of $50 to $150 per square foot. On the plus side, stone countertops are incredibly durable and lend an air of grace and elegance to any space.

Solid Surface Countertops

This material can give you a similar look and feel to stone countertops, but the cost of a new countertop in this category will actually cost you a lot less. Ranging from $40 to $80 per square foot, solid surface countertops are as durable as stone. A typical kitchen countertop in this material should cost you somewhere between $1,200 and $2,500.

Laminate Countertops

This is one of the cheapest countertop materials you can get, with prices ranging from $7 to $30 per square foot, depending on the type of laminate you choose. This means that you could easily get a 30-foot countertop within $200 to $900. Bear in mind that laminate is very durable, and the recent advances in laminate technology allow you to create very realistic countertops that mimic any natural material from stone to bamboo.

Tile Countertops

Tile is a very popular option for countertops, especially in kitchens and bathrooms. There are a number of tile materials available, including stone, ceramic, and porcelain. Stone tiles typically run between $4 and $20 per square foot, whereas ceramic and porcelain tiles fall in the range of $1 to $250 per square foot. Porcelain tiles will generally fall in the higher end of that price range, with ceramic tiles occupying the lower end of the scale.

Wood Countertops

Wood is a very popular option for countertops, especially in kitchens. Depending on the type of wood you choose, these countertops can cost anywhere between $30 and $150 per square foot.

Get A New Countertop Installed

Once you choose the material for your new countertop, chances are you will need a handyman to help you install it. Visit our website today and use TalkLocal’s free online referral service to find the perfect handyman for the job in your area.

Replacing Your Coping Saw Blade

Wednesday, August 14th, 2013

Replacing Your Coping Saw Blade - Handyman

Coping saw blades are thin, hardened steel blades that can be effectively used to cut shapes and designs inside wood or make coped joints in crown moldings. While these blades are strong and super efficient, they must be replaced from time to time so that you can continue to work more efficiently and less dangerously on your projects.

Why Coping Saw Blades Need Replacing

With continuous use, blades of any kind become dull and lose their edge. This means that firstly, the quality of the cut won’t come out as clean as it should be. Secondly, you will need to put in a lot more effort to perform a task that could be performed much more easily with a sharper blade. Another significant factor here is that having to work too hard means that there is a larger risk of slipping and hurting yourself while working with a dull saw blade.

Understanding when your coping saw blade needs replacement is something only you can do well, based on a judgment of how easy or difficult it is right now for you to use it. Abrasive materials and friction heating can weaken the sharpness of the blade. Sharpening it may not always be a good idea either, especially in the case of carbide tip blades. In fact, a new pack of coping saw blades usually costs just a few dollars, and hence, it is best to replace them when you feel it’s necessary.

How to Replace a Coping Saw Blade

1. Replacing a coping saw blade is a fairly simple process. You must first squeeze the saw so that the blade is sufficiently loosened.

2. You can then unhook it from both the ends.

3. It’s now time to attach the new blade, which can be hooked into the now-free slots and simply twisted to fit in position.

4. The tautness can be adjusted by twisting the handle, and you are all set for your next project.

Taking Care of Your Coping Saw Blade

When not in use, it is best to keep your coping saw blades wrapped in something soft and protective to preserve the sharp edges. Slicing a piece of hose and storing the blades in it can be a neat trick. Also, before you begin cutting something, ensure that there are no nails in the wood, as that could damage the edges of the blade

Get the Right Help for Your Woodwork Project

You don’t have to be an expert at handling a coping saw if you need some woodwork done for your home. You can get in touch with trained and experienced professionals who can do the job to perfection within minimal time. Just drop us a line, and we at TalkLocal will make sure you are connected with the very best professionals in your area.