Archive for the ‘Heating and Cooling’ Category


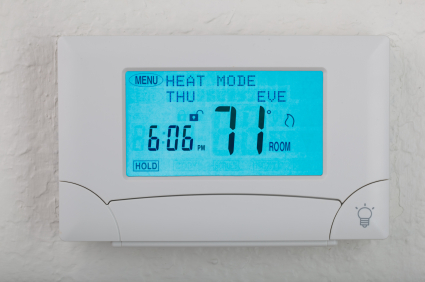
Thermostat Display Blank

Tuesday, September 25th, 2012

Thermostat Display Blank Heating & Cooling

You are trying to set the temperature in your home, but the thermostat display is blank. Before you freak out or call professional help, check to see that the battery in the thermostat is still good if your display system requires a battery. If that isn’t the problem, continue reading this guide.

Loss of Power from Other Sources

In order to troubleshoot the problem, you will need to check the wirings inside your display and find out which ones are working and which ones are not. Basically you need to check for power flowing on the wiring—for this, get a voltmeter.

A voltmeter is a device that measures the amount of electrical difference (flow) between two points of a circuitry. You can measure the electrical flow by attaching the two metal tips of the voltmeter to the wires you want to test.

Disassemble your thermostat display to the point where you see four types of wiring. Two of the wires should be black—these are high voltage wires, (120V/240V) so you don’t want to mess around with them yet. You should also see the two smaller wires that are not black.

One of these smaller wires should be marked to be 24V, either in your display manual or in hardware. Locate that wire and test the voltage with the voltmeter to the ground/wall. If the voltmeter reports the flow of 0V, this indicates that the fuse on the circuit board is blown. The blown fuse is making your thermostat display blank in this case. Replace it.

If the 24V is not a problem, carefully check (with rubber gloves) the voltages of the 120V and 240V wires with your voltmeter. If you find a problem with any of those wiring, backtrack the problematic wiring through until you find the problem or reach an AC component. If the connected component does not work, the component will have to be replaced.

Consult a Professional

If you are not sure what you are doing, consult a professional to avoid damaging your system. TalkLocal can help with finding the correct local experts to help you in this case, saving you time and energy in what may be a stressful situation.

How to Unclog Air Ducts

Tuesday, September 18th, 2012

How to Unclog Air Ducts Heating and Cooling

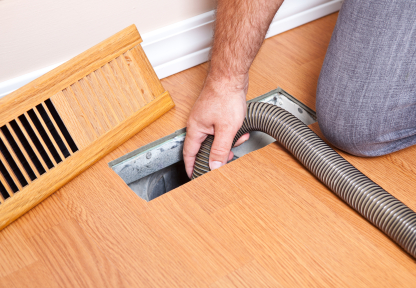
Clogged air ducts can be damaging to your home and your health. Clogged air vents cause higher energy costs as it increases the amount of energy used to power air-conditioning or heating units.  Also, clogged air ducts can contain mold, dust, bacteria ,and fungi that are dangerous to human health.  However, don’t worry because it is easy to clean an air duct. For severely clogged air ducts, a professional is recommended.

How to Unclog Air Ducts:

Inspection

1. Turn on the central air-conditioning unit.

2. Go to each duct and evaluate air flow coming out of the vent.

3. Unscrew the vent and inspect vent for dust buildup.

4. Use a flashlight to inspect the inner duct for excessive buildup. If there is not excessive dust buildup, screw the plate back on.

Vacuuming

1. Find or buy a vacuum cleaner hose with strong sucking power. The more sucking power, the better the cleaning of the air duct.

2. Insert hose deeply into the clogged duct.

3. Begin vacuuming from the deepest point and work toward the vent opening.

4. After cleaning, screw plate back on the air vent.

Remember, air ducts cannot be completely cleaned without professional help. For professional air duct cleaning, use TalkLocal. TalkLocal will connect you to the best HVAC professional in your area.

How to Program a Thermostat

Monday, September 17th, 2012

How to Program a Thermostat  Heating and Cooling

Knowing how to program a thermostat is a crucial skill to have. If you have a manual thermostat, that means you’ll need to set the temperature yourself and wait for the temperature to adjust. Rather than wasting your own time, energy, and of course, money, try switching to a programmable thermostat. Having a programmable thermostat allows you to set a temperature that adjusts itself when needed.

So how exactly do you program a thermostat? Well, first you need to find out whether your thermostat is programmable or not. If it has only a temperature setting and the ability to turn it on or off, then your thermostat is an older model.  If you have one of these types, you will need to purchase a programmable thermostat in order to start saving money.

The programming itself will vary from thermostat to thermostat. Most thermostats will have a way to program the thermostat directly by means of a schedule or program button. If you need help with this part, consult your user manual for directions on what to do.

To effectively and efficiently program your thermostat, there are some general rules to keep in mind.

1) Make sure to program the thermostat so that it turns off heat or air conditioning when you aren’t home. Schedule it to return to the regular temperature again roughly 20 to 30 minutes before you get home.

2) Program the weekend based on your schedule. Many people are home on Saturdays and Sundays so you’ll want to keep the thermostat on if you’ll be home.

3) Program your thermostat so that the heating or cooling turns off or is reduced when you’re sleeping. Once you’re asleep, you probably won’t notice any changes in temperature. Set the thermostat to turn back on about 20 to 30 minutes before your alarm goes off in the morning.

4) Should you decided to go out of town, make sure to shut down your programming for the duration of your trip. However, if you have pets in your home or you live in a very cold climate, keep the heating on and ensure the temperature is set above 55 degrees.

Once you program your thermostat correctly, the savings will be evident in your heating and cooling bill. Knowing how to program a thermostat correctly is a vital step to maintaining an efficient home air conditioning system.

If you have followed all these instructions and still need assistance, consider using TalkLocal. TalkLocal is a free service that will connect you with top-quality, reputable heating and air conditioning companies in your neighborhood within minutes. Just enter in your specific problem, location and availability, and up to three companies will call YOU directly, saving you the time and stress of finding one yourself.

Air Conditioning Unit not Cooling Well

Friday, September 14th, 2012

It’s summer. It’s hot. The last thing you want when you walk into your house is to find out that your air conditioning unit is running but not cooling. There are a couple explanations for why your air conditioning unit is not cooling well, and here are some troubleshooting tips to get it back to normal working condition.

If the air conditioning unit is in fact running, but not cooling well enough, your filters may need to be replaced. If they are dirty and the pan underneath has no condensation water in it, then you need to replace the filter. In addition, you may want to check the coils inside and outside unit and clean them.

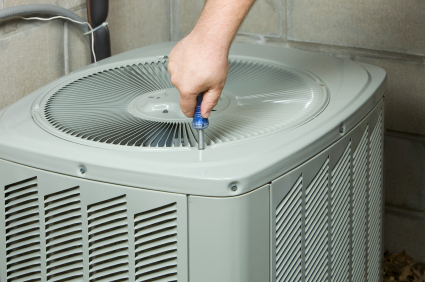
Your unit could be low on Freon, which could explain why the air coming from the system is not as cool as it should be. If you go to the outside unit and inspect the two copper pipes sticking out, the larger one should be cool to the touch, and the smaller should be warm/hot. Warm air should usually be coming out from the unit. If these situations are not the case, refrigerant may be necessary.

Another possible explanation is that some vents in your house are closed. Go around and make sure they are all open and not blocked by anything that may be preventing maximum airflow.

There could even be a problem with your thermostat, which means that it is not correctly reading and failing to relay the temperature you have set. If none of these solutions have helped, you should contact a professional for insight and help.

To locate an HVAC company near you, try using TalkLocal. TalkLocal is a free service that will connect you with top-quality, reputable HVAC professionals in your neighborhood within minutes. Simply enter in your specific problem, location, and availability and TalkLocal will contact multiple companies, who will then call YOU directly, ready to help. Save time and sweat from trying to locate the right HVAC company on your own, and let TalkLocal do it for you.

Weird Noise from HVAC System

Wednesday, September 12th, 2012

Weird Noise from HVAC System Heating and Cooling

Some noises coming from your HVAC (heating, ventilation, air conditioning) unit is normal. What isn’t normal is when it starts making those strange noises that may be cause for concern. There are a bunch of different noises your HVAC unit can make, so being able to identify whether the noise is normal or abnormal is important.  Check out this article to find out if your home is making a weird noise from HVAC system.

Normal Sounds

Let’s start out by discussing some of the noises you should expect. Sudden thumps, low pitched hums, “whooshing” noises, and buzzing sounds are all normal sounds that should be no cause for alarm. These noises happen to HVAC units constantly, so don’t be alarmed if any of these happen.

Abnormal Sounds

A squealing noise is one of the abnormal noises that is indicative of your HVAC unit needing repair. A squealing noise is probably the result your belt-driven motor, if you have one. The squealing usually indicates the belt is loose or worn out. In either case, it will need to be repaired.

A popping noise coming from your vents is an abnormal noise, but more of an annoyance than an issue. This popping is caused by the dust in your air ducts contracting and expanding as the temperature changes.

Another noise that may occur is the sound of metal hitting metal. This is likely the result of the fan blade hitting something, be it ice, wire, or tubing. If you hear this noise, shut the unit off immediately. This will need to be repaired.

If your HVAC unit is making any of these sorts of noises, it is of vital importance to get them checked out. No one wants to have a faulty A/C unit during these hot summers, or no heat during these cold winters. If you need help with any repairs, consider using TalkLocal to find a heating and air conditioning company for you. TalkLocal is a free service that will connect you with top-quality, HVAC companies in your neighborhood within minutes. Just enter in your specific problem, location and availability, and up to three companies will call YOU directly, saving you the time and stress of finding one yourself.

Water Heater Pilot Light Troubleshooting

Monday, September 3rd, 2012

Water Heater Pilot Light Troubleshooting Heating and Cooling

The pilot light on a water heater is used to ignite the gas that comes out of the main burner to provide light. A small constant stream of gas is released to power the pilot light, which triggers the release of the main gas source for the burner. Older water heaters have the pilot light out in the open, and are lit by a match or another flame source. Newer water heaters have the pilot light in a separate compartment, and can’t be lit by a match. Here are some steps for water heater pilot light troubleshooting:

CAUTION: If you smell gas, do not proceed. Evacuate the house immediately and call your gas department to have them fix the leak.

For older water heaters

1. Turn the temperature control knob to the lowest setting.

2. Turn the on/off switch to the pilot setting.

3. Remove the outer and inner access panels at the bottom of the heater.

4. Locate the pilot button (should be located next to the on/off switch) and hold it down as you light the pilot light in the next step. Some models don’t have a separate pilot light button, and instead it is incorporated into the Pilot setting of the on/off switch.

5. As you hold down the pilot light button, follow the silver tube inside the access panel to the end, which is where the pilot light is located. Light the end with a match or another flame source.

6. Hold down the pilot light button for an additional 30 seconds after the pilot is lit.

7. Replace and secure the access panels.

8. Turn your burner from the Pilot setting to On and set the temperature back to the desired setting. You should hear the burner heating back up.

For newer water heaters

1. Turn the temperature control knob to the lowest setting.

2. Turn the on/off switch to the pilot setting.

3. Locate the pilot button (should be located next to the on/off switch) and hold it down as you light the pilot light in the next step. Some models don’t have a separate pilot light button, and instead it is incorporated into the Pilot setting of the on/off switch.

4. While looking through the sight glass and holding down the pilot light button, slowly press the spark generator until you hear a click.

5. There should be a spark from the generator, and the pilot light should be lit. Keep on holding down the pilot light button for an additional 30 seconds.

6. Turn your burner from the Pilot setting to On and set the temperature back to the desired setting. You should hear the burner heating back up.

If your pilot light won’t light or keeps on going out, you probably have a faulty thermocouple. Thermocouples are used to sense if the pilot light is on or not, which then triggers the release of the main gas light. Replacing a thermocouple, especially on a newer model, can be confusing and shouldn’t be done by anyone other than a professional. Use TalkLocal for free to find a trained professional that can help you with your thermocouple needs!

Pilot Light went out on Furnace

Friday, August 31st, 2012

Pilot Light went out on Furnace Heating and Cooling

The pilot light went out in your home furnace and you aren’t sure what to do.  First,  here is some background info. The pilot light on your furnace is a small flame that hits a thermocouple above it, which creates an electrical current that holds a pilot valve open, allowing the pilot gas to flow.  If the thermocouple gets too cool, then the gas intake will shut off and flame will die.  So when the pilot light goes out on your furnace, you can usually pin it down to one of three causes:

Lazy Flame

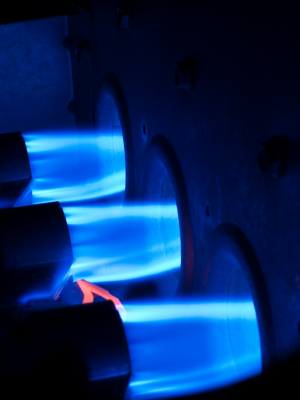
A lazy flame is usually yellow in color and weak when compared to the blue, noisy, crisp pilot flames.

Without the proper amount of oxygen, the blue flame will turn into a weak yellow flame and no longer heat up the solenoid properly, leading it to extinguish the solenoid.  Check your air intake valves by the pilot light; they often times gets clogged with dirt and make the pilot flame weak and ineffective.  Strengthen the flame by sanding and clearing off the grime obstructing the intake valves.

Bad Thermocouple

Since the thermocouple regulates the amount of pilot gas released, the thermocouple itself is an integral part of the pilot light.  If the thermocouple is bad or faulty, then it will not properly register the heat given off by the pilot flame and erroneously extinguish the flame.  In some cases, you may be able to sand down the thermocouple (there may be dirt or grime that makes the temperature readings inaccurate), but in other cases, you may need to replace the thermocouple itself.  Fortunately, the thermocouple is a relatively cheap replacement part you can find around your local hardware stores (usually around $10).

Backdraft

Another potential reason that the pilot light goes out is a backdraft from your vents.  High winds may create a backdraft in your vents, blowing wind back toward you pilot light and extinguishing it.  While this is uncommon, you may want to have a professional look at your situation to be certain that you don’t need to completely replace your furnace.  TalkLocal can connect you with high quality heating experts in your area in just minutes! It’s fast, easy, and completely free!

How often should you Change your AC Filter

Thursday, August 30th, 2012

How often should you Change your AC Filter? Heating and Cooling

How often should you Change your AC Filter?

Air conditioning filters come in a variety of forms, but all forms need to be changed on occasion to keep air quality at optimal levels. Some of the different types of filters include economy filters, efficient filters, panel filters, and reusable filters. Of course, every home has different amounts of dust, so some may need to be changed more often, but if you’re wondering how often you should change your AC filters, keep reading.

Economy filters, sometimes known as panel filters, should be changed every two months. These filters often advertise they can last up to 90 days, but when a panel is filtering air for 60 days, there is going to be much dust and sediment that congests the filter and restricts air flow. This can bring up problems later on, so we recommend changing them at least every two months.

For filters that are either reusable or highly efficient, you will want to change these more frequently, roughly once a month. The highly efficient filters capture the smaller particles that other filters miss, so you’ll want to replace these every month to make sure they continue to do so. Reusable filters should also be cleaned every month, as these filters are never 100% clean and they lose a bit of their filtering ability with each change.

Filters are capable of capturing dust, lint, pollen, smog, bacteria, pet dander, and similar particles. But if you don’t change the filters, then you may as well not have a filter. That’s why its imperative to be diligent about changing your filters in proper intervals.

If you would prefer a repairman do this, consider using TalkLocal to find one for you. TalkLocal is a free service that will connect you with top-quality, reputable HVAC companies in your neighborhood within minutes. Just enter in your specific problem, location and availability, and up to three companies will call YOU directly, saving you the time and stress of finding one yourself.

AC Fan Not Spinning

Thursday, August 16th, 2012

AC Fan Not Spinning Heating and Cooling

Is your AC fan not spinning?  If the fan of your air conditioner has stopped spinning, the fan may just be getting a little stiff. A simple solution is to try using a stick to tap the belt and make it move again. It may start up immediately and be just fine and dandy. If not, the issue is a little more serious.

Next, you should try to turn the air conditioner off and wait a little while before restarting it.  Sometimes it could overheat and cause the fan belt to shut off.  If your air conditioner fan does not start working after you turn the device back on, you should take some of the following steps.

The fan may not be getting power so you should go into the service panel on the side of the unit. You can use a multimeter to check and make sure that there is a continuous electrical path within the device. If there is power going to the fan then the issue is with the fan itself.  You may want to replace the belt/fan so that the problem is rectified. If there is no electric signal reaching the fan, then something else is broken. You should make sure that everything is aligned properly and in the right position.

Another reason the fan may have stopped working is because the compressor has seized up. This could be the result of an oil leak. If so, it is a serious issue and you should shut the entire air conditioner off to stop further damage. Call a professional in this case. The motor could also be shot, so you should call a service man because the average person usually doesn’t know how to fix this .

Use TalkLocal to be put in contact with reliable local businesses almost immediately. Simply input your problem and availability in the online service request and TalkLocal will do the rest. Within minutes, you should be connected with a qualified HVAC company.

What is the Best HVAC System for Homes

Thursday, August 2nd, 2012

What is the Best HVAC System for Homes Heating and Cooling

So what is the best HVAC system for homes.  There are several well-known HVAC system on the market. Before you reach for the most expensive and popular system, you should assess your needs to avoid buying a system you don’t need.

High-efficiency 16 to 23 SEER (seasonal energy efficiency ratio) central air has low running costs and many energy saving features, although it costs more at initial investment. This HVAC system is appropriate for those that live in hotter climates that require longer running air conditioning. Mid-range efficiency 14.5 to 17 SEER are less expensive initially and fair well in terms of utility bill costs. These systems are most appropriate for milder climates that do not experience intense heat waves.

As you can tell, the best HVAC system available on the market is difficult to assess. If there was a superior HVAC system for homes, then everyone would only be using it. However, there is no best HVAC system because people have different requirements.

The secret behind a quality HVAC system in your home is proper installation. You should be more concerned about who installs the HVAC system than the actual brand name or system. You could get the best system installed by the worst contractor, which would lead to quicker malfunctioning in your system. Correct installation ensures that your HVAC system functions efficiently without increasing your utility bill or breaking down.

Sit down with a quality contractor to discuss HVAC systems. You should be paying careful attention to points about climate control and comfort. If you need help finding a reliable contractor, TalkLocal can help connect you with the best HVAC system contractors in your local area. All you need to do is submit a service request on TalkLocal’s website, stating your service need, location, and availability. Then, TalkLocal does the rest, comparison shopping for you and connecting you within minutes to someone who can help.