Archive for the ‘Landscapers’ Category


10 Safety Measures for DIY Tree Trimming

Friday, October 21st, 2016

Tree

Unlike cutting your Christmas tree or small bushes around the house, tree trimming operations can be dangerous and can involve climbing and pruning with power tools. For some trees, an aerial lift may be required to reach the taller branches, putting you at risk for falls or electrocution if there are nearby power lines. That’s why it’s helpful to keep these safety measures in mind if you plan to trim a tree on your own.

Note: Tree trimming can be hazardous so be certain to consider professional assistance before tackling this task.

– Pre-work Assessment

You should examine the worksite for any hazards, pay extra attention to any area with nearby power lines. It’s important to estimate the felling zone, leaving ample room for the tree, and redirect the tree, so it falls out of the way of obstacles. Any tools that you’ll use should be inspected to make sure they operate correctly and efficiently.

– Tree Inspection


Trees should be checked thoroughly, as the job varies depending on the size and kind of tree. If the tree leans in one direction, this will play a significant role in determining which direction the tree will fall. The trunk should also be checked for any knot holes, cracks, or signs of rot that could hinder the process. If the tree has interlocking branches with another tree, they must be removed prior to felling. Any local fauna should also be considered, such as insects, snakes, mammals; you should also note any plant growth on the tree.

– Inclement Weather

Plan the job ahead and be sure to work in optimal weather conditions.  Risk increases with inclement weather. So, in cases of wind, snow, hail, or any other hazardous weather conditions, reschedule for a better day. In addition, if you are prone to heat cramps/syncope/ exhaustion/stroke or any other heat-related illnesses, be sure to take extra precautions – especially on humid days.

– Locating Escape Areas

Before starting the cutting process, be sure to designate your escape areas, safe locations to stand after you’ve made the back cut and the tree is beginning to fall. To determine the escape areas and prevent any serious injury or death, first reconize the danger zones. The first danger zone is in a semi-circle, half the diameter of the tree towards the direction of the fall. The second danger zone is one-quarter of the diameter of the tree that is in the opposite direction of the directed fall. These two areas must be avoided when operating. The escape areas lie between the danger zones.

– Power Lines


Assume all power lines nearby are energized. If necessary, contact the utility company to discuss possible de-energizing and grounding of power lines. Only trained and experienced line-clearance tree trimmers can do tree trimming or removal work within 10 feet of a power line. Some other cautions that can be taken around power lines include using proper ropes with correct carriers/hooks for raising and lowering equipment, using pull ropes to prevent branches from falling onto power lines, and using nonconductive tools and equipment.

– Tools

The chainsaw is among the most common tool used. Other key cutting tools include rope saws, pole pruners/loppers, and folding pruners.

For operating a chainsaw, be sure to read the manual before attempting to operate. Some guidelines include:

                  1. Stay alert as chainsaw work can be exhausting

Turn the engine off when carrying a chainsaw

Kickback is also a major concern when operating chainsaws. Kickback happens when the chain at the end of the bar comes into contact with a hard object or when the teeth of the saw are pinched in the wood, which causes the saw to kick backwards and upwards, where it can hit you. To reduce kickback, be sure to not limit cutting to the upper section of the bar, but insert the saw fully. Furthermore, when cutting, stand at an angle with a firm balance, so if the saw kicks back, it will avoid your neck and head. Many chainsaws made after 1995 have anti-kickback devices installed within them. If your chainsaw lacks one or are looking for a new chainsaw, you can purchase a best-selling WORX WG303.1 16-Inch Chain Saw on Amazon for $92.87 as of July 18, 2016.

– Protective Equipment

OSHA regulations require head, eye, face, hearing, leg, and foot gear before operating chainsaws, with additional equipment as required by the different debris and poisons:

– Fall Protection

To avoid injury from falling, be sure to use ropes and harnesses to anchor yourself whenever possible and avoid free-climbing, but never anchor or tie yourself to the limb or branch that you are cutting. Be sure to position yourself only on limbs that can support your weight and that are close to the trunk. Limbs that are cut should be removed from the tree, so you don’t accidentally use them for support when descending. If any ladders are used, they should be tied into the tree. Safety lines should be kept away from chainsaws and other cutting equipment to prevent them from being cut. Extra caution should be exercised on slopes.

– Teamwork

It is important to work with another person. That way there is one person who stays on the ground and another who climbs. In an emergency situation, both individuals should have first aid and CPR training.

– Alert and Caution

Finally, tree trimming accidents can lead to serious injury or death, so stay alert and cautious at all times. If you aren’t prepared to handle the risk or lack the necessary experience, contact a service professional instead. Let TalkLocal find you the professional you need.


The owner of this website is a participant in the Amazon Services LLC Associates Program, an affiliate advertising program designed to provide a means for sites to earn advertising fees by advertising and linking to Amazon properties including, but not limited to, amazon.com, endless.com, myhabit.com, smallparts.com, or amazonwireless.com.


Granny Pod: Multi-Family and Senior Living Solution

Wednesday, January 13th, 2016

shutterstock_297181775

As baby boomers begin to retire, what will happen to them? Where will they live? Retirement villages, nursing homes, or their own homes? What does a child do when their aging parent can no longer live independently? “Move them in,” you say, but what happens if there’s no space for their parent in their home? Well, that’s where the granny pod comes in — granny flat if you’re Australian. Of course, I personally prefer the term  “auxiliary dwelling units for the elder gentlewoman or man of exquisite taste and resourcefulness”.

What’s a “granny pod,” you ask? It’s basically a tiny home but much cooler (and safer). They’re “tiny home”-like structures that can be placed in your backyard. Most contain a kitchenette, a bedroom that also functions as a common area, and a bathroom. It’s like a deluxe master suite right in your backyard.

What makes a granny pod different than a tiny home? Well, for one thing, they have a cooler name. They’re also equipped with a lot of high end medical technology. The MedCottage, for example, boasts additional features, such as a virtual companion, a lift, video system that monitors at ankle level (no granny peep show here), pressurized ventilation, and the floor is specially cushioned in case of falls. Basically, in comparison to the tiny house, it’s the cousin at the family reunion who always has the latest gadgets.

Sounds great and all, but what’s the catch? Well, there are a few restrictions. (You didn’t think it would be that easy, did you?) For one thing, these auxiliary dwelling units can only legally house one person. Also, there are sometimes zoning law restrictions that prevent people from getting granny pods. So, always check to see if you’re permitted to have one in your backyard.

Oooh, I’m interested! How much does it cost? They cost roughly $125,000, give or take a few thousand. Before you freak out, some companies will buy back your granny pod when it’s no longer needed (approximately $40,000). Also, the average cost of an assisted living facility is $42,000 a year. At those rates, it practically pays for itself.

So basically, we say that the granny pod is the perfect solution to keeping mom or dad close and letting her or him maintain their independence. If you need to get your lawn in order so you can move mom or dad in, give Talklocal a call and we’ll connect you with a landscaper in no time.

Steps to Planting Fall Flower Beds

Tuesday, October 6th, 2015

colorful flower bed ideas

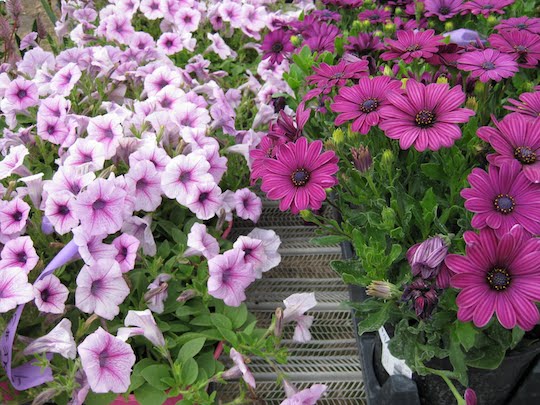
Your garden can be just as beautiful in the fall as it is in summer. Planting fall flower beds will keep your garden looking pretty even when your summer flowers begin to die. They are also less likely to inhabit any pests, which we think is a huge plus.

Steps to Planting Fall Flower Beds:

Step 1: Clear out weeds and dried leaves from your current flowerbed. If you don’t have an existing flower bed, locate where your new flowers bed will be. You can work with the space you have whether big or small.

Step 2: Buy soil that contains the right nutrients for winter flowers and bulbs. Distribute the soil in your flowerbeds.

Step 3: Observe your flower beds to find out the amount of sunlight they get. This information is helpful in choosing the best flowers and bulbs to plant in your fall flower beds. Once you’ve made your flower choices, buy bulbs online or check the local garden center if they have your chosen bulbs available.

Step 4:  Each bulb your purchased will come with instructions on how top plant them. First, use a garden trowel to dig a hole in your flower bed in the depth indicated on the bulb packaging. Then, proceed to follow the directions for planting. Pay attention to giving enough spacing in between each bulb. Cover the bulbs with soil. Don’t forget to stake the correct plant markers beside the bulbs.

Step 5: Choose the flowers to include in your fall flower beds. Plant them around the planted bulbs, using the plant markers as your guide to avoid planting directly above the bulbs. Some perennials are perfect for fall gardening such as Chrysanthemum, Toad Lily, Aster, Goldenrod, Russian Sage, and Helenium. These flowers will remain vibrant throughout autumn up until the first hard frost. Their bright colors will make pretty borders and entire fall flower beds.

Step 6: Give your flower beds thorough watering.

Looking Forward to Planting Fall Flower Beds?

Get expert opinion and help for your fall gardening project or for any landscape job you currently have. TalkLocal is your link to the best landscape designers and contractors in or near your area. We’re experts in matching homeowners with the service professionals they need and we don’t charge you for it. Try us now!

Weed Control Tips: Making Dead Weeds Stay Dead

Monday, September 21st, 2015

weed control_pic

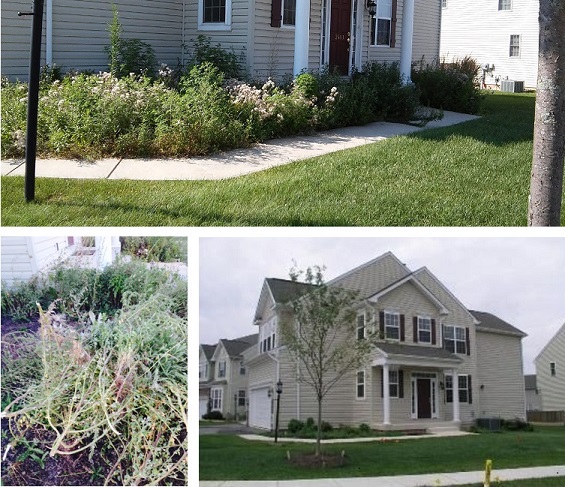
Even after a neighbor sent a picture teasing Brian and Amber about their unruly lawn while mockingly suggesting that she (the neighbor) was embarrassed to merely walk her dog pass the home let alone live next door, it was weeks before the new homeowner’s found time to finally start that long overdue garden weed control project.

“While weeding, I found nesting birds, mating crickets, and a praying mantis living in the thriving new ecosystem my negligence had created”

–  Amber from Pennsylvania (via email)

What’s worse: they soon realized that their tactics simply weren’t the best way to control weeds. In other words, their time, effort, countless little pin pricks, and allergic reactions had been all but wasted as their garden quickly succumbed to out of control weeds.

“The weeds are coming back with a vengeance. It’s as if our work  had only paved the way to an era more wild than the last. We feel overwhelmed,” wrote Amber.

Well, Amber, the phrase “grow like weeds” is a truism for a reason. So, if you want to reduce the resilience of your weeds to something you can keep up with and manage, then follow these weed control tips:

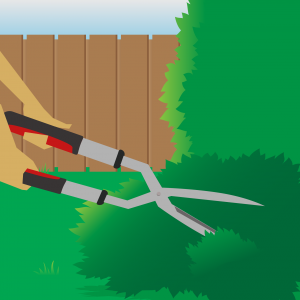
Nip It In The Bud: Don’t have time for a major weeding session? Amber and Brian would have fewer weeds to deal with if they had simply removed the flower heads every week using gardening scissors or hedges. Flowers lay down new seeds and help spark rebirth.

Don’t Neglect the Roots: Of course, if you neglect the root network, then our weed problem will only grow more entrenched over time. Dig deep when weeding and pull the weeds from as close to the root as possible. In addition, find and dispose of lone root fragments because they actually may flower.

Break Up The Soil: To make uprooting less labor intensive, ensure that the ground is moist from either your sprinklers or a recent rain shower. Then, use a shovel to break up the soil in areas where the roots may be especially deep.

Apply Herbicide at the Right TimeAerating the lawn after applying weed control could render the herbicide inefficient. That is why you must aerate the lawn prior to applying the herbicide.

Get the Right Herbicide: Furthermore, when you choose your herbicide, don’t forget to carefully read the instructions on the label to make sure that you choose the right one for the weeds in your yard.

Repeat: Excessive rain or lack of it can neutralize the effect of herbicide, and weeds will start germinating. This is why you might need to apply pre-emergent herbicide repeatedly.

Ground Cover: Sunlight-starved seeds and root networks will have a harder time growing in uncovered ground. Landscape fabric, mulch, or mulch alternative layered to about two inches in thickness should be strategically placed to allow sunlight where plant growth is desired.

Brian and Amber have a lot of work ahead of them despite their efforts. Fortunately, with these weed removal tips in mind, they have the knowledge to produce lasting results in their lawn. However, if you don’t have the time to go through these steps and need someone to take care of those pesky weeds for you, TalkLocal will connect you with a local pro who will make those pesky weeds history.

Prepare Your Vegetable Garden Before Winter Arrives

Friday, September 4th, 2015

shutterstock_175956125

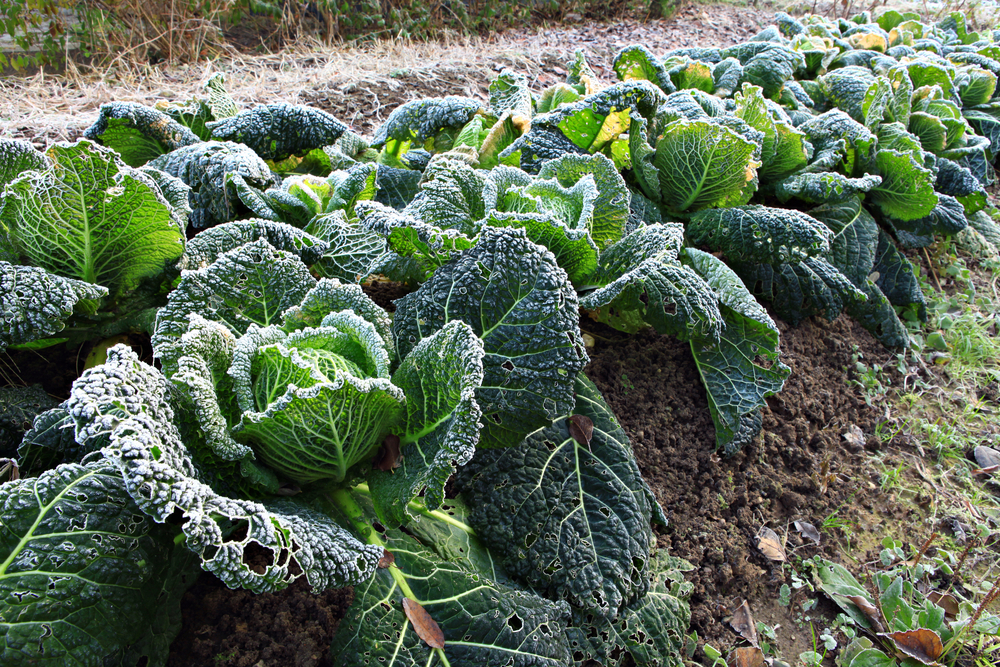
An unprepared vegetable garden is no match for even a slight frost…so to make next year’s work easier, your garden must be protected. That’s why now is the time to prepare your vegetable garden. Winter is coming — and, unlike in Game of Thrones, it won’t take seven years to arrive. Follow these four easy steps to protect your garden from the harsh weather conditions.

1. Clear out old plants. This will prevent growth of undesired mold or disease and take a step out of your way next year. Rotting plants can pollute the soil and ruin subsequent crops, so be sure to get up all of the roots. This debris can be used for composting.

2. Setting aside an area for composting will give you great soil come next year. Dig trenches in your garden and fill them with organic debris. The heat from the trenches will facilitate the decomposition process, helping create extremely fertile soil.

3. If you have immature vegetables that might die during the winter, you can preserve them for the next season by digging them up (get up all of the roots without harming them) and burying them headfirst with the roots sticking out of the ground. As strange as it may sound, the relative warmth of the soil will keep the vegetable from dying in the frost.

4. Cover the soil with a tarp to protect it from direct exposure to frost. Frost can damage the soil, making it less suitable for rearing plants in subsequent years.

Whenever dealing with gardens, the best possible option is to seek the assistance of a professional landscaper. With TalkLocal’s assistance, you can find one with the right experience and schedule you need – for free. Don’t wait for the winter to draw any closer; head over to TalkLocal and let us show you how easy it is to find a local landscaper before Jack Frost comes knocking on your door.

5 Fall Vegetable Gardening Tips for your Eager Green Thumb

Friday, August 21st, 2015

iStock_000069446443_Large.jpg

Autumn calls to mind images of  falling leaves, changing weather, and kids in new clothes waiting nervously for the school bus. In this season of change, we also can’t help but think of the upcoming holidays where friends and family come for the company and stay for delicious meals.  One way to make every meal even more special is to use vegetables from your very own home garden. Surprisingly, may of the most nutritious seasonal vegetables are best planted in fall. Some notable fall friendly vegetables include broccoli,  carrots, kale, spinach, and garlic.

So, whether you’re looking for a fulfilling way to spend your down time with the kids heading off to school, or if you want an outdoor activity to bring you all together between dance class and soccer practice; now is the perfect time to start your very own vegetable garden with some helpful fall vegetable gardening tips. Before getting your bucket and spade…

Check out this step-by-step process for getting more green out of your garden this fall. 

1. Choose the location of your garden wisely. Make sure your vegetables will be exposed to up to eight hours of sunlight daily and ample rainfall. Healthy soil is slightly moist and loose enough to be penetrated by roots.

2. Check each seed pack for how much space your vegetables need, as the amount varies greatly. For example, carrots and broccoli usually only require two to four inches between plants, while kale can require up to a foot.

3. Ensure that the pH of your chosen soil is ideal for your vegetables. Carrots, for example, prefer more acidic soil; to prepare an ideal environment, you can even add lime to the soil.

4. Be aware of your climate. Fall vegetables are not well-suited for summer heat, so if it lingers in your area, it might be better to start the seeds with a simple indoor hydroponic setup – or you can plant them a little bit deeper, where it’s typically a few degrees cooler.

5. If your seeds are outside and temperatures are above Fall average, give them extra water to compensate for evaporation. After germination, you can water heavily once a week rather than lightly every day if you find it more convenient.

After you’ve taken all of these precautions (along with spreading a tarp over the areas of your garden prone to freezing at night), you’re ready to raise that green thumb. But if your yard is a bit rougher, with soil too dense, rocky, acidic, basic, whatever, for plant life, and your schedule a little packed to do something about it, we have the perfect solution for you: TalkLocal. Our unique and free search system will connect you with the perfect landscaper to turn an ordinary backyard into a rich, money-saving garden.

DIY Home Hydroponics System: The Herald of a Utopian Tomorrow (Kinda)

Thursday, August 20th, 2015

shutterstock_250289425

Fragrant greens, reds, blues, glistening sunlight on top of plump fruits and vegetables an arm’s reach away. Somewhere in this paradise, you know that Adam and Eve are still running around naked as jaybirds, laughing at talking snakes and perfectly contented by their naivety plus all of the delicious totally legal fruit they are free to consume. Scarcity? Hunger? Currency? No such thing. Obviously food just grows out of the ground like nature’s own Willy Wonka factory. Wait… can’t relate to this heaven on Earth? Then you need a DIY home hydroponics system.

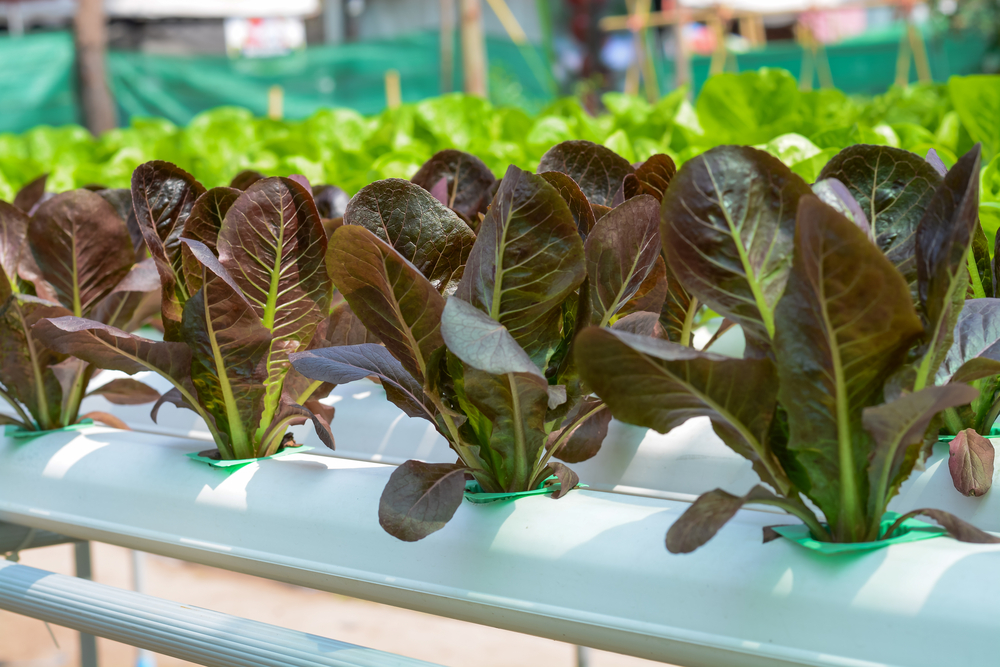
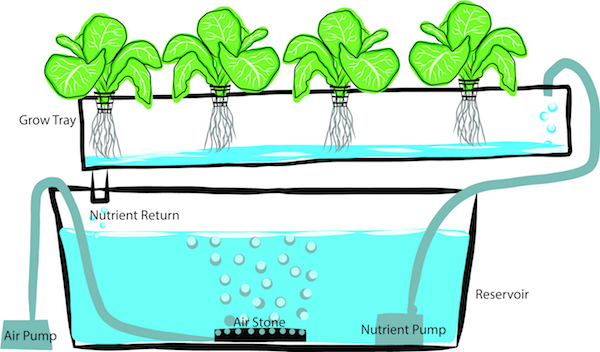
Okay, hydroponics may not solve all of life’s woes, but the growing method uses little more than a pump, liquid growing solution, and indoor fluorescent lighting to grow and maintain plants without an outdoor garden. Your next-generation indoor tomatoes probably won’t be big enough to restore Eden, but will give you a little taste of paradise.

Oftentimes, store-bought hydroponics kits are needlessly expensive; the systems aren’t particularly hard to make yourself, so we’re going to take you through building your own hydroponic “ebb and flow” system. This relatively simple design consists of three main areas: a reservoir from which the solution will be pumped to the plants, a growing bed which is a walled surface where potted plants soak up the solution and grow, and an above-hanging light fixture. Check out this useful diagram from Hydroponics 101:

shutterstock_157397657

THINGS YOU’LL NEED

For light fixture:

– ½ inch PVC tubing (how much depends on how tall your system is, and how much support your lighting will need)
– Fluorescent grow lights
– 4 PVC T-connectors
– 4 PVC 90 degree connectors
– Ruler
– Saw
– Chain
– Light timer

For reservoir:

– Plastic tub (the size of your reservoir will dictate that of the garden but it should be large enough to hold enough liquid to water several plants)
– Small pump
– Hydroponic growing solution (MaxiGrow, for example)
– pH tester

For growing bed:

– Pots (must allow liquid to flow in and out)
– Short ½ inch PVC pipe (cut shorter than pot height – think drainage)
– Silicone sealant
– ½ inch drill
– Clay pellets (optional: they give tougher roots something to grab onto, ideal for some plants)
– Plastic container, similar to that used for the reservoir (doesn’t need to be as deep)

BUILDING THE LIGHT FIXTURE

1. Decide the length of your PVC pipes based on the intended size of the hydroponic garden. For a few plants, four ten-inch pipes should be sufficient for the base of the stand. The legs should be around a foot high.

2. Use the T-connectors to connect four pipes for the base.

3. Use the 90-degree connectors to attach the legs.

4. Wrap the chain around the base and use it to hang the grow light.

BUILDING THE RESERVOIR

1. Wash the container well and make sure to rinse out any excess suds.

2. Fill the container with the solution, making sure to follow any manufacturer’s instructions.

3. Configure the pump for use with the timer. It will need to be cycling the solution 3-5 times a day for around 20 minutes per cycle.

4. Insert the pump.

BUILDING THE GROWING BED

1. Drill two ½ inch holes at opposite ends of the floor of the bed. Insert a short PVC pipe into one and the pump hose from the reservoir into the other.

2. Seal the holes around the pipes with sealant.

3. If you’re using clay pellets, wash them and spread them in a thin layer across the floor of the growing bed.

Just like that, you’ve made your own personal paradise and brought tremendous convenience to your kitchen. Fresh vegetables and herbs are now close at hand, regardless of the season. But who’s to say you should stop there? TalkLocal can connect you to the perfect landscaper to bring fertility back to your dilapidated or weed-overrun garden, or get your yard ready for a new one. Get started and see all we can do for you (and for free)!

Easy DIY Landscaping Projects – Make your Neighbors Jealous

Monday, July 13th, 2015

shutterstock_244704934

What does your yard say about you? It might rest outside the walls of your house, but your yard is still part of your home. We burn through hours deciding between pieces of furniture, color swatches, and carpets to make our houses comfortable and expressive; meanwhile, more see a yard than a living room, and the natural beauty of good landscaping is nearly unmatchable. It may seem daunting at first, but we’ve put together three easy DIY landscaping projects to beautify your lawn.

Creating a Space

An important idea in landscaping is that yards shouldn’t just be expanses of green – angles, balance and color should be used to make a yard feel like a space, like a room in a house. Find a diagram of your yard and understand what sort of space you’re dealing with, and then look around your yard to get a feel for it. What sorts of natural landforms are there? If you were to imagine your yard in terms of rooms, what would the rooms look like, what would you do in them, and where would they go? You can create your “walls” through straight angles between trees, flowers, and bushes, or by utilizing walkways.

Gardening

Gardening will allow you to create dynamic and beautiful spaces through arrangement of differently shaped and colored flowers. With a little work and research, you can make something much more impressive than a small square filled with flowers – use the colors to border your house and add personality, or different scents to fill your space with a calming aroma. For a real gardening challenge, try to arrange flowers so they create a vibrant walkway.

Special Landforms

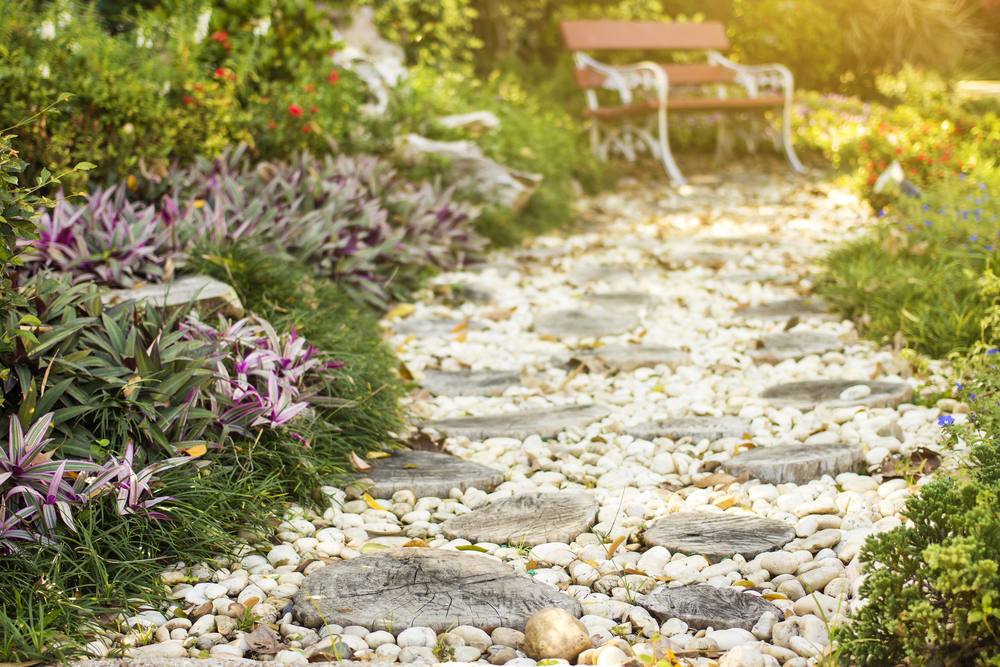
You can also diversify your yard with interesting features, such as rock walkways or small bodies of water. They’re actually very easy to introduce to your yard. For rocks, just imagine what you want them to look like, and buy rocks of the appropriate shape. A small pond is a weekend project: start by contacting your town government to get digging approval, get a pump, materials to line the bottom of the pond, and whatever plants or rocks you wish to decorate its outside.

But we’re all busy, and maybe landscaping isn’t your thing. Luckily, there are professionals who can handle any task, especially landscaping. With our unique search system, all of the obstacles to hiring a professional, such as scheduling, quality, and availability, are things of the past. Don’t waste any of your precious time – head over to TalkLocal now and find the perfect local service professional in half the time it’d take to find your old shovel.

Dandelion Medicinal Benefits and Other Uses for The Pretty Ragweed

Wednesday, June 3rd, 2015

shutterstock_137674295

As pretty as they are, letting dandelions grow wild and unfettered is simply not an option. Sure, the golden blooms may call to mind the raw beauty of nature; but, the resulting unkempt lawn is bound to make you a neighborhood pariah, infecting the well-manicured lawns of any neighbor within a 5 mile radius with those airborne seedlings, and draw side-way glances and blame whenever property values drop. The problem with dandelions is that they are weeds (pretty weeds) and weeds don’t belong on the lawns of responsible homeowners. In other words, dandelions must die!

Of course, it’s still a shame to let anything beautiful go to waste, especially when you can use dandelion medicinal benefits to support your body among other things. So…

Here are 4 ways to get a bit more enjoyment out of this sunny infestation once you’ve rooted it out.

WARNING: lay off the weedkillers and fertilizers if you intend to try these tricks! And, if you or a family member have ragweed allergies, you should avoid contact with dandelions or consult a doctor prior to doing so.

Dine on Dandelion: The entire dandelion is edible and delicious, if properly prepared. Check out this recipe for Sweet and Sour Dandelion Greens for just one of countless meal ideas.

Delicious Dandelion Drinks: Dandelion also makes a great tea or wine. Just check out this four ingredient dandelion wine recipe.

Doctored by Dandelion: Dandelions when eaten are high in Vitamin K (74% daily dietary value) and Vitamin A (64%), as well as Calcium (19%) and Iron (24%). Dandelions are also celebrated for their possible medicinal properties as they contain chemicals which may reduce swelling and inflammation among other ailments. Check out this step-by-step process for making your own Dandelion Infused Oil to promote healthy skin.

Dandelion Your Dirt: With all the nutrition packed into those lawn destroying dandelions, it’s easy to see why dandelion fertilizer could end up being as good for your garden as it was bad for your lawn. Here’s the basic process for making fertilizer out of any unwanted weeds.

With the unassuming beauty of the dandelion, pulling them root to stem from the lawn can be rather bittersweet. After all, who hasn’t noticed how their unruly blooms swaying serenely in the unkempt fields along the highway make a long drive feel like a pleasant stroll in the park, or how they brighten even the most decrepit and dilapidated farm house with their sunny sprouts? And who can forget the childhood memories of sending their seedlings to the wind with a gentle blow and a little prayer? At least now you know how to put these surprisingly lovely ragweeds to use, even if you can’t allow their beauty to flourish in your lawn.

And, if you need help keeping your lawn pristine, find the right local landscaper by visiting  TalkLocal or the iPhone/Android app.

National Gardening Exercise Day: June 6th

Friday, June 6th, 2014

Written by Marianne Zhao

National Gardening Exercise Day: June 6th - Seva Call

June, the lovely month when the flowers bloom and the weather is ideal for days spent at the pool and outside.  June also happens to be the month of National Gardening Exercise Day (June 6th, to be exact).

What is this strange holiday?

Well, although it’s not as well known as July 4th or Labor Day, National Gardening Exercise Day is important to those who value the outdoors and personal health. It celebrates gardeners who want to stay in shape, combining aerobic movement with tending to plants.

If you fall in the category of an aerobic gardener or just want to hear more about this intriguing holiday, here are some typical activities done on National Gardening Exercise Day:

– Stretch before heading out into the garden (it is important that your muscles are warm)

– Alternate your movements; raking, mowing, weeding, digging, etc.  Change it up every 15 minutes or so

– Add physical challenges:

> squat while hoeing or weeding (be careful if you have bad knees)

> lunge and weed (don’t forget to switch legs)

> sit and weed (use your upper body to twist and stretch)

> don’t bend from your back, bend from the knees!

> remember to alternate your balance from left to right

How will you celebrate?

If this holiday shows you that you want to get in shape or add some new things to your garden, but you want to hit the gym and leave the gardening to a professional, TalkLocal has a wide network of personal trainers and landscapers. Submit a request at www.talklocal.com and get connected in seconds. Hope you enjoy this unique holiday!