Archive for the ‘Landscapers’ Category


Tips for Installing a Pool

Friday, February 8th, 2013

Tips for Installing a Pool - Landscapers

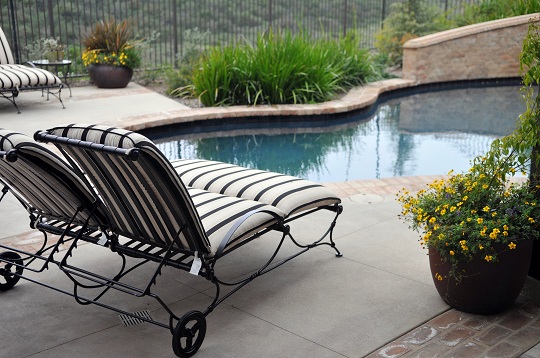
Pools are great investments for the home; they offer a great way to enjoy the outdoors during the summer. If you are considering installing a pool in your backyard, you’ll definitely want to see these tips for installing a pool. While you’re most likely going to hire a contractor to do the actual in-ground installation, you’ll need to first consider many of the logistics and design choices for your backyard pool.

Pool Specifications

One of the most important aspects to consider is how large of a pool you’re willing to make in your backyard.  While even a small backyard can accommodate sizable pools, you’ll need to figure out how much of your backyard you’re willing to dedicate to the pool, the shape of the pool, and the material of the pool.  Fiberglass and vinyl-lined pools are ideal for colder climates, as concrete may crack during the winter. However, concrete is the most flexible and is usually the most durable type of pool.

Obtain Zoning Permissions

In-ground swimming pools need to comply with the appropriate building and zoning regulations, so you’ll have to apply for a building permit. Try to do this as soon as possible.  There most likely will be regulations regarding the distances between property lines, sewer lines, septic tanks, and other in-ground features.

Filtration and Circulation System

Don’t forget that you’ll need space for your filtration and circulation system.  While many won’t take up much space, you still need to keep them in mind and leave at least a couple of square feet of space.

Pool Location

Your actual pool location can be extremely important.  Placing the pool far away from trees will allow you to warm up the pool with the sun and also reduce the amount of leaves you’ll have to clean.  You also want to avoid windy areas, as they’re uncomfortable for people getting out of the pool and cause the pool water to evaporate quickly. Likewise, make sure the area is clear from electrical wires or septic systems when you begin excavating.

Additional Help

These are all design decisions that you’ll have to evaluate in the context of your own backyard.  If you have any concerns, you should always talk with a pool installation or landscaping expert.  You can always use TalkLocal to make that search extremely easy.  You’ll be talking to a high quality local expert in just minutes!

How to Remove Weeds from Backyard

Tuesday, February 5th, 2013

How to Remove Weeds from Backyard - Landscapers

One of the most important steps in cleaning up your garden is locating and removing weeds. Not only are they not the most attractive plants, but they take up space that could be used for plants of your choosing. The serious issue with weeds is that they suck up the water and other nutrients from surrounding plants, hindering their growth. Thus, eliminating untamed weeds is a necessity.

How to Remove Weeds from Backyard

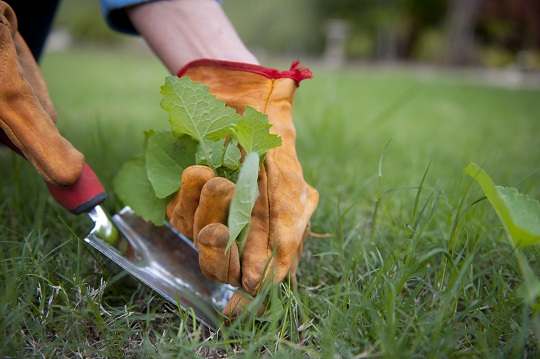
When removing weeds, it’s crucial to make sure that the entire root of the plant is taken out of the ground. If only the foliage is removed, the weed will stay put and will continue to grow and hog up the nutrients. If this happens, be sure to use a spade to get under the dirt to remove the root of the weed. Using herbicides should be the last option as they are harmful chemicals that can ruin plants you don’t want to destroy. In the future, if you want to have the easiest time removing weeds, try to start weeding as soon as possible; the more time they have to grow, the more difficult it will be to remove them.

Once you’ve removed your weeds, it is essential to add fertilizer or mulch to the area. This will aid in hindering the growth of even more weeds. Also, the more grass and other plants that flourish in your garden, the less space there will be for weeds to take over. Make sure you follow the package’s instructions for mulch or fertilizer, as adding too much can smother your plants, while adding too little still allows weeds to grow.

Additional Help

While these tasks may seem simple, they can become a nuisance after some time. If you would like a professional to assess your yard and remove weeds as part of a process to re-do your land, be sure to use TalkLocal to find an available landscaper for you. We will connect you with up to three professionals in your area who will be available to help you when you need it most.

Landscaping Ideas For Front Yard

Sunday, February 3rd, 2013

Landscaping Ideas For Front Yard - Landscapers

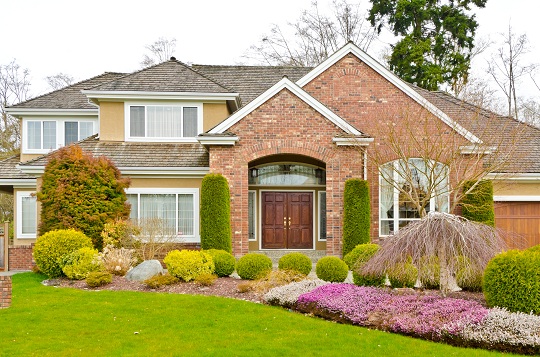
The front lawn is the first thing you see when you come home, the first thing people see when they visit you, the first impression for every person that drives by your house.  Landscaping can really change the entire look of your house.  If you want your front yard to stand out you should try out some new ideas for grooming your front yard.

Landscaping Ideas for Front Yard

1) Green lawn: A vibrant, green lawn is the first step towards landscaping your front lawn. If your grass is patchy and brown, nothing else on your front yard will look very appealing.

2) Potted plants: You should try to put a lot of vibrant bright colors around your lawn. This will make it seem far less bland, and will accentuate the exterior of your house.

3) Koi ponds: A lot of people also turn to small little ponds or seating areas that will encourage people to spend more time on their front yard. Ponds can also bring a feeling of serenity to your yard, especially if you fill your ponds with fish.

4) Flower beds: Flowers and such perennial plants will really pop against a well-watered lawn. Again, try to choose flowers of different colors to add some aesthetic appeal to your lawn.

5) Hedges: Hedges can be used to create natural barriers to your lawn, acting as a boundary between your yard and the street, the driveway, or even your house.

6) Trees: Like hedges, trees can provide a natural barrier for your yard. Well-placed trees can also provide shade for a front patio or even for your house during the hot summer months.

7) Gnomes/statues: If you want to add a little pizzazz to your lawn you can add some lawn gnomes and statues. Try to stick with smaller statues, and scatter them among the flower beds, or other areas. Clusters of large statues could look too gaudy.

8) Rocks: Rocks seem a little strange to have, but medium size rocks in different colors or patterns can pull the whole lawn together, giving it a more natural feel.

9) Patio/Seating: A patio or seating area can make your lawn seem very welcoming to guests. And it is always nice to have a pleasant place to relax when the weather is nice. A stone pathway can create another form of barrier between your yard and the surrounding areas, such as your driveway.

Additional Help

A welcoming front yard can really enhance your life.  People will be drawn into a happy space and your house will soon be the best looking place in the neighborhood.  Once you finish landscaping the front yard you can move on to the back yard as well.  Creating uniformity between the spaces will really improve the look of your entire home.

If you are looking for a professional opinion on landscaping for your front lawn you should seek specialized help.  Use TalkLocal to be connected with reliable local landscaping businesses. Simply input what service you are looking for along with your availability and you will be connected to a qualified company who can help you when you need it.

How to Dethatch Lawns

Saturday, February 2nd, 2013

How to Dethatch Your Lawn - Landscapers

In order to keep your lawn beautiful and healthy, you will sometimes need to dethatch it. As your grass grows, plant material will build up in between the green part and the roots. This is called thatch. Thatch is necessary for your grass to grow because it provides a shield against potential harm for the roots. However, if too much thatch builds up, it can be harmful to your lawn by blocking oxygen, water, and other nutrients from the roots, so you will need to dethatch it. This article will teach you how to dethatch lawns. If you mow your lawn regularly, leaving only small clippings off grass on your lawn, you should only have to detach your lawn once every 2-3 years.

How to Dethatch Lawns

If you suspect your lawn has acquired an excessive build-up of thatch, you can figure out if this is true through the following method.

1. Take a tuft of grass from your lawn.

2. Measure the length of the thatch layer, starting at the end of the roots and finishing at the beginning of the green grass.

3. If the thatch layer is greater than 1/2 inch you will need to dethatch your lawn.

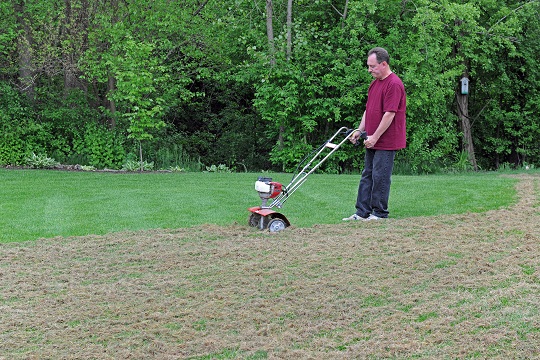
In order to dethatch your lawn, you will need to cut through the thatch layer. You cannot successfully dethatch your lawn with a normal metal rake. You will have to purchase a special thatching rake (usually around $30) or some other thatching equipment in order to detach your lawn.

Do not dethatch your lawn in the spring as this is when the grass is in between dormancy and growth and the grass roots are lowest in energy and nutrients.

Dethatching your lawn can cause stress to your lawn, so you you make sure to fertilize it and water it before your dethatch it in order to prevent damage. Also, give your lawn a break and do not do all of the dethatching in one day. This will also help to prevent damage.

Additional Help

If you do not wish to dethatch your lawn yourself, you can contact a landscaping professional to do it for you. With the help of TalkLocal, you can be on the phone in minutes with up to three high quality landscaping professionals in your area that are available to help you when you need them.

Lighting Your Garden to Radiate its Potential

Friday, February 1st, 2013

Lighting Your Garden to Radiate its Potential - Landscapers

Lighting Your Garden to Radiate its Potential

Even though plants, fences and pathways seem to get the most attention when it comes to landscaping, lighting is still an essential feature that can take your front or backyard to the next level.

Different Lighting Options

It is a good idea to begin by assessing the different lighting options available to you.

These are just some suggestions; you might want to look into other options such as path, mushroom, and accent lights. Also, when shopping for different lights, look out for stylish options that will fit more appropriately with your house and garden rather than using the normal, more mundane versions of lights.

Plan Your Lighting

Drawing a plan for lighting your garden should be the first step you take before buying or installing anything. To help you get started, when it’s dark outside, use a flashlight to find the best places to put lights and to test out different angles of light to see which work best. Once you have a plan in mind, you’ll be able to decide which type of lighting to get and where to put it. If you don’t get enough lights for your garden, it won’t live up to its potential, while having too many lights can wash out your plants and do more harm than good. Your garden would go from looking accented to overwhelming.

Additional Help

Choosing the best lights and their placement may seem easy but may quickly become confusing and stressful, especially if you have to put them in the ground yourself. If you want an easy way to deal with your lighting, a knowledgeable landscaper is the best option; they’ll know the best placement and types of lights suitable for your land. If you use TalkLocal today, you’ll be connected with an available landscaper quickly and easily so you can be on your way to making your garden that much more beautiful.

How Often Should Lawn be Mowed?

Wednesday, January 30th, 2013

How Often Should Lawn Be Mowed? - Landscapers

It may still feel like winter, but spring is just around the corner! And that means blowing the dust off of our gardening tools and preparing to freshen up our lawns and gardens. As we begin to see more sunlight and less snow, mowing the lawn will once again become a regular routine. But how often should we mow the lawn? Does it even matter? As it turns out, it does.

How Often Should Lawn be Mowed?

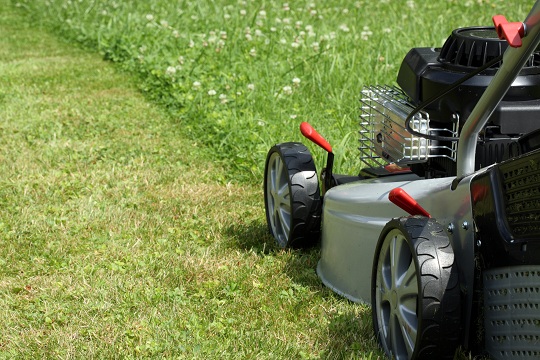
Several factors should be taken into consideration when deciding when to mow your lawn: fungus prevention, moisture preservation, tilling or spreading fertilizer, proper trimming, and beauty. Most lawns should be mowed once per week, but if you use fertilizer, your grass will grow more quickly. Be careful not to cut more than one- third of the height of the grass. If you violate this rule, you risk damaging your lawn because you will be cutting off some of the stem of the grass blade. This results in a yellowish tint to your grass. Furthermore, over-cutting the grass will put it at risk of fungus and disease.

Other factors for judging how frequently your lawn should be mowed are the type of grass, the season, and your location. For example, if grass is cut too short during the summer months, the stems will be exposed to more heat and are likely to burn, turning brown.

Proper Tools and Procedures for Lawn Mowing

When you mow the lawn, make sure you use a proper lawnmower, rather than a trimmer. A trimmer can cut into the soil and weeds will grow where the soil is disturbed. A lawnmower’s blades do not reach down as far as the soil, and so it will not encourage weed growth. A lawn mower’s blades should be set at least an inch off of the ground to ensure that you do not cut the stems of the grass.

Make sure you keep your lawnmower’s blades sharp. A dull blade can catch and pull the grass out from the root. Also, do not mow your lawn when it is wet. Mowing in wet weather will leave your lawn uneven in height and make it look patchy.

Additional Help

Your lawn should be mowed regularly, not only for the aesthetic appeal but also to prevent patchiness, damage, disease, and unwelcome insects from taking up residents in your lawn. Contact TalkLocal to put you in touch with professional landscapers in your local area. We will connect you with up to three landscapers who will be able to properly care for your lawn. It only takes a few minutes!

Increasing Curb Appeal

Friday, January 11th, 2013

Increasing Curb Appeal Landscapers

Curb appeal is the aesthetic appeal of your home from the outside. It is the very first impression everyone gets, including potential home-buyers, that will decide whether they want to see what’s inside.  There are many simple, easy, low-cost improvements which can all be done in just a day that will result in increasing curb appeal for your home to all future visitors.

1. Replace Old Hardware

Hardware that’s tarnished and showing its age (like house and mailbox numbers, lock sets, and handles) may cause your house to look dingy and aged, especially if they’re of different styles and ages.  One of the easiest things to do is to replace all the hardware at once, making sure that whatever style you choose to go for stays consistent throughout the hardware (such as bronze or brushed nickel).

2. Give your mailbox a makeover

Your mailbox is undoubtedly one of the first things that visitors see, so you can use this as a platform to create incredible first impressions.  Mailboxes should complement a home and match the aesthetic that you’ve created, so you should paint or stain the mailbox to match the trim and wood of the house.

3. Install outdoor lighting

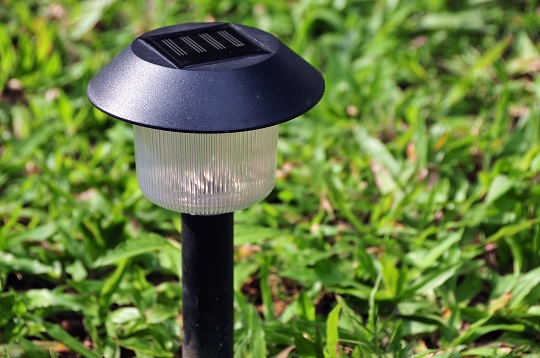
Outdoor lighting illuminating a walking path can really improve your homes curb appeal, providing both security and a soft luminescence that makes your house stand out at night.  Low-voltage or even solar powered lights can make installation really easy and energy efficient.

4. Wash your house’s face

The normal wear-and-tear and dirt on the outside of the house can negatively affect any first impressions.  Just using good ole soap and water with a brush can really help remove any dirt and dust that may be covering your house’s good side.  Also, you may want to consider renting a power washer to restore your walkways back to their natural and beautiful color.  Washing almost all surfaces, including windows and the garage door (yes, the garage door), is a must.

These are all easy one-day tips, but there are also a lot of other home improvements that can significantly increase your curb appeal, such as replacing your gutters or redoing your driveway.  If you don’t have the time yourself to do these improvements, you can always use TalkLocal to talk immediately with a local, highly rated handyman or landscaper.   You’ll be impressed by how fast and easy it is!

How Long After Fertilizing Can Pets Go On Lawn?

Thursday, January 3rd, 2013

How Long After Fertilizing Can Pets Go On Lawn Landscapers

If you are wondering how long after fertilizing can pets go on lawn, look no further. It is well known that the chemicals in lawn fertilizer are toxic and can be particularly harmful to pets because they lie closer to the ground and clean themselves with their mouths. Although it is safest to avoid using chemicals dangerous to your pets, it is probably safe to let your pet on a fertilized lawn after two days have passed and the lawn has been watered. Always make sure to read the directions carefully before using fertilizer.

Symptoms of Fertilizer Poisoning

Symptoms of poisoning include nausea, vomiting, difficulty breathing, weakness, twitching, collapsing, irritability, and seizures. If you believe your pet has been poisoned, then call a veterinarian immediately.

Precautions 

Dangerous fertilizer chemicals can be tracked into the house from neighboring yards and public areas. Look for flags noting recently fertilized grass and keep pets and children away. Clean off your pet immediately if you notice it has wandered into fertilized grass. Since pets often lick their coats, it is important to wash off the fertilizer as soon as possible to avoid ingestion of poisonous chemicals.

Pet-safe Alternatives

There are many chemical-free alternatives to toxic fertilizer. Grass needs nitrogen, phosphorous, and potassium to produce a healthy green coating. These nutrients can be naturally obtained from other plants. Sprinkle grass clippings, shredded leaves, or compost onto the lawn to provide these essential nutrients. You can also try using organic fertilizer on your lawn. These are fertilizers made from natural materials or organisms. Corn gluten, manure, and bone meal are a few examples.

If you have questions concerning pet safety and lawn care, look no further than TalkLocal. TalkLocal can connect you to quality veterinarians and landscaping professionals.  Help is just a few clicks away, so try TalkLocal today. Best of all: It is a completely free service!

10 Must Do Tips to Cleaning Up after a Storm

Monday, December 24th, 2012

10 Must Do Tips to Cleaning Up after a Storm Landscapers

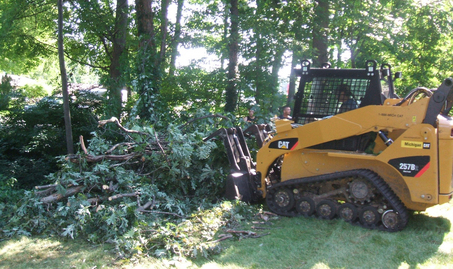
Even though life may seem incredibly hectic after a destructive storm rolls through, there are many important things that you’ll want to do, especially if you’re looking to file an insurance claim.  Here are 10 tips for cleaning up after a storm:

1. Make temporary repairs to prevent further damage.  You’ll want to cover up holes in the walls, roof, or the windows with boards or plastic so that inclement weather cannot further damage your home.  Make sure that you stay safe and don’t risk your own safety while making these repairs, especially if the repairs are on the roof.

2. Contact your insurance company immediately so that they know damage has occurred, the severity of the damage, and the time it happened.  Make sure you supply them with good contact information and you have a record of all correspondence with the insurance company.

3. Save all your receipts from all the repair expenses, since you most likely can be reimbursed for those materials.

4. Take photographic or video evidence of the damage for insurance reasons.  This will be important later on when you are talking with your insurance company and trying to file a claim.

5. Don’t throw out damaged personal property items before your insurance company has seen it.   You should be especially certain to keep damaged furniture or other significantly expensive items so that the insurance will be able to verify their damage and eventually replace it.

6. You should try to provide heat to your home if you have the means to do so (like with a generator) if the temperatures outside are below freezing.  If you are unable to do so, consider turning off the water and draining pipes to prevent freezing pipes from bursting.

7. If your home has suffered significant enough damage that you cannot occupy your home safely, talk to you insurance company.  They often times will cover your living expenses while repairs to your home are being made.

8. Avoid using electrical appliances, such as televisions or speakers if they’ve been exposed to water, unless you’ve had a technician tell you they are safe to use.

9. Keep away from dangerous situations such as downed power lines or fallen trees.  These situations are best handled by professionals and may pose a significant threat to your well being.

10. Make sure the food that you eat is safe.  Since you’ve most likely been without power, food will only stay good in a refrigerator for about 24 hours.  Beyond that, discard any milk or egg-based goods (like mayonnaise) that have been sitting at room temperature for more than two hours.

If you are in need of a cleanup crew, try using TalkLocal to find local landscapers.

When Should I Fertilize my Lawn

Monday, December 10th, 2012

When should I fertilize my lawn Landscapers

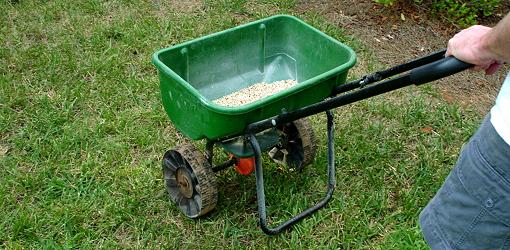
Fertilizing your lawn is an important step to maintaining a good-looking lawn. A lawn needs food just like any other plant, and fertilizer is the only way to feed it. A properly fertilized lawn is healthier, meaning it can battle through severe weather conditions more effectively. You may be asking yourself, “When should I fertilize my lawn?” Feeding your lawn even once a year can improve its condition, but feeding it four times a year is even better. Putting your lawn through a schedule like this can make your lawn look lush and green.

First Round

Early Spring (February thru April) is the first time during the year where you will want to fertilize your lawn. During this period, food is of the utmost importance if you want to have a lush lawn during the year. Feeding your lawn in the spring strengthens the roots and gives it the food it needs to grow.

Second Round

The next period where you will want to feed your lawn is in late spring, from April to June. During this time, your lawn is using up its stored energy and needs more to continue its growth. However, this is also around the time where weeds begin to sprout, so you will want to get rid of these to continue your lawn’s growth.

Third Round

The summer months of June through August are the next stage of the feeding schedule. These summer months are important because heat, drought, insects, and storm damage can all take their toll on a lawn. Feeding your lawn during this period helps to strengthen the lawn and protect against these problems.

Fourth Round

The fall months of September through November comprise the last timeframe for fertilization of your lawn. These months generally have cool nights, plenty of rainfall, and morning dew — basically as good as it gets for lawns. Apply the final feeding before the winter months and the cold kick in. This will allow for a healthier and greener lawn the following spring.

Professional Help

Following a plan like this will allow you to keep your lawn lush and green and capable of handling any problems that may test the strength of your lawn. If you would prefer professional help, consider using TalkLocal to find a landscaping specialist for you. TalkLocal is a free service that will connect you with top-quality, landscaping companies in your neighborhood within minutes. Just enter in your specific problem, location, and availability, and up to three companies will call YOU directly — saving you the time and stress of finding one yourself.