Archive for the ‘Landscapers’ Category


Getting Rid of Crabgrass

Thursday, December 6th, 2012

Getting Rid of Crabgrass Landscapers

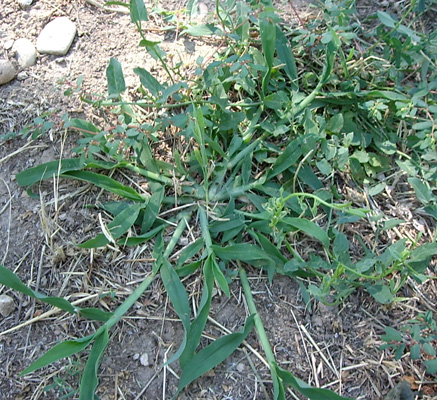
Crabgrass is an annual weed that typically appears out during the warmer months. Getting rid of crabgrass is possible if you utilize the proper tactics. In fact, it is possible to prevent crabgrass from growing in the first place. The best way of getting rid of crabgrass is prevention, so if you’re reading this article in mid-July, then manually de-weeding your lawn is pretty much the only way of getting rid of crabgrass.

The best prevention for crabgrass is to apply herbicides before the crabgrass sprouts. These herbicides come in either grainy or liquid form and work to kill the crabgrass seeds before they get a chance to fully germinate and allow seedlings to emerge. To successfully get rid of crabgrass before it emerges, timing is of the utmost importance. The best time to apply the herbicide is around your second regular mowing during the spring season.

Two of the top pre-emergent herbicides for killing crabgrass are Dimension and Tupersan. Dimension is safe to use on most lawns and provides a solution that lasts. Not all crabgrass emerges at the same time, so this extra time can be helpful at times. Tupersan is a unique herbicide because it does not damage germinating lawn grass seeds. Instead, it has fertilizers that help grass cover areas where crabgrass may sprout, and it has the herbicides to get specially rid of crabgrass.

The use of herbicide can be risky if you don’t use it properly, so make sure to follow these tips.

1)   Irrigate your lawn in the areas where herbicide was applied, as water activates these pre-emergent herbicides.

2)   If you use the herbicide and the effects aren’t working as they should, consider reapplying the herbicide. This is an important step, as not all crabgrass seedlings germinate at the same time, so reapplication may be necessary to kill some of the slower seeds.

3)   Measure your lawn’s area and follow the directions on the herbicide label to make sure you don’t use too much or too little.

4)   NEVER apply pre-emergent herbicides on new sod. Sod is especially prone to chemicals, so be careful what you use on it.

If you follow these tips, you should be able to get rid of your crabgrass infestations in no time. If you would prefer professional help, consider using TalkLocal to find a specialist for you. TalkLocal is a free service that will connect you with top-quality, companies in your neighborhood within minutes. Just enter in your specific problem, location and availability, and up to three companies will call YOU directly, saving you the time and stress of finding one yourself.

Pesticide Spraying Techniques

Wednesday, December 5th, 2012

Pesticide Spraying Techniques Landscapers

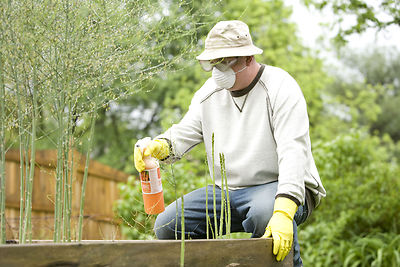
Pesticides are extremely useful for prevention of insect damage to crops and plants. However, while extremely useful against insects, these pesticides are also extremely dangerous for most animals and even humans. Use caution and follow these pesticide spraying techniques.

First and foremost, read and follow the label directions. The directions vary from pesticide to pesticide, but generally, the pesticide will need to be mixed with water. Make sure to use the proper mix ratio that the product tells you to use. Using stronger concentrations usually doesn’t increase effectiveness, but it can increase the toxicity.

One safety tip is to use the pesticide in well-ventilated areas to ensure the chemicals don’t get absorbed into your body. Liquid pesticides in particular may produce poisonous fumes that are released when the container is opened or when the product is being used or mixed. Also be sure to avoid contact with skin, as some of these chemicals can be absorbed through skin. Be careful for sparks and open flames, as well. The pesticides are often highly flammable, so caution is advised. When you mix the pesticides, be sure to never use any utensils that may later be used for food.

Once you are ready to spray the pesticides, place it into a sprayer and test it to ensure it sprays properly. If it is working properly, begin by spraying the plants on both the upper and lower sides of the leaves. You should spray the plant from a distance between six and 10 inches. Continue spraying your plants until you have used all of the pesticide in the sprayer. When you are done, clean out the empty tank and rinse it at least three times.

If you would prefer professional help, consider using TalkLocal to find a specialist for you. TalkLocal is a free service that will connect you with top-quality, companies in your neighborhood within minutes. Just enter in your specific problem, location and availability, and up to three companies will call YOU directly, saving you the time and stress of finding one yourself.
How Often Should I Water Plants

Thursday, November 29th, 2012

How Often Should I Water Plants Landscapers

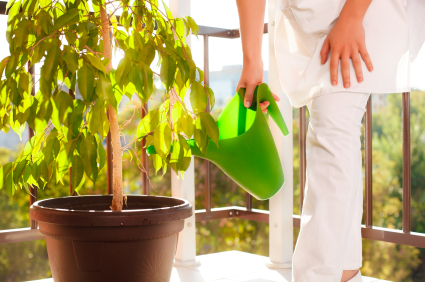
You have beautiful plants on the inside and outside of your house, and you’re wondering how often should you water plants. There are many factors that come into play when deciding. These factors include the type of plant, the climate, and whether or not the plant is an indoor or outdoor plant. Figuring out how often you should water plants can be confusing, but this article is here to shed some light on the situation and help point you in the right direction.

Indoor plants

Indoor plants require special care. Just because they are protected from the inclement and harsh weather does not mean they are fragile when it comes to receiving the appropriate amount of water.

Here are a few tips and tricks:

– Indoor plants with large leaves and those with thin leaves, along with plants that have a lot of surface roots will require more frequent water supplies than other plants.

–  If the plant is in a location that is either hot or dry, more water is needed to satisfy the plant.

– Check with the type of soil you are using. Different soil types have different absorption rates and capacities and this could make a big difference in the amount of water you need.

–  When you place a large plant inside of a small pot, it will need more water because there is less soil surrounding it. Also, add more water if the plant is in a clay pot compared to a plastic container because in the clay pot, the water evaporates quicker.

– The color of the soil is a great indicator to tell if the plant needs more or less water. If the soil is losing its dark brown/black color, the plant needs more water.

Outdoor plants

When it comes to outdoor plants and flowers, the situation can be a bit tricky. The rule is usually to water the plants and flowers twice a day (or at the minimum, once). Avoid watering during the very heat of the day. Stick with early morning and later in the afternoon.

 Additional help

Still need help with your plants or planting new ones? Check out TalkLocal. You will be connected directly to local, high quality professional that can help you with any landscaping needs at the time that is most convenient for your schedule. Try it out!

How to Keep Deer off Lawn

Wednesday, November 28th, 2012

How to Keep Deer off Lawn Landscapers

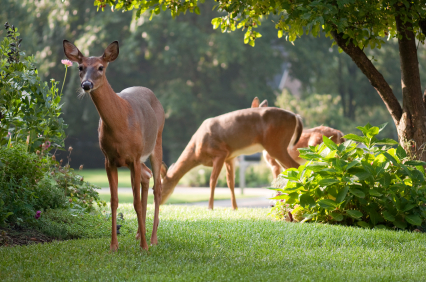
Do you notice your lawn looking less attractive because of the deer that run around on it? There are a number of ways to learn how to keep deer off your lawn, varying in expense and work. You can try some of these methods to see if they work.

– Grow plants that deer don’t like, so they won’t come into your yard and eat them. Some of these include daffodils, irises, foxgloves, or yucca. Some plants with strong smells such as sage and chives will also dissuade the deer. However, if hungry enough or curious enough, deer will eat these too, so this is not a sure-fire method.

– Spray your plants and flowers with hot pepper spray or make your own mixture of strong smells – try garlic powder, eggs, and any strong smelling edible products. Additionally Irish Spring Soap works well when hung around trees. Deer will avoid plants with these tastes/smells.

– Use human hair around the perimeter of your yard. You can go to your barbers and ask them if you they could save some of the hair for you. Deer do not like human hair and will not cross over it.

– Use a deterrent such as fox urine, wolf urine, or lion dung (from a zoo) – basically, the urine of any deer predator – to mark the perimeter of your yard. Deer will be frightened of the potential danger. Some commercially available products use similar ingredients, de-odorizing them for the human nose. Taking your dog out for a walk and getting them to mark your perimeter will work just as well.

– Keep a dog. A dog is the deer’s natural predator. So deer will not try to approach a home with a dog, especially one that goes outside.

– Put a tall fence around your yard – Deer will jump over anything four feet high, and attempt to jump over six feet-high fences and get injured. So an eight foot high fence is the only way to keep deer out of your yard.

TalkLocal can help you find a landscaper to help you set up your deer fence quickly and effectively! Just visit our website or call us at 1-877-987-7382.

How to Compost Fall Leaves

Friday, November 16th, 2012

How to Compost Fall Leaves Landscapers

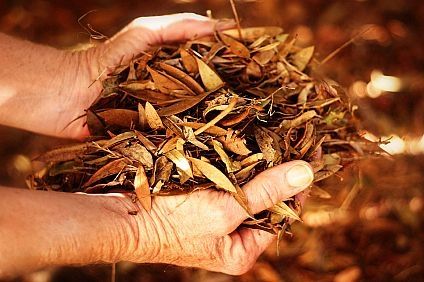
Fall provides an abundance of leaves that can be turned into rich compost and added back into the garden to make the soil more productive. Home composting is a great way to use a natural process to add valuable nutrients and conditioners to the soil. If you have never made compost before, you might wonder how to go about it. Here’s how to compost fall leaves in a relatively simple way, with minimal cost and effort.

1. Purchase or build large compost bins five to six feet across. The large size allows for rapid heating which creates compost faster. Bins can be purchased from home stores, garden centers, or farm supply stores. Inexpensive bins can be built from chicken wire.
2. Add raked leaves to the bins alternating with layers of nitrogen material. Do not shred leaves which can lead to compacting. Nitrogen comes from green matter and can be in the form of grass clippings, green plant material, or nitrogen fertilizer. One to two cups of nitrogen fertilizer per bin or one part leaves to two parts green clippings is ideal.
3. Water layers as you build the pile. Water is necessary for decomposition. If you wait until you finish building the pile, it becomes more difficult to saturate.
4. Do not turn leaves. Fall composting does not require turning because it allows heat to escape which is needed for the composting process. Only turn in the spring.

Following these steps will produce usable compost by spring. If left untouched, leaves take two to three years to compost.

Keep in mind a few tips when composting fall leaves. First, do not compost weeds. Some seeds may not be destroyed during the heating process and may be spread around the landscape when using compost. Second, do not add protein to the compost pile. This includes meats, bones, and fat. They attract animals such as rats. Finally, to prevent the spread of disease in your yard, do not add diseased plant material to your compost pile.

If you have questions or need additional professional assistance, let TalkLocal help you. It is easy, quick, and takes just minutes.

How to get rid of Broadleaf Weeds

Thursday, November 15th, 2012

How to get rid of Broadleaf Weeds Landscapers

Figuring out how to get rid of broadleaf weeds can be a tricky task, especially if you value getting rid of broadleaf weeds using the organic route. Any type of weeds can be annoying but broadleaf leaves can be especially troublesome because they usually grow in pairs. Check out the rest of this article for tips on how to get rid of these pesky weeds.

First, what are broadleaf weeds?

Broadleaf weeds blossom in pairs and and have wide, flat leaves, hence their name. Broadleaf weeds are all over the place. One of the most common types of broadleaf weeds is the dandelion. In order to keep broadleaf weeds from forming, one of the best practices is to keep your lawn and garden well kept. Trim, prune, and cut at the appropriate times.

How do I get rid of dandelions?

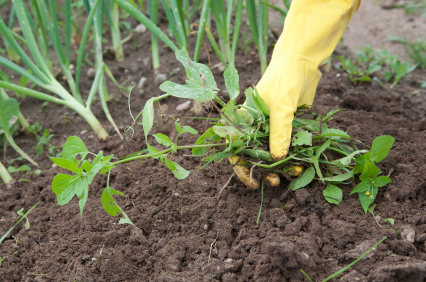
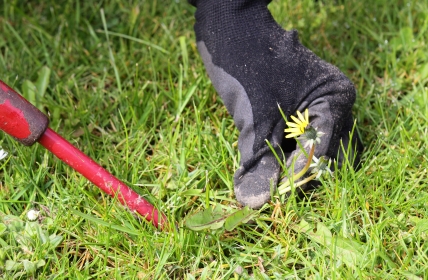
Dandelions are tricky because you cannot just remove part of the dandelion and expect it to wither away and never arise again. Dandelions must have their entire bodies removed in order to stay away. Either remove the dandelions by hand or use a dandelion weeder. After you have removed the dandelions, fill the empty space with new lawn seeds to prevent the dandelions from forming again. Pesticides are another option for killing the weeds.

What can I do besides using a ton of chemicals and pesticides?

One option that doesn’t use pesticides throughout your lawn is adding corn gluten to your fertilizer as you spread the fertilizer throughout the lawn. In addition, you can walk through your lawn and use a shovel to dig up the weeds.

Still need help with getting rid of the weeds? Check out TalkLocal, where you will be connected directly to local, high quality professionals that can help you with your landscaping needs at the time that is most convenient for your schedule. Check it out!


How to Trim Bushes with an Electric Trimmer

Tuesday, November 13th, 2012

How to Trim Bushes with an Electric Trimmer Landscapers

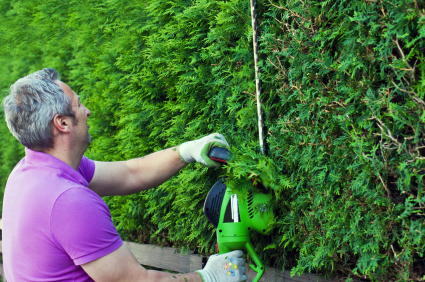
Hedges are understandably difficult to maintain. However, you can not neglect them because they contribute to the overall look of your house as well as its curb appeal. Trimming your own hedges is manageable, but you will need patience to get a nice end result. You can research different bush and shrub shapes before starting to gauge the difficulty of the project and your own skill level. Clean-looking shrubs require not only the right tools, but also the effort. By following this guide, you will learn how to trim bushes with an electric trimmer, and get your shrubs looking the way you want with ease.

Tools needed:

– Extension Cord

– Electric Hedge Trimmer

– Safety glasses

– Gloves

How to Trim Bushes with an Electric Trimmer

1. Plug in the cord of the electric trimmer into the extension cord, being mindful to give yourselves enough extra wiring for unrestricted movement.

2. With two hands, start trimming the hedge from bottom up. Start at the base and move upwards slowly at your desired depth. As a general rule, hedges are smaller at the base and grow in size at the top.

3. To trim the top, hold the electric trimmer out in front of your body while you trim. If you want round edges, start trimming a couple inches above the top while moving downward as you trim. If you want square edges, simply move the trimmer from side to side across the top while keeping the electric trimmer steady.

Safety Tips

– If you are attempting to trim bushes with an electric trimmer, make sure to wear safety glasses and gardening gloves when doing so.

– Be mindful of the cord.

Need Help?

If this seems like too much work to handle, consider using TalkLocal to find a local gardener. TalkLocal is a FREE service that will connect you with a reliable, top-rated gardener in your area within minutes

How to Get Rid of Dandelions

Monday, November 12th, 2012

How to Get Rid of Dandelions Landscapers

You might see dandelions in your yard and think they are a pretty flower, but technically, they are classified as broadleaf, perennial weeds. Your kids might love plucking the white-headed ones up out of the grass and blowing them away while making a wish, but what they’re really doing is spreading hundreds of baby seeds all over your yard. While they can actually be considered an edible, beneficial weed that provides great nutrition and can help add nutrients and nitrogen to the soil, some may consider their existence unsightly. There are several different approaches on how to get rid of dandelions. Here’s what you can do to kill and prevent them from growing in your yard:

– There are specific weed removal tools for dandelions that can be found at your local home garden center. These handy tools can be used to dig up not only the flower, but the entire tap root of the plant, preventing re-growth.

– Avoid dandelion sprouting by mowing your lawn often. By chopping off the head of the yellow dandelions before they can sprout and mature into the white-headed, seed-bearing form, you are also preventing re-germination of the plant.

– After mowing your lawn, leave the grass clippings to cover the dandelion. This helps provide a sort of “blanket” over the plant, preventing it from sunlight, which is necessary for growth.

– Go to your home garden center and purchase corn gluten meal (CGM), or another weed-killing spray herbicide and sprinkle it over the dandelion population.

– Less conventional methods include pouring boiling water over the plants, or spraying them with a vinegar-water mixture (no more than 5% or 10% concentration of vinegar). This will kill them within days.

If the dandelion problem has grown out of control and you would like some professional help, try using TalkLocal to locate a landscaper near you. TalkLocal is a free service that will connect you with top-quality, reputable companies in your neighborhood, within minutes. Simply enter in your problem, location and availability and TalkLocal will contact multiple landscaping professionals, who will then call YOU directly, ready to help.


Winter Lawn Fertilizer

Friday, November 9th, 2012

Winter Lawn Fertilizer Landscapers

Winter lawn fertilizers are essential. You have worked so hard to keep a crisp, green lawn during the fall and now you can make sure that this same lawn will be back next year. This is where winter lawn fertilizers come into play. The following are a few tips and tricks when it comes to preparing your lawn for the long winter haul.

What will winter lawn fertilizer do for my lawn?

Winter lawn fertilizer will keep your grass healthy. It will allow the grass the strength and health to bounce back when spring comes around. Instead of spending all spring working on bringing your lawn back to life, you will have a great head start if you prepare your lawn for the winter.

How does winter fertilizer strengthen my lawn?

The winter fertilizer will increase the nitrogen storage capacity of your grass for later in the spring. In addition, the grass’s roots will be strengthened from all the nutrients provided by the fertilizer.

Now that I know the benefits of winter fertilizer, what steps do I need to take to prepare my lawn?

One of the first steps is to clear away the debris from your lawn. This is very beneficial for maintaining a healthy lawn. The debris that you need to clear away is called “thatch.” If the thatch is not removed, it will make it more difficult for the thatch to reach the grass. In addition, your grass will be burned. To keep thatch from building up, maintain your lawn regularly and keep it trimmed to an appropriate length.

As winter nears, keep trimming your grass. Ideally when winter comes around and you do your last mow, trim the grass to a length of two to three inches. This is the optimal length of grass during the winter months.

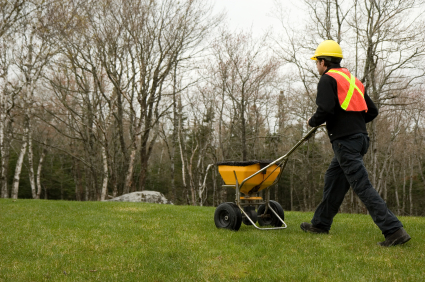
Now that your lawn is groomed to the perfect condition, apply your winter fertilizer as the instructions indicate on the bag or container.

Additional help

Not sure if you have done everything appropriately? Would you like professional help to keep your lawn pristine? Check out TalkLocal, where you will be connected directly to local, high-quality professionals that will help you at the time that is most convenient for your schedule. Give it a try!

Lawn Aeration Tips

Thursday, November 8th, 2012

Lawn Aeration Tips Landscapers

Mowing and fertilizing regularly are not the only tasks necessary for maintaining a beautiful lawn. The process of aerating once or twice a year can make the prized difference of a healthy yard. Aeration is extremely beneficial in that the holes created through the process allow for additional oxygen, water, and critical nutrients to seep into the soil, improving its root health and development. When soil is compacted and dry, roots are not able to thrive as well as when soil is looser and hydrated – something that aeration can create.

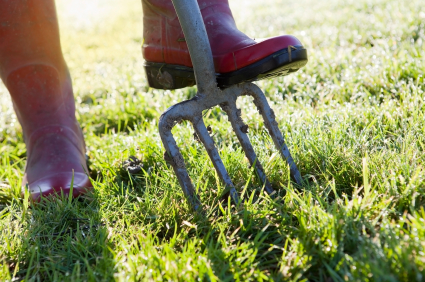
There are two main methods of lawn aeration – either using spikes, which compacts the soil as it presses down and creates holes, or coring, which penetrates down into the soil and removes a “core” cylinder-shaped pack of dirt. You can perform aeration either manually, such as with spiked shoes or coring tools, or through motorized methods, such as having aerators attached to lawn tractors.

Either of these choices is easily available, but coring is generally the more effective method, as it actually pulls out plugs of dirt as opposed to compacting more of it down like spikes would do. Though, the method you choose simply relies on your particular preferences, lawn size, budget, time constraints, and needs.  For example, using a manual coring tool is probably a better choice if you have a small lawn. The larger lawns will require motorized aeration tools to get the job done quickly.

Lawn Aeration Tips:

– The best time of year to aerate is in early spring or late summer/early fall.
– Aerate twice a year if you live in arid/dry climates.
– Water your lawn a day or so before aerating so the soil becomes soft, making it easier to penetrate and remove soil cores.
– Aerate the more trafficked areas of your lawn often. The reason for aeration is because your soil is very compacted and probably oxygen-deficient, so opening up the soil in these areas is necessary.
– After aerating, remove the coils or mow over them to break them up.

If you are having trouble aerating your lawn or would simply prefer professional help, try using TalkLocal to locate a landscaper near you. TalkLocal is a free service that will connect you with top-quality, reputable companies in your neighborhood, within minutes. Just enter in your problem, location, and availability and TalkLocal will contact multiple landscapers, who will then call YOU directly, ready to help.