Archive for the ‘Landscapers’ Category


How to Thin Trees

Wednesday, August 28th, 2013

How to Thin Trees - Landscapers

As summer melts into fall, it is important to take a look at the trees on your property and decide which ones need pruning. Ignoring this crucial chore could lead to devastating consequences for your home, especially if you live in an area that is prone to heavy, blustering fall winds and rain.

An overgrown, top-heavy tree could easily topple over into your home or drop dangerous branches in conditions of high wind. While you should call in the services of a professional arborist for specialty trees, you can deal with most of your trees by yourself. The key to learning how to thin trees effectively is to realize the effect pruning has on a tree.

Every cut and break you make to a tree’s structure and leaves is like a wound to the tree. When you thin a tree, you have to remove branches and foliage, but every lost leaf reduces the tree’s ability to photosynthesize and harness nutrients. That is why it is vital to the long-term health of your trees to prune them only as much as is necessary.

How to Prune Your Trees

There are a few basic methods you need to master when learning how to thin trees. The first is to step back and take a good look at your tree to determine where it needs pruning. Picture the tree canopy in the image of a perfect oval and remove any branches that fall outside that space.

Use pruning shears or a pruning saw on thicker branches. Make the cut at a slight upward angle just above the V where the branch you are removing meets the tree trunk or another branch. Make sure that you cut straight through the branch to prevent the bark from tearing downward. Stripping the bark from a tree makes it more susceptible to disease.

When to Prune Your Trees

Certain trees need to be thinned at certain times of the year. For instance, maple trees should only be thinned during summer, or if you’re feeling hardy enough, during winter. These are the times of the year when the tree’s sap is safely stored in its roots, meaning that you won’t have a big, sticky mess on your hands when you prune it. Before you prune any tree, it is best to determine its species and the appropriate pruning season for that tree. Also take care to never thin trees that are close to power and utility lines – if you have such a tree to deal with, it’s always best to call in a professional.

Need Professional Advice?

Learning how to thin trees takes time, patience, and some skilled guidance. If you need to consult with a professional arborist, visit TalkLocal’s website. We can help you find highly rated, certified arborists in your area via our free, online referral service.

Types of Evergreen Shrubs

Monday, August 26th, 2013

Types of Evergreen Shrubs - Landscapers

Evergreen shrubs make your garden colorful and alive. These plants have a distinct look to them that will make them a great addition to your home. There are many types of evergreen shrubs, but we will discuss the most common and most colorful ones that will let you add variety to your garden. While they are smaller than espalier trees, many evergreen shrubs are known to produce flowers all year round, thus making them ideal as decorations.

Seven Types of Evergreen Shrubs

Winter heaths, or flowering stalwarts, are pretty shrubs that flower at the most unlikely of seasons. These plants live up to their name, and they flower in winter. They may even flower for half of the year if the conditions are ideal. Ideal conditions include nitrogen-rich soil and plenty of water.

Minuet laurels are plants with very colorful flowers. They are quite small, making them ideal for a small garden.

Blue Star Junipers are another type of evergreen shrub that are ideal for small gardens. These plants do not bloom, but they have blue needles that are quite attractive.

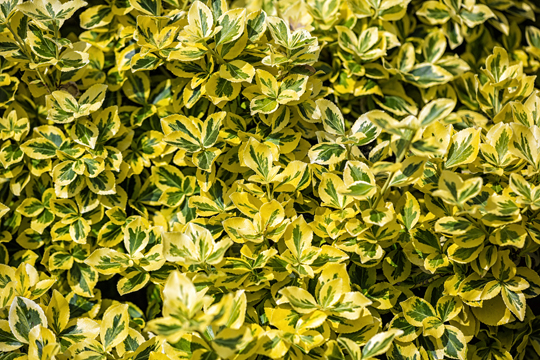
The next plants are Emerald and Gold Euonymus. They are so named because their leaves are emerald in the periphery but are gold in the center. They are quite beautiful plants that you can add to your garden.

Emerald Gaiety Euonymus are cousins of the emerald and gold, but instead, their leaves are green and white.

Moonshadow Euonymus plants are green and gold varieties of the euonymus plants. They are small and compact and make for a lovely ground cover.

Dwarf English Boxwoods are small plants that are attractive as the background for other evergreen shrubs.

Need Help With Your Landscaping?

If you are in need of a good landscaper but have trouble locating one in your area, then you can contact TalkLocal today and let us help you. We can find you a landscaper in your area in just minutes, for free!

How Much Mulch Should I Buy?

Friday, August 23rd, 2013

How Much Mulch Should I Buy? - Landscapers

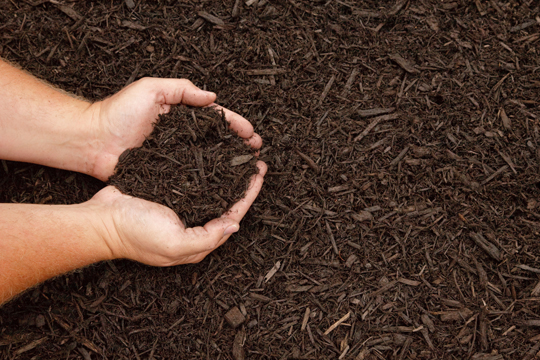
Using mulch can do your garden a lot of good, and this is for several reasons. First of all, it’s a natural fertilizer that improves the quality of your soil by providing it with nutrients. Besides this, mulch keeps water in the soil, preventing evaporation. It also keeps weeds from sprouting. On the aesthetic side, mulch gives your garden a unitary appearance, keeping its neat and tidy look.

What Kind of Mulch Do You Need?

There are many types of mulches, from leaves and straw to tree bark and gravel. The kind of mulch you use depends on what you want to achieve. For instance, if you have flowers and plants, organic mulches, such as compost and manure, are a better choice. On the other hand, if you’re interested in creating patterns of orderly paths in your garden, you might want to use gravel. However, in both cases you need to ask this question before you start adding mulch to your soil: How much mulch should I buy?

How Do You Answer This Question?

1.  You need to calculate the area of your garden in square feet. For this, measure the length of your garden, then the width, and multiply them. This way you get the total area that needs to be covered with mulch.

2. Then decide the depth of mulch layer. For flowerbeds, a three-inch layer is enough. The same goes for vegetable gardens. If weeds are particularly resilient in your garden and you want to keep them under, the mulch layer needs to be thicker, up to six inches.

3. Now you have to do more calculations. Take depth into account and multiply the total square footage of your garden with the depth of your mulch layer. For instance, if your total area is 500 square feet and you want a two-inch mulch layer, you multiply 500 by 2 and get 1,000.

4. Lastly, divide the result by one cubic yard. To do that you should know that one cubic yard means 324 square feet, with a mulch layer that goes one-inch deep. In the example chosen, 1,000 / 324 = 3.08. Round it up, and you’ll get 3.1 cubic yards. That is the answer to your question: How much mulch should I buy?

Looking for Help?

Need a hand with your landscaping projects? TalkLocal can connect you with an experienced landscaper in the area, for free and right away.

How to Install Lawn Sprinkler System

Thursday, August 22nd, 2013

How to Install Lawn Sprinkler System - Landscapers

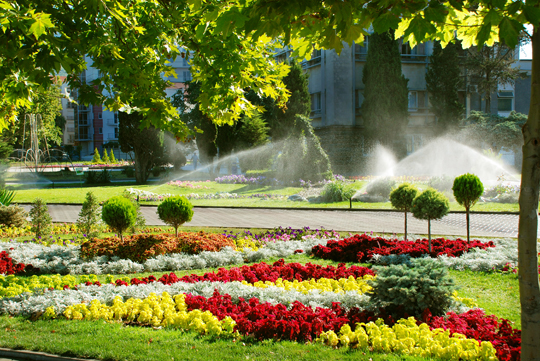
All you have to do is type “how to install lawn sprinkler system” into any search engine, and you’ll end up with an exhaustive list of every landscaper and sprinkler installer in your region. However, for those of you who are handy and enjoy DIY projects, installing your own sprinkler system is a relatively easy job.

Proceed with Caution

The first thing you need to do is figure out if there are any buried utility lines running underneath your lawn. Your local Public Utilities Department can help you with this. Once you determine where the buried lines are, you can decide on where you want to lay the pipes for your sprinkler system. Make sure to purchase a well-rated lawn sprinkler with a long-term warranty and read the manufacturer’s instructions before installing it.

Start Digging

Once you have figured out where you want to lay the pipes, stake out the lines using string and dig the trenches at a depth of six to twelve inches. If you live in an area that is prone to deep frost, you should make sure your trenches are closer to a foot deep. You also want to ensure that all of your trenches are level with each other.

Place the Pipes

The next step is to place the pipes in the trenches, along with sprinkler tees every seven to ten feet. Use three-quarter-inch PVC pipes and connect them using rubber cement. Put together your control valves and manifold system, which you will later attach to the main water line. Attach the sprinkler heads to the tees, ensuring that the heads are level with the rims of the trenches.

Connect the Water

Your lawn sprinkler system is now installed. The last step is to connect your main water line to the manifold. Draw a pipe from the main line using a tee, which is best placed immediately beyond the water meter. Make sure to put in a shutoff and control valve before you attach this new pipe to the manifold. Turn on the water and check that the sprinklers are functioning. Once you are satisfied, simply replace the sod in the trenches and your lawn sprinkler system is ready for use.

Want Professional Help?

While a lawn sprinkler system is pretty easy to install, it still requires some technical knowhow. If you need additional help on how to install lawn sprinkler system, simply use the free referral option on TalkLocal’s website. Within minutes, you will be connected to the best sprinkler installers in your area.

Window Well Cover Materials

Wednesday, August 21st, 2013

Window Well Cover Materials - Landscapers

A large number of homeowners who decide to invest in much-needed home improvements choose to purchase and install window well covers for their basement windows to minimize safety risks associated with uncovered openings and to prevent dust and debris buildups, which are hard to clean. How could one find the best window well cover materials for this project? What are the attributes of first-hand materials that should be used by all homeowners in their inexpensive, result-oriented DIY assignments?

How to choose the best window well covers

When it comes to purchasing remarkable window well covers, it is advisable to put quality over affordability. In other words, go in favor of durable, incredibly resistant, rustproof products, which could be considered an excellent investment in the long term. Apply these simple tips to make an informed decision:

1)    Stay away from fragile materials and purchase covers that are designed to support a considerable weight.

2)    Reinforced mesh is an exceptional alternative at hand, especially if you are constantly worried about the safety of your children and/or pets.

3)    Landscapers recommend a wide range of high-quality window well cover materials, which are inexpensive, longer lasting, and maintenance-free, like steel, aluminum or polycarbonate-based products.

4)    Choose a style complimenting the exterior of your home. Also, pick the right window well cover materials based on your real needs and expectations.

What are you really asking for? A higher level of protection against potential accidents and burglary attempts? A much more effective debris buildup prevention and more light inside your basement? In this case, you could buy and install mesh covers or classic bars. Either way, get in touch with a reputable supplier who won’t hesitate to offer you premium, durable materials and custom design tailored to your necessities, demands, and financial possibilities.

How to find the best window well cover supplier

Are you interested in finding and installing the best window well cover materials? If you don’t have the time, patience, and skills to conduct a DIY project, count on the in-depth knowledge of a talented landscaper. Identify the best ones by consulting TalkLocal, your one-stop source of fresh, accurate information. Contact a landscaper today and profit from tiny, yet incredibly important home improvements ensuring a higher level of comfort and safety for all of your family members.

Using Gravel in Gardens

Tuesday, August 20th, 2013

Using Gravel in Gardens - Landscapers

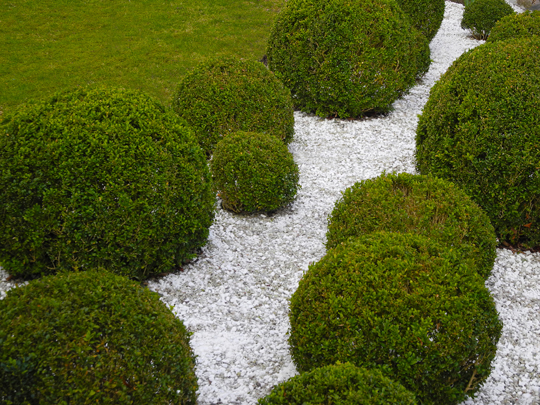
At first glance, you wouldn’t say that gravel is very important, but these small pieces of stone can change the outlook of your garden completely. Gravel can be laid out in paths or all over the garden. In addition, it can be easily maintained, and it doesn’t harm the environment.

What Do You Need to Do Before Using Gravel in Gardens?

– Establish and mark your path

– Dig a trench

– Install the fabric in the trench

– Edge your trench

How to Prepare Your Garden for Using Gravel

1. If you choose to install gravel in paths, it is recommended that you mark the path from the very beginning in order to have a clear picture of the parcel you need to fill with gravel. Make all of the necessary measurements.

2. Only after this, start digging a trench. Its depth is, of course, your choice, but 2 inches would be more than enough.

3. After digging the trench, start installing the fabric. If necessary, cut it out as you wish and use pegs to fasten it up. If you are afraid of weeds that may come out, this is definitely the solution to the problem.

The fabric can prevent weeds’ seeds from germinating. When choosing your fabric, ask an expert for advice.

4. After taking all of these decisive steps, you must do one more thing before using gravel in your garden: Edge the trench so that the little stones don’t fall out. You can use bricks, bigger stones, or plastic. Only now can you start putting your gravel into the trench. It can be easily evened with a rake.

How You Can Make Your Garden Special

Using gravel in gardens is done for both functional and aesthetic reasons. Curvy gravel paths can give your garden a unique look. In order to make it even more special, use some exotic flowers and other plants.

Could You Use Some Assistance?

If you need the opinion of a professional when choosing the type of gravel, fabric, or even exotic plants you need for your garden, TalkLocal can put you in contact with an expert right away.

How to Build a Garden Terrace

Monday, August 19th, 2013

How to Build a Garden Terrace - Landscapers

Most American families who own a house dream about turning their dull, unorganized backyard into a beautiful garden terrace, without breaking the bank to support this series of much-appreciated home improvements. Numerous homeowners are interested in finding tips and tricks showing them how to build a garden terrace on time and on a budget, without involving an architect. Here are a few simple steps that you should follow, in order to obtain excellent results.

1. Choose the best location for your garden terrace

A garden terrace can be a temple of relaxation and an incredible oasis of greenery, complimenting your home and even increasing its resale value. Start this ambitious project by identifying the best location for your garden terrace.

Choose a terrace that  is 100% waterproof, with a fully functional drainage system, and solid enough to support the weight of your potted plants and all other décor elements that you plan to implement.

2. Use your imagination

Want to learn how to build a terrace garden on your own? It’s simple! Just unleash your creativity and put all of your ideas on paper. What kind of terrace garden would you like to take pride in? What type of decorations (rocks, herbs, shrubs, sculptures) would you prefer? Put your imagination to work to come up with the perfect layout; then start putting theory into practice.

3. Purchase the best type of soil and the best plants for your project

Opt for the right soil to avoid potential problems. The ideal soil combination shouldn’t absorb a large amount of water like a sponge. When it comes to purchasing the ideal plants for your terrace garden, feel free to go in favor of the shrubs, herbs, and flowers that you love, as long as they have soft roots that couldn’t possibly create cracks in your foundation. Potted plants, like bonsais, for instance, are a great alternative at hand which should be considered by all homeowners who are now learning how to build a garden terrace.

Need Help?

If you have the tools, the skills, and the time required to complete this project on your own, then a DIY approach is a valid option. However, if you’d rather go in favor of professional services, count on TalkLocal to identify the best landscapers in your area. Always remember that an excellent garden terrace is a great, long-term investment and a priceless asset for all family members who want to create a relaxing, comfortable, outdoor living area.

Benefits of Thinning Trees

Thursday, August 15th, 2013

Benefits of Thinning Trees - Landscapers

Is your yard or property looking a little like an enchanted forest lately? You may be reluctant to cut down some of your trees, but don’t let that reluctance stop you from thinning your trees. Just like weeding your garden, thinning trees in your yard can actually help your other trees thrive and live longer, healthier lives, not to mention making your property more beautiful. Let’s take a moment to review a few of the benefits of thinning trees.

Healthier Trees

Tree thinning has been shown to allow the trees left behind to thrive in ways they were unable to before. Fewer trees drawing moisture and nutrients from the soil means that the individual trees remaining have greater access to the things they need to survive, not to mention better access to the all-important sunlight, if your trees’ canopies overlapped. Better nutrition means your trees will grow larger and more beautiful and become more resistant to insects, disease, and the perils of drought conditions.

Healthier Lawn & Plants

Fewer trees means more sunlight reaches the ground, and that means your shrubberies and flower gardens will benefit from the change, as well as your grass and vegetable and fruit gardens. If you love being outdoors, thinning your trees could mean more time gardening than ever before for you!

Increased Property Value

Choosing to thin the trees on your property means that you can choose only the most visually and aesthetically appealing trees to remain. A more beautiful lawn means better curb appeal, and that means increased property value for your efforts.

Need Help with Your Trees?

Do you have trees you’d rather be rid of? Don’t take on the task of cutting and disposing of those trees by yourself. Let the experts at Talk Local help you find a professional landscaper to thin those trees for you. TalkLocal has a free concierge service that can connect you with professionals in your local area today.

How to Use Pre-Emergent Herbicide

Tuesday, August 13th, 2013

How to Use Pre-Emergent Herbicide - Landscapers

Weeds are like spam; you don’t want them, but they keep invading your lawn or yard. For a garden they’re even worse, as they can undermine your landscaping efforts and design. But you can avoid this constant headache if you act on it early on.

What should you do?

Because prevention is better than cure, you can stop the weeds from overtaking your lawn, yard, or garden by learning how to use pre-emergent herbicide. This way, you will recover your neat and green turf.

How Does It Work?

When you use pre-emergent herbicide, the purpose is to prevent weed seeds or seedlings from germinating. After application, the herbicide creates a barrier that doesn’t allow the weed to grow. The key is to do this early in spring, a few weeks before sowing any plant seeds.

Weed Control Basics

Pre-emergent herbicide works if it is applied at the right time. When you choose your herbicide, don’t forget to read the instructions on the label carefully to make sure that you choose the right one for the weeds in your yard. To be effective, pre-emergent herbicide needs to be applied before the emergence of weeds, generally early in spring and fall. However, it is advisable to take into account the climate, which can vary from one region to another and from year to year.

The temperature of the soil determines germination; so when you decide to use pre-emergent herbicide, pay attention to this aspect as well. The weather has a say in this, too. Excessive rain or lack of it can neutralize the effect of herbicide, and weeds will start germinating. That is why you might need to apply pre-emergent herbicide repeatedly.

Click for help

TalkLocal can help you find immediate help should you need a qualified professional to assist you with your landscaping projects or lawn care. A few clicks can get you what you need, on your terms, for free.

Growing Vine Fruits Indoor

Monday, August 12th, 2013

Growing Vine Fruits Indoor - Landscapers

Vines That Can Be Grown Indoors

Several vines can be grown indoors. It is a good idea to grow fruits fit for small gardens. Grapes are one of the vines that can be successfully cultivated indoors and outdoors. Additionally, most grape vines do better when grown under glass. Even in warmer locations, these plants do well indoors. Growing vine fruits indoor gives you a chance to appreciate them better. They make a nice background to dinner parties and add beauty to your home.

How to Grow Vine Fruits Indoors

Grapes, the greenhouse variety, should have roots planted outside the greenhouse. Then, you guide them through pruning to grow indoors. If you plant the roots indoors, you will need more irrigation. The best soil for fruit is slightly acidic. The best time to plant these vines is November and December so that pruning them won’t lead to them bleeding out. Just before the growth starts, the plants should be fed fertilizers and dried blood at a rate of 120 grams per square meter.

Just before the growing season, these vines benefit from a sprinkling of dried blood at 30 grams per square meter. The vines should be watered every 7 to 10 days. Vines with roots outside the greenhouse should be watered more frequently, as their roots tend to dry out. Watering should be more concentrated during dry seasons and dry spells.

It is a good idea to place mulch in the summer to prevent the atmosphere from getting humid. After about 3-4 years, it is also a good idea to dig a trench and place fresh soil on the roots, along with pebbles for better irrigation.

Finding Professional Help

TalkLocal can help you find great landscapers who will suit your needs. Give us a call today to be connected with the right professionals in your area.