Archive for the ‘Maid Services’ Category


What are the best dusting methods

Thursday, September 20th, 2012

What are the best dusting methods Maid Services

Home cleaning is not finished without dusting. Dusting can be an easy, but are some methods that are better than others in making your home spotless. Some dusting methods may damage your household items, so read on to learn about the best dusting methods.

Top to Bottom

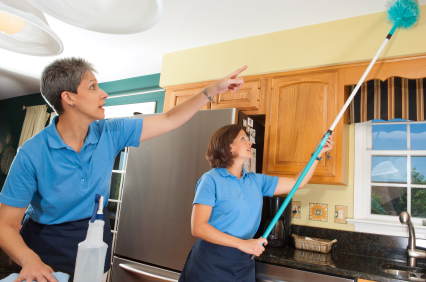
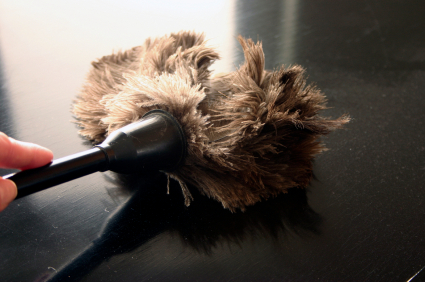
Dusting from top to bottom is the best dust method. A duster cannot pick up every dust particle, so the excess dust will go into the air and fall to lower surfaces and the ground. By working from top to bottom, you don’t have to re-dust, but instead, make one clean sweep of the room. For this method, dust the highest surfaces in the room and work to the next highest item in the room until all the dust is on the floor or trapped in the duster.

Vacuum

Vacuum cleaning is best after dusting. The vacuum can clean the floor of the dust that fell to ground.

Electronics

Electronics could be damaged in dust accumulation. Electronics should always be unplugged when dusted. Use a microfiber cloth to gently swipe the surfaces of an electronic. For crevices of electronic devices, use a soft, long-handled brush. Then, vacuum around the cords and vents to prevent dust from clogging outlets and electronics. For desktop computers, open them up and use a compressed air can to spray dust off of the computer components.

Soft Toys

Soft toys cannot be cleaned of dust using conventional dust methods due their texture. You can clean soft toys by following these steps.

1. Put soft toys into a large plastic bag.

2. Put one or more cups of baking soda into the bag.

3. Seal the top and shake the bag.

4. Remove each item and shake off the baking soda.

5. Vacuum the toy for remaining baking soda.

To find professional cleaning services, use TalkLocal. TalkLocal will connect you directly maid cleaning within your area.

Best Ways to Clean Painted Walls

Wednesday, September 19th, 2012

Best Ways to Clean Painted Walls Maid Services

These are five easy steps to cleaning your painted walls and brightening up the atmosphere of your home.

Here are the best ways to clean painted walls:

1. Dust your walls! This may seem like a crazy thing to do because you are going to be cleaning your walls anyways. However it will make your job of getting spiffy clean walls much easier. Think about it – if you do not get rid of the dust, it will mix with the water used to clean and make brown streaks along the walls.

2. Make yourself arm protectors! Why? Has nasty water ever dripped down your arms as you cleaned? If you dislike that feeling, there is a solution! Wrap a towel around your wrist and secure it by placing a rubber band around your wrist as well. No more dripping down your arms!

3. Hit the walls! Don’t literally hit the walls, but get to work on the walls. Have a bucket of cleaning solution (or just simply water) and a few towels ready. Dip your towel into the solution and get to work. Scrub the walls in circular motions with your wet solutions. After they are clean, take a dry towel and dry the walls.

4. Get rid of the stains. Use a Mr. Clean Magic Eraser to get rid of stains. These sponges work great for Crayons and other random stains.

5. Repeat! Some stains are hard to clean, so don’t be afraid to repeat methods two or three times. Then you can take a step back and observe all your hard work!

After the first time you clean your walls, you may realize that it is not so daunting a task and will make your room look crisper and brighter. To keep your walls sparkling, hire a maid service to take care of it for you. Check out TalkLocal to talk with up to three professionals right in your neighborhood who can help you out. Check it out!


How to get Rid of Water Stains on Windows

Tuesday, September 11th, 2012

How to get Rid of Water Stains on Windows Maid Services

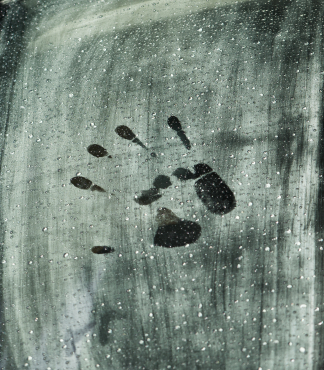
You can view a million things in your backyard through your windows.  A couple of deer looking to graze, a beautiful sunset, or your children playing in the grass are among the few.  But when there are water stains on your windows these picture perfect moments can be ruined.  Water stains are the result of hard water and can be truly annoying.  You should try to get rid of water stains as soon as you can because otherwise they will only get worse and become a bigger hassle to clean.

How to get Rid of Water Stains on Windows

Before you do anything you should clean the window with plain water to get rid of all the easy to remove dirt and stains.

Vinegar and Water

When you want to remove water stains, you can concoct a homemade solution that will clean your dirty window.  You should prepare a solution of one part water and one part white vinegar.  Try to use water that is soft, which contains less minerals.  Minerals such as calcium, magnesium, and other metal cations are what cause hard water in the first place, causing the stains you see on the window.

Now you can soak a clean towel into the vinegar and water solution and then dab it onto the stain.  Hold the wet towel to the window for a few minutes keeping constant contact with the window.  The vinegar’s acid softens the mineral deposits, which should make it easier to remove. Using a new towel, wipe and rub the window to remove the spots.  You may need to repeat this process a few times in order to get rid of the harder stains.

Lime-A-Way and Lemon Juice

You can also try to use Lime-A-Way to remove stains. After this process is completed, you should try to use lemon juice to buff it up.  Lemon juice also has the softening abilities of the vinegar.  Spray a mixture of lemon juice and water onto your window and let it set for a little while.  Once this is done wipe it off with a clean towel and your windows should look as good as new.

Got maids?

If you prefer someone else deal with hard water stains on your windows, you can find reliable maid services using TalkLocal. Simply input your problem, availability, and location onto the website and within minutes, you should be connected on the phone to someone who can help you out.

How to Clean under a Stove Top

Thursday, September 6th, 2012

How to Clean under a Stove Top Maid Services

While cooking on your stove top, you may (often) spill contents over and under the stove burners. Whether it be soup, sauce, vegetables or ground beef, these food particles can stay for days or weeks (but hopefully not). The comes a point where it needs to be cleaned up, but how do you reach under these burners?  Read this article to get some tips on how to clean under a stove top.

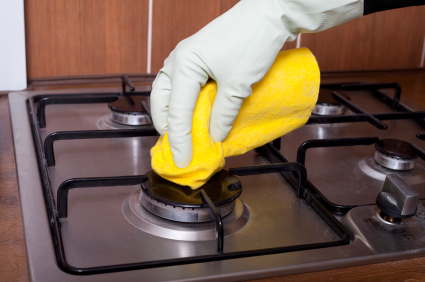
Most stove tops can actually be lifted up so you can easily clean under and around the burners. Your stove top should be able to lift up from the front, and there may even be a rod to help keep it hoisted in the ‘up’ position, much like what you find under the hood of your car. Before lifting this though, check to see whether your burners are connected to the actual stove top or not.

If you have electric burners, they are likely connected, so you can simply lift up the top and start cleaning underneath. If you have gas burners, you should be able to remove the metal burners and place them to the side before lifting the top up.

Now to the process of cleaning. You can use a typical household cleaner, a sponge/paper towels, and warm water to rinse. Be sure to clean up all remnants of the household cleaner so the chemicals don’t burn off when you turn on the stove.

If you are having some difficulty or just want someone else to clean the mess, try locating a local maid service to help. You can use TalkLocal to find one near you. TalkLocal is a FREE service that will connect you with top-quality, reputable maid services in your neighborhood, within minutes. Just enter in your problem, location and availability and TalkLocal will contact multiple professionals, who will then call YOU directly, ready to help. Save time from searching through phonebooks and directories for the right maid, and let TalkLocal do it for you!

How to Clean a Leather Couch

Monday, September 3rd, 2012

How to Clean a Leather Couch Maid Services

Leather is a special material that reacts badly to many chemical cleaners, so soap and water is usually the best method to remove leather stains. However, different types of leather require different cleaning methods, as do different types of stains. Using a cleaner for a specific type of leather on the wrong leather could result in your couch changing colors. No matter the leather type, always do a test on an inconspicuous part of the sofa first to see if the leather becomes discolored.  Check out this article if you want to learn how to clean a leather couch.

Finished Leather

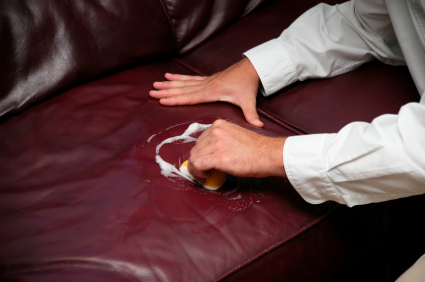
The leather on your sofa is most likely finished, which makes the leather more durable and easier to clean. This doesn’t mean that you can use whatever you want; it just means that you can use soap and a damp cloth to clean your couch. Make sure the soap isn’t too abrasive; moisturizing soap for sensitive skin is the best. The cloth or rag should also not be too abrasive, so microfiber is a good choice. Even with these precautions, still test the soap on a part of the sofa that no one will see to make sure it won’t discolor your leather. Rub the soap gently into the leather with the soft cloth, and then wipe it off with another clean cloth. Use a reliable leather conditioner, which is available at most home improvement and furniture stores, on the spot that you cleaned. This method should work for most finished leather stains, but a common stain many people have are water marks. These stains ironically come from the same method that’s used to clean them: cleaning your sofa with too much water. This is why you should always use a damp cloth instead of a soaking wet one.

Unfinished Leather

If your couch is unfinished, your job becomes a lot harder. Instead of regular hand soap, you’ll need special saddle soap for your unfinished couch. Use the same method used to clean finished leather to clean your unfinished leather sofa. In order to prevent stains from soaking into your sofa again, use a leather protection spray on your sofa after you’re done. Note that even with the special saddle soap, you need to test it on a hidden part of your sofa first to see if it changes color. Even specially made formulas for unfinished leather may not work on your sofa, since different types of unfinished leather absorb chemicals at different rates. Ultra porous materials like lamb and calf leather will absorb and lose moisture much faster than regular unfinished leather.

Since leather is a very finicky material, it’s best to call a professional in order to avoid damaging your couch. TalkLocal can find you professionals to clean your leather sofa for no additional charge!

House Cleaning for a Party

Friday, August 17th, 2012

House Cleaning for a Party Maid Services

The date of you’re big house party is quickly approaching.  The invitations are out and the R.S.V.P.’s have been accounted for, but the cleaning still needs to be done.  Here are some simple tips to make house cleaning for a party a quick and easy task.

List out all the area that need to be cleaned

List out every area that needs to be cleaned and remember closets and entryways.  Also make a list of rooms that should not be entered during the party.  This will help you stay organized.

Clean the areas that need to be clean

Start with the entryways. Then, move on to the areas that will be constantly active during the party and where the food will be placed.  Remove any clutter from these rooms as the party guests need space to move around.

Clean throughout the party

No matter how much you prepare, some sort of cleanup will always be necessary.  Have a stack of cleaning solutions to clean spills and paper towels on hand.

If you find yourself overwhelmed by the amount of cleaning that needs to be done before or after the party, you should hire a professional.  Use TalkLocal to connect you with the maid services in your area today.

What to Use to Clean a Stainless Steel Refrigerator

Wednesday, August 15th, 2012

What to Use to Clean a Stainless Steel Refrigerator Maid Services

Stainless steel appliances are a popular choice for people who want to give their kitchen a modern look.  Newer refrigerators in particular are often stainless steel and can be tricky to clean as the exterior is prone to getting covered in fingerprints and smudges.  This can be irritating and keep your kitchen from looking its best.  If you don’t know what to use to clean a stainless steel refrigerator, you should read these tips and learn the best ways to keep them shiny and smudge-free.

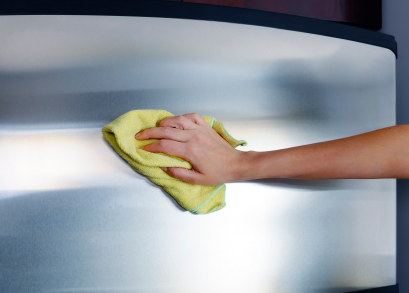
The interior of a stainless steel refrigerator should be cleaned in the same way as any other fridge interior.  Where they differ is in the cleaning of the exterior.  To get dirt, smudges, and fingerprints off of the outside surface of your fridge, try using a small amount of rubbing alcohol on a microfiber cloth.  If you do not have any rubbing alcohol available, you can try mixing half a cup of baking soda with a few squirts of dish soap and warm water.  When wiping the fridge down try to rub your cloth with the grain of the stainless steel rather than against it.  Wiping against the grain can leave scratches and other damage to the surface of the refrigerator, especially if you are using harsher cleaning products.

Once the fridge is clean and dry, the surface might look a little dull or worn out.  To solve this problem, our next step is to polish the stainless steel back to full shine.  There are many different products that you can potentially as polish including: baby oil, mineral oil, petroleum jelly, and WD-40.  Using a rag, apply whichever polish you chose to the entire surface of your stainless steel refrigerator.  Then buff it with another clean rag until the cloth comes away dry.  Applying this polish will not only make your fridge gleam but will help prevent fingerprints and other smudges from appearing.

If you ever need some help with all of the cleaning in your home and kitchen, consider using TalkLocal to match you up with a maid service.  TalkLocal will automatically connect you to a high quality, local company; all you need to do is enter your location, availability, and a brief description of your service needs.

How to Clean an Oven

Friday, August 10th, 2012

How to Clean an Oven Maid Services

Here’s a little joke for you: “How do people know when to move? When the oven gets dirty.”

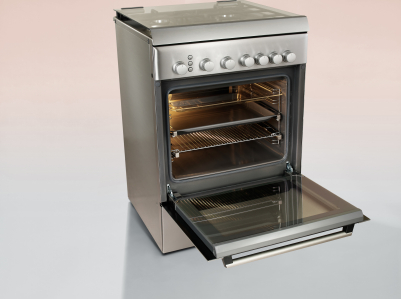
Cleaning the oven is a truly daunting job and it’s definitely not for the faint of heart. The black dried carbon stuck to the sides of your oven is incredibly hard to remove, especially if you don’t have a self-cleaning oven. Few cleaning products are powerful enough to effectively clean off the grime and the powerful ones are often contain chemicals you definitely don’t want in your food. You could be doomed to an eternity of scrubbing, or you could try this cheap and relatively labor-free method. This method uses baking soda as a primary ingredient—which is perfectly safe to be consumed —and should involve no scrubbing. However, it does take time, so it may not be the best option if you need your oven cleaned quickly.  Here is how to clean an oven:

1. Buy a large empty spray bottle (that holds a quart to a liter) and baking soda. Make sure that the nozzle isn’t too fine and that dissolved baking soda will be able to pass through. The spray bottle should also not have held any other substance other than baking soda or water previously.

2. Place three heaping teaspoons of baking soda into the spray bottle using a funnel.

3. Wash the baking soda into the spray bottle by pouring water into the funnel. Use this method to fill the bottle up with water.

4. Shake the spray bottle well so that all the baking soda dissolves. Otherwise, you might have baking soda residue at the bottom of your spray bottle after you are done.

5. Spray the solution on the black grime multiple times throughout the day, but make sure the oven is cold before you do so. You don’t want to get baking soda everywhere or get burnt.

6. Eventually the black grime will detach from the sides and flow down to the floor of your oven as a powder that you can wipe away.

Don’t have an entire day to clean your oven? Use TalkLocal for free to find quality professional help in your area that can make your oven shine!

How to Remove Cigar Smell from a Room

Thursday, July 26th, 2012

Cigar smoke—well known for its distinct smell—can be tough to mask if it is indoors on a regular basis. An occasional cigar in your basement might not leave a lasting smell, but consistent indoor cigar smoking definitely leaves a stubborn odor. Consider these tips on how to remove cigar smell from a room:

– Leave bowls filled with cleaning products such as ammonia, vinegar, or pine-scented cleaner in the closed-off room overnight.

– Spray an air freshener or perfume on a light bulb when off. When you turn it back on, the scent will fill the room.

– Fill ashtrays with cat litter to mask the smell.

– Sprinkle baking soda on carpets and furniture and let sit overnight. This should help absorb the odor. Vacuum the baking soda up in the morning.

– Try using products certified for extreme odor removal.

– Rent an odor removal machine.

If none of these at-home methods are successful, you may want to consider getting your carpet, furniture, and upholstery professionally cleaned. Cigar smoke is a scent that tends to stick around persistently, so it might be worth the investment. To be directly connected to a maid service or carpet cleaning company in your area, visit TalkLocal and enter your specific needs along with your availability and location.

How to Prepare your House for a Maid

Monday, July 16th, 2012

How to Prepare your House for a Maid Maid Services

Preparing your house for a maid can be a tricky task. One challenge is understanding what information to convey to the cleaning service. Also, understanding a maid’s role and his or her expectations is key. On one hand, you want to clean up a bit to look presentable but on the other hand, you do not want to do the work that you are paying for.  Here are some tips on how to prepare your house for a maid.

1. Communicate

– Leave instructions for garage doors, locks and keys, alarms, and pets.

– Be clear describing the length of stay and amount of payment.

– Convey special instructions for particular pieces of furniture.

– Provide feedback on the maid’s previous visit on areas that went well and areas that need improvement.

2. Clarify

– Read the contract and know if the maid will bring cleaning supplies.

– Provide directions to access cleaning supplies (e.g. vacuums, washing machine, etc.) you want used.

– Provide instructions for when you need certain areas cleaned by and what you expect the house to look like when you return home.

3. Understand

– A maid is there to clean, not to pick up and organize your belongings around the house.

– Maids have accidents, too – pick up items you do not want damaged in the cleaning process.

Other helpful tips:

– Don’t leave fragile objects in vulnerable locations around the house in case accidents happen.

– Tell your maid where to leave the clean dishes, unless you like searching through cupboards later.

– Take the kids to the park while the maid is there. You can get some fresh air and the maid can do his or her job without distractions.

Now that you have prepared your house for a maid, you are now ready to have your home cleaned. TalkLocal is a free service that will connect you directly to a maid service that can come when you need one. TalkLocal picks up to three high rated companies in your area for you to choose from.