Archive for the ‘services’ Category


Cut the Red Tape: About Building Permit Laws

Monday, July 27th, 2015

shutterstock_309800942

Nobody likes dealing with rules and regulations, especially not when it comes to building permits. However, whether you’re a tenant or a contractor, you’ll almost certainly have to, but don’t worry because they’re not as complicated as they seem.

 The Basics

It may seem surprising, but building permit laws are there for your protection – they ensure that contractors abide by construction standards, which means safer buildings for tenants. Their requirements also can help you figure out exactly how to go about your bigger DIY projects.

Almost any construction project requires a building permit, so whether you’re a contractor building a new home or a tenant trying to build new additions, it’s a good idea to familiarize yourself with local codes.

Minor projects like repairing walls, changing faucets, and painting don’t need permits, but there are specific permits for different types of projects, like plumbing and electrical work.

 How do I get a building permit?

If you’re working with a contractor, your best bet is to let them handle the application; they’ll have the information and experience necessary to undergo the process, and are better-suited to take on the liability. Be wary of a contractor who resists taking out a permit – if they insist a permit is unnecessary, verify with your own research.

If you’re handling the project yourself, you can either go about the process yourself or find a building permit service. In the former case, you’ll need to present a building official with your plan; more extensive projects are best planned by a specialist like an architect, but you can draw up simple ones yourself. The official will then review your application for up to a few weeks.

Some municipalities offer pre-approved permits for projects that conform to a standard plan. It’s a good idea to check if your local government has a pre-approved plan for your specific project; this will both save time and provide helpful guidelines for your work.

Permit fees can range depending on the scope of your project. Small-scale projects can cost as little as $50, while larger ones may cost a few hundred dollars.

 Building Permit Inspections

After receiving your permit, the official will carry out a number of inspections that varies by the scope of the project. The official taking out the permit plans these inspections, so be sure to ask which inspections are necessary and schedule accordingly. For example, a contractor building a new home must have the ground upon which he intends to pour concrete inspected.

The building inspector will only check for relevant concerns; for example, if you’re building a new wall, the inspector will not make sure your plumbing is up to code.

After Inspection

Inspections span the actual construction process, so after the last inspection, you’re done! The inspector may present a certificate that proves your project is up to code. Proudly display this certificate in your storage closet.

Securing a permit can be a hassle that you may not have time for; however, a skilled contractor can take care of it for you without you even needing to stand up! Get a leg up on your next project by heading to TalkLocal – enjoy free access to the  unique search system that makes finding local service professionals a breeze.

Top Energy Efficient Appliances: Saving More Than One Type of Green…

Friday, July 24th, 2015

shutterstock_153253364Have you ever heard the story about a woman who switched out a refrigerator from 1973 for a refrigerator made in this century, saving $400 every year? In fact, more and more energy efficient appliances are hitting the market every year. So, if you’re torn about whether to repair an old appliance or replace it, look beyond the sticker price and think about your utility costs. Your appliances might not be as old as our example, but the energy use of your current appliances could be driving higher energy costs than it should given modern advances. Upgrading your appliances can drastically reduce this utility cost and increase your home’s energy efficiency, saving a whole lot of both types of green.

Don’t know where to start? Here are some of the top energy efficient appliances on the market in 2015:

–        Refrigerator: The Mighty Samsung RF261BIAESR

The Samsung RF261BIAESR is large and sophisticated, with a total capacity of 25.5 cubic feet due to an extremely efficient array of internal shelves, bins, produce crispers, and a separate pantry with its own temperature control. This refrigerator has rightfully earned an EPA Energy Star label, which means that besides being extremely affordable and functional, product testing verifies that it’s significantly more energy-efficient than most others on the market. Indeed, this appliance uses a 398 kWh/year while many refrigerators almost double that.

 –        Washing Machine/Supercomputer: LG WM3170C

LG WM3170C, a $879 front-load washer of 4.28 ft^3 volume, uses its 90 kWh/year with staggering efficiency, boasting seven different cycle options, anti-vibration technology, and an LED display. If seven cycles aren’t enough for you, this washing machine can be synced to a smartphone to download even more.

 –        Boiler: The Wallet-Saving Bosch Greenstar

Most Energy Star-certified boilers net you 19% savings on energy costs when compared to your average boiler, but they reach as high as 40%, even though those units can be more expensive than they’re worth. The Bosch Greenstar series includes high-efficiency, ultra-compact, and quiet boilers for any home size – the low energy usage will pay for a big chunk of the cost of switching out your current boiler in just a few years.

 –        Dishwasher: The Crowd-Pleasing Whirlpool Gold WDT720PADM

The $400-600 Whirlpool Gold WDT720PADM washes your dishes at 44 decibels, little more than a hum in the background, accommodating all sizes with an adjustable upper rack, fold-down tines, and a silverware basket – all using an Energy Star-winning 260 kWh/year. It’s no wonder this dishwasher’s over 1000 votes average near five stars on Lowes.com.  Picture3.png

 Need quick and reliable installation for a new appliance? TalkLocal has you covered: go to TalkLocal and use our unique search system, which will turn the hassle of researching and scheduling into a walk in the park.

Find the Right Contractor Using These 10 Top Consumer Review Sites

Wednesday, July 22nd, 2015

shutterstock_345238313

Whether you’re dining at a restaurant or you’re in line at the department of motor vehicles, receiving poor service is always a hassle. But, when poor service comes at the hands of a mechanic, contractor, or other professional who you’ve entrusted with the care of your car, home, or loved ones, it can be disastrous. This is why it’s important to research and make sure you find the right contractor before hiring them to work on the things that matter to you the most. In addition to finding a professional that suits your price range, schedule, and job needs, you should always read consumer reviews.

If you already have a local professional in mind, a quick Google Search may be all it takes to get the review information you need. But, if you haven’t yet found a professional, online reviews may do a better job of helping you connect with the professionals with the best reputations; rather than the professionals that are merely nearby, or listed early in an alphabetized directory.

Here are 10 of the most popular online review sites nationwide:

600px wideWarning: Although these are trusted review sites, you should still keep an eye out for fake reviews. Here are some ways to spot a phony review:

   1) The minority report – The review that seems the most popular, most liked, and comes up first in the list does not reflect the overall feedback regarding a company. Never rely on just one review.

   2) Disregard the extremes – In general, people don’t actually love or hate a business interaction. So, reviews approaching such extremes may be biased.

   3) Vague language – Compare a user’s review of another service along with the one you are looking for. If they’re both vague and have the same ‘cut and paste’ language, then they are most likely fake reviews. Trust your gut.

Check out this blog for more information in discarding fake or biased reviews. If it’s a really big job, you should also ask to speak to one of his or her references personally just to make sure.

Of course, it would be much easier to get a complete picture of businesses in your area if you could read thousands of online reviews, social media interactions, and other critical information in mere seconds.

With TalkLocal, you just enter what you need, where, and when; our software collects business ratings and reviews from across the web and connects you with up to 3 top-rated professionals in about 90 seconds. That way you can compare quotes, verify availability, and do research only on the professionals that want to do business with you.

So, if you’re still looking for that right contractor, let TalkLocal find them for you.

Author’s Note: All website descriptions are from Crunchbase and the Franchise Opportunities Journal.

How to Install an Indoor Hammock

Wednesday, July 22nd, 2015

shutterstock_16202134

When we think of hammocks, I bet most of us imagine ourselves lying outside, ‘laxing on the beach without a care in the world. However, we live in a world dictated by the 9 to 5 grind, and most of us just don’t have the time to just relax…

UNLESS IT’S NATIONAL HAMMOCK DAY!

So, how do you celebrate this auspicious occasion? You celebrate by relaxing in a hammock of course, and if you don’t have the space for a nice outdoor hammock, we have a complete guide to help you get that beautiful, and often envied, indoor hammock!

To set up a hammock indoors, you will either need to buy or build wall hooks, or use a custom hammock stand.

To hang a hammock indoors using wall hooks, here are the steps to follow:


You’ll need…

2 Lag hooks
2 wood planks (2”x4”)Some drywall screws
A drill and, of course
A hammock.( If you don’t already have one that you’ve been using inside, you can buy a hammock from REI or Amazon).

1.  Cut the 2x4s to size (around 20” should work in most cases) and drill the plot holes into the 2x4s for the lag hooks. It’s best to measure them out before beginning. (You can also dress up the lumber with wood finish or just paint on it with whatever pattern speaks to you.)

2. Decide how high you want your hammock to hang and how far the ends will be from each other. Once you’ve decided all of this, screw your lag hooks into the 2×4 (which will be your hangers) and then screw the hangers into the wall horizontally.  Spread the screws apart when doing this so you don’t weaken the wood too much.

3. Last but not least, hang up the hammock and you’re done! Don’t just hop in it, though. Make sure you test out the hammock. You don’t want to sit in it and then suddenly you’re on the ground.

(For further information on how to do this, you can see this handy dandy DIY Wall hooks Guide.)

If you’re looking to have an indoor hammock but feel better having a professional do it, then contact TalkLocal and we’ll set you up with the handyman who will get that hammock up and swinging so you can celebrate Hammock Day the way you’re meant to.

Happy Hammock Day from TalkLocal!

DIY Furniture Makeovers: Don’t Let your Furniture Decay!

Wednesday, July 15th, 2015

shutterstock_223684648

Is your furniture starting to look “antique”? The story behind those white rings on your coffee table – “I, uh, left some Chunki Chikin Soup® on it” – won’t draw conversation like the history that paints the family china, so it’d be best to keep it looking new. It would be an expensive hassle to regularly get professionals to retouch your furniture – so if you have some extra time on your hands, save yourself some trouble by trying out some of these tricks for DIY furniture makeovers.

Getting Started

Look over the furniture for blemishes like white rings, cracks, or degraded finish – applying mineral spirits will highlight them.

Cleaning Up

Dip a sponge in a mixture of soap and water and gently scrub the finish. Wring the sponge, rinse, and dry using a towel.

Removing White Rings

Remove minor white rings by applying petroleum jelly and letting it sit overnight. Worse white rings require special products and severe rings require the attention of a professional.

Removing Paint Stains

Remove any paint stains with a modified razor blade. Just wrap a bit of masking tape on both ends of the blade, and when you hold it, bend it slightly to get it close to the paint without actually touching the wood. Scrape the paint carefully.

Removing Blemishes

Apply gel stain to the surface to cover up small blemishes. Soak up the gel stain with a cloth and wipe it across the finish, and then remove the excess with another cloth. It takes time to dry, so if you change your mind, you can remove it with mineral spirits before it sets in.

Filling Cracks

Fill in any small cracks with wax from a wax stick. Break off small pieces, warm them in your hands, and work them into the length of the crack using a thin tool. Clean up any extra wax with a cloth.

Updating your Finish

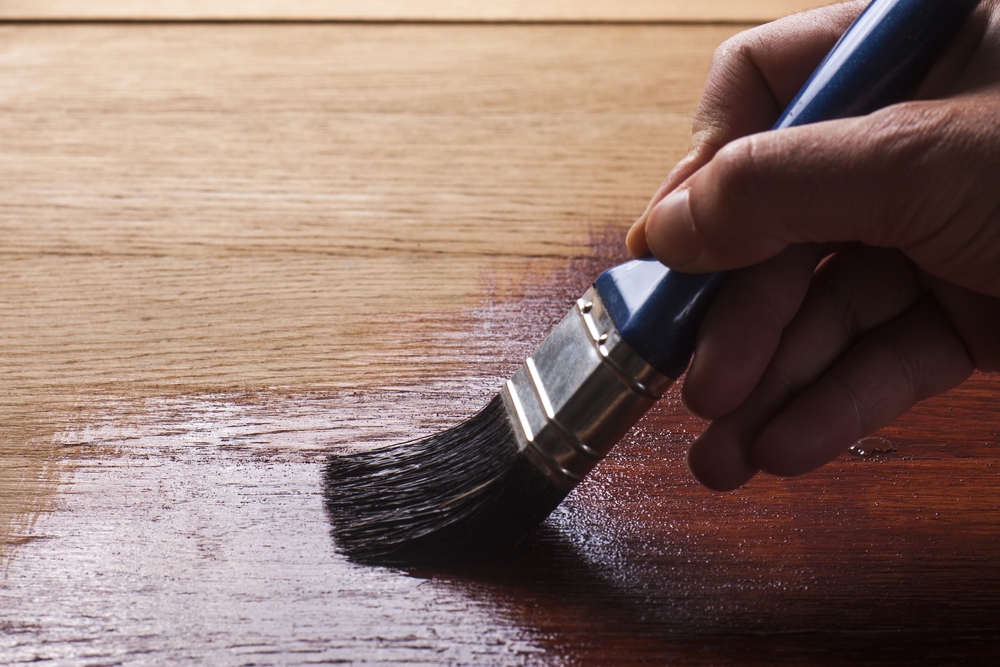
After you’re finished, apply wipe-on finish with a rag in small swirls. Wipe off the excess in the direction of the grain, and let it dry overnight.

It’s surprising how much better your furniture can look after these simple procedures. They won’t work for glaring issues, however; if there are extreme blemishes in the finish, deep white rings, or it needs stripping, get a professional – head to TalkLocal and we’ll fix you up with one furniture upholestry professional before you know it.

Easy DIY Landscaping Projects – Make your Neighbors Jealous

Monday, July 13th, 2015

shutterstock_244704934

What does your yard say about you? It might rest outside the walls of your house, but your yard is still part of your home. We burn through hours deciding between pieces of furniture, color swatches, and carpets to make our houses comfortable and expressive; meanwhile, more see a yard than a living room, and the natural beauty of good landscaping is nearly unmatchable. It may seem daunting at first, but we’ve put together three easy DIY landscaping projects to beautify your lawn.

Creating a Space

An important idea in landscaping is that yards shouldn’t just be expanses of green – angles, balance and color should be used to make a yard feel like a space, like a room in a house. Find a diagram of your yard and understand what sort of space you’re dealing with, and then look around your yard to get a feel for it. What sorts of natural landforms are there? If you were to imagine your yard in terms of rooms, what would the rooms look like, what would you do in them, and where would they go? You can create your “walls” through straight angles between trees, flowers, and bushes, or by utilizing walkways.

Gardening

Gardening will allow you to create dynamic and beautiful spaces through arrangement of differently shaped and colored flowers. With a little work and research, you can make something much more impressive than a small square filled with flowers – use the colors to border your house and add personality, or different scents to fill your space with a calming aroma. For a real gardening challenge, try to arrange flowers so they create a vibrant walkway.

Special Landforms

You can also diversify your yard with interesting features, such as rock walkways or small bodies of water. They’re actually very easy to introduce to your yard. For rocks, just imagine what you want them to look like, and buy rocks of the appropriate shape. A small pond is a weekend project: start by contacting your town government to get digging approval, get a pump, materials to line the bottom of the pond, and whatever plants or rocks you wish to decorate its outside.

But we’re all busy, and maybe landscaping isn’t your thing. Luckily, there are professionals who can handle any task, especially landscaping. With our unique search system, all of the obstacles to hiring a professional, such as scheduling, quality, and availability, are things of the past. Don’t waste any of your precious time – head over to TalkLocal now and find the perfect local service professional in half the time it’d take to find your old shovel.

3 Ways to Keep Your Car Clean

Friday, July 10th, 2015

shutterstock_333946184

Cleaning a car is one thing, but keeping that car clean is another challenge in itself. One of my greatest frustrations involves me spending hours cleaning out my car and then, two weeks later, my carpets look like this:

 Untitled design

It’s amazing how quickly grit and grime accumulate in car upholstery. It’s as if my carpet has been a welcome mat for camping grounds on a construction site on sandy beach front property. And trust me, the picture makes that carpet look better than it is.

Surely, there must be a solution to help keep cars clean that doesn’t involve doing a thorough cleaning every two weeks. Luckily, there is!

Here are a few ways to keep your car clean:

1.       Keep a trash can in the car

You can buy a fancy trash can (like this one), or you can simply use a plastic bag. A lot of times, we leave trash in our car with the intention to take it out later. But, this doesn’t always happen. A trash can solves this problem, so you won’t have to worry about trash being all over your car.

2.       Use ceramic car coasters

When I first saw this, I didn’t think too much about it. However, it turns out that cup holders carry a lot of grime from sticky juice to just overall dirt. From my experience, cup holders are hard to clean out. Ceramic car coasters solve this problem by keeping dirt and grime away from the actual cup holder.

 shutterstock_342970751

3.       Keep a cleaning kit in your car

You probably keep a bunch of cleaning supplies such as Windex, toilet cleaners, brooms, vacuums, etc. in your house. While you won’t need all the supplies you keep in your house, it is good to keep a couple of cleaning supplies in your car. Simple things like cleaning wipes, dusters, or even a small vacuum can help to maintain your car’s cleanliness. One day, you may spill some Sprite on your seats. Another day, you may sneeze on your dashboard. So, knowing how exhausted and distracted you may be once you finally get home, it’s best to have some tools readily available to clean whatever mess you may make right away.

At the end of the day, let’s not forget that most of us are not car cleaning experts. So, if you ever need a more thorough cleaning, TalkLocal can help you find local car washes.

Good luck and happy cleaning!

DIY Faux Brick Wall Installation: Swanky Indoor Styles

Friday, July 3rd, 2015

shutterstock_322214192

Brick is everywhere these days – restaurants, swanky bars, modern homes – and for good reason: nothing adds a rustic touch like indoor brick walls. DIY faux brick wall installation isn’t that hard and it’s much cheaper; also, like laminate flooring, it looks convincing. Follow these easy steps to spice up your home.

1)      Measure your wall and decide how many bricks you need, as well as if you’re going to need to create special templates for windows and light fixtures, which can easily be done with cardboard and a box cutter or scissors. Faux brick wall tiles can be bought at almost any DIY store, or ordered from Home Depot online.

2)      Decide on a color scheme. You may be able to choose any, but in some cases, important furniture will require that you use certain colors. Though you can buy faux brick in almost any color, they can be painted to whichever you like.

3)     Saw the panels to conform to your templates.

4)      Get a hammer, nails, safety gloves, a nail gun, and caulking equipment. The panels can be easily affixed to the wall, no catch – just make sure you’re not obstructing objects on your walls by properly cutting down the panels.

5)      Make sure to caulk the panels down to fill in any cracks or spaces.

Small DIY home improvement projects like these can be fun and easy – but if you have a bigger project on your hands and lack the time or space to do it, get a professional. Head over to TalkLocal and we’ll fix you up with the perfect contractor for all your home improvement needs.

Changing A Flat Tire: 3 Tricks Even The Veterans Forget

Monday, June 22nd, 2015

Changing a flat tire all alone is difficult, not because the steps involved are complex, but because beginning to change a tire immediately prompts the urgent and attentive intervention of passing strangers. I’ve been shown how to change a tire several times. First by my parents who directed me in the process, and later by the helpful strangers who quickly talked through everything they did. One time, I successfully jacked up the car before being interrupted by someone who warned me that I was supposed to loosen the lug-nut. Plus, my jack was denting the bottom of my car because it was placed in the wrong spot. It wasn’t until last week, at the tender age of 30, that I finally changed a tire… completely on my own… from start to finish… without being rescued by some kindly gentleman stranger. I lucked up that day. Not only did I discover my flat tire while already at home, I took care of it in the security of my enclosed garage- away from helpful neighbors.

My first step was to find the above video on Google. To my surprise, there were steps that even my tire changing vets hadn’t done- probably forgot. So, whether or not you feel confident changing a flat tire, take a couple of minutes to watch the above video.

And, the next time you change a flat tire, don’t forget these most frequently skipped tricks: 

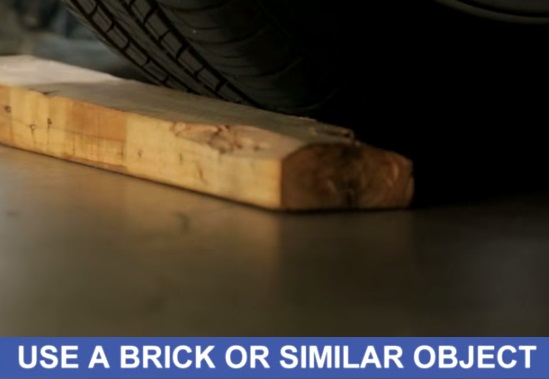
Wedge a brick or piece of wood beneath the flat wheel:


1450326_10152014065584656_430503267_n

Before loosening the bolts, which is what most people do when changing a flat tire, you should place a wedge a thick brick or piece of wood beneath the flat tire to prevent it from turning. This, in addition to parking on a flat surface and setting the parking break, keeps the car from rolling, It’s also easier to loosen the lugs if the wheel is stationary rather than turning with each wrenching motion.

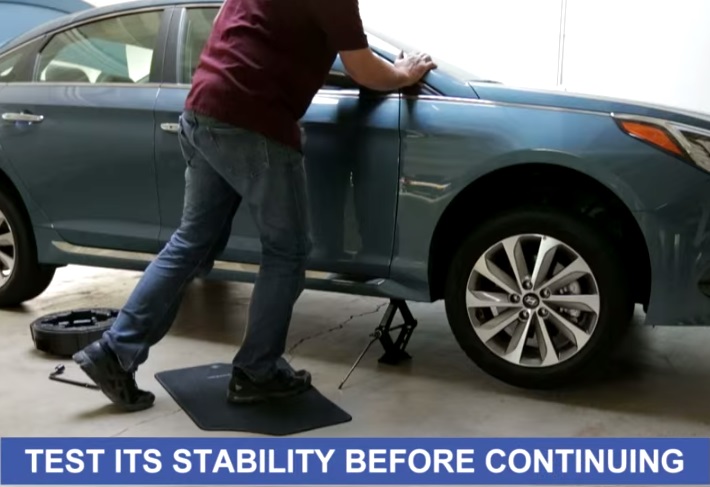
Give the car a firm nudge to make sure the jack is stable:

10-Things-To-Know-About-Shiatsu-Massage-Therapy

If you’ve placed the jack in the location suggested by your car manual and lifted the car until the wheel is a couple inches off the ground, it should be safe to operate on the car in the elevated position. Still, it couldn’t hurt to use your body weight to test the car’s stability to the setup where it would be weakest, above the jack itself. It’s a simple step, so be sure to give it a try before putting yourself at any potential risk. Only then should you proceed to completely remove the lugs and swap the flat tire for the donut or new tire.

Make sure the new tire is well secured:

aaargh

After sliding the new wheel into place, you need to get the lugs fully tightened. You should go over the lugs once or twice with the tire iron. If you have a torque wrench, use it on each lug. If not, simply attaching the tire hire so that its handle is perpendicular to the ground and stepping on it like a step can certify that the lugs are as tight as possible.

As embarrassing as it is to admit, it took me 45 minutes to change that tire last week. Of course, only 15 of those minutes were spent changing the tire itself. I also had to do some research, hunt down my car user’s manual, and add air to the donut which was apparently a bit low.

Of course, if your roadside troubles need more than a quick fix or its something you just can’t handle, TalkLocal can connect to the right local towing or roadside assistance service. Visit TalkLocal or download the app on iPhone, Android.

DIY Natural Cleaning Products From 3 Common Household Items

Friday, June 19th, 2015

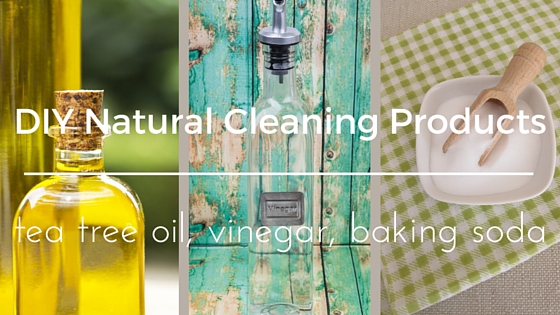
DIY Natural Cleaning Products

Cleaning is a nuisance, even before you actually start. Honestly, I don’t mind cleaning. There’s something that makes me happy about a clean house, but there are still annoying little issues. Trying to find the right cleaning product for the right thing and then having to deal with the aftereffect of the horrid smell, not my favorite. If only there was some way to make it easier…

Wait! There is, as shown by this great video. It explains a bunch of helpful DIY cleaning hacks to help make it easier on you but what I really enjoyed was learning about 3 simple household items that make great DIY natural cleaning products.

So, without further adieu…

Here are 3 products that you can use to make your home shine:

The Magic of Vinegar

Did you know that distilled white vinegar is a natural disinfectant? It has a high alcohol content so it can be used to clean a lot of surfaces. It also has the added benefit of being a natural bug repellant…which will come in handy this summer when the ants try to invade my home.

The Power of Baking Soda

Baking soda is great. I don’t know about others but I still keep baking soda in my refrigerator to keep it smelling nice. Turns out it was a good thing as baking soda is also anti-bacterial. Additionally, it’s a great abrasive so it helps with those hard to get off stains.

The Benefit of Tea Tree Oil

Tea tree oil, or melaleuca oil, has plenty of advantages. Not only is it completely natural but research states that tea tree oil is antibacterial, anti-fungal, anti-infectious, pretty much anti-everything bad. So, it’s a great addition to your cleaning supplies.

What else makes these three simple products so cool? Well, they’re all safe for you and the environment; they’re reasonably priced; and you can use them in a bunch of different combinations to clean almost anything you need. Not to mention both vinegar and baking soda are natural deodorizers which you can use together with other essential oils to have a beautiful scent left afterwards.

So, give the video above a look and see all of the different ways you can use these three handy-dandy items in your home. Or if you don’t have time, go to TalkLocal and find a local professional maid service to get your house spick and span.