Archive for the ‘Painters’ Category


Quick Tips Before You Prepare Exterior of House For Painting

Tuesday, January 28th, 2014

House Painting Ideas for a Gorgeous Home - Painters

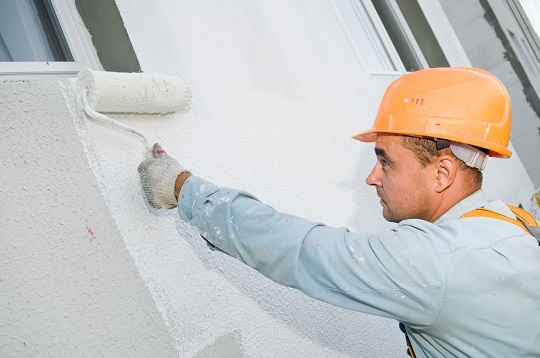
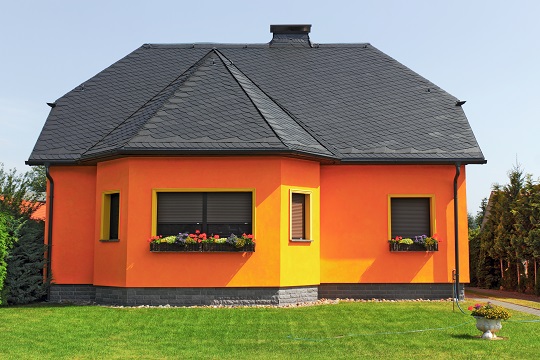
Repainting the exterior of your house with a fresh coat of paint or even a new color is the simplest way to give your home an instant facelift without breaking the bank.

Choosing a Color Scheme

Go Classic: Most of the time, the tried-and-tested color combinations simply are the best. For example, bright white window frames and warm beige siding will never go out of style.

Bright Accents: You can use two different hues to create bright accents, such as painting your door a bright teal while giving window shutters a dusty gray color. This will work for homes that are covered in mostly one color like white or another neutral hue.

Contemporary: The combination of brown and steel gray will give your home a modern look. This color scheme is perfect for homes with wood sidings that are stained medium or dark brown, which adds contrast and helps soften the coolness of the gray paint.

Painting Tips

Knowing which colors to paint your house exterior is just half of the work. You need to make sure the actual painting is done flawlessly. Here are some tips to know before you pick up the paintbrush:

1) Always use quality paint. Low-quality exterior paint will not withstand weather conditions day-in and day-out. When you buy high-quality paint, you can expect it to resist fading and cracking even when it’s exposed to the sun and harsh temperatures.

2) Don’t skip sanding. It’s one of the most critical steps to ensure paint adhesion. Power wash the surface to be painted before sanding. Paint will not stick properly to a dirty and/or mildewed surface.

3) Primers exist for a reason: they make paint adhere better. Apply a coat of oil primer and then a coat of acrylic or latex paint for a strong seal.

4) If you have several paint cans of the exact same color, mix them together in a large container. By combining them, it will result in a uniform paint color.

5) Prevent paint streaks by working from the top to the bottom of a surface.

Fall is the best time to paint your house exterior, because the chances of rain are slim which allows the paint to cure properly. Humidity levels are also good in the fall, making it an ideal time to paint since high humidity can cause bubbling in the paint.

Call in a Pro for a Stress-Free Paint Job

Whatever exterior painting you need to get done around your home, you can find a reliable and experienced painter in your area with TalkLocal’s help. Contact us today and we’ll get you in touch with qualified professionals in no time.


Fire Retardant House Paint

Tuesday, January 21st, 2014

Fire Retardant House Paint - Painters

Fire accidents are disastrous events that can happen at any time. You might recover your money from your insurance company, but it would be better if you could reduce the risk of fire breaking out or delay its spreading. You can do that by using fire retardant house paint to cover and protect the walls of your house.

Regular Paint versus Fire Retardant House Paints

Most paints that are used on walls and furnishings are usually flammable, and in case of fire, they work as a fuel, feeding the fire, and making it spread faster. On the other hand, using a fire retardant house paint can delay the fire from spreading, protecting the infrastructure of the building.

How Does Fire Retardant House Paint Work?

This kind of paint is specially designed to be a poor heat conductor. When the temperature rises because of fire, fire retardant house paints swell up, forming what is called char. This substance prevents fire from spreading, giving fire fighters the chance to try to put it out. Each fire retardant house paint is rated with regard to fire resistance, which means that you can know for how long it can keep the fire at bay.

When they first appeared, fire retardant house paints were extremely toxic and expensive. Nowadays, there are many options at hand if you decide to use fire retardant house paints for your house or office. They are safer and less expensive.

Whether you decide to use fire retardant house paints to protect your home from fire is up to you, but if you want to limit fire damage, keep in mind that they can be an effective alternative.

Ask an Expert

Need help to paint your house? Not sure about what kind of paints to use? Let Seva Call track the best professionals in your area. By using our free service you will get what you need in minutes.

Painting with Acrylic Enamel House Paint

Wednesday, January 15th, 2014

Painting with Acrylic Enamel House Paint - Painters

Acrylic enamel or acrylic enamel paint is a water-based paint that uses acrylic as the binding ingredient to create the paint film. This paint is durable, non-yellowing, and resists chipping. It works well on shiny or slick substrates such as glass and car exteriors, which is why it is often used for automobile painting. It is also used to paint a variety of materials from metal, steel, and aluminum to pipes and fencing.

When dry, acrylic enamel gives a semi-gloss or gloss sheen. It has minimal odor and dries quickly, although unevenly, sometimes with noticeable brushstrokes. It’s also not as great for sanding as oil-based enamel paint. Acrylic enamel house paint is ideal for painting doors, windows, and woodwork trims. It’s easy to cleanup with just water and soap. Acrylic enamel house paint has numerous color options to choose from and it comes in cans, aerosol sprays, and tubes. Usually, paint jobs that use this paint will only need one coat.

How to Paint with Acrylic Enamel House Paint:

1. First, the surface to be painted must be prepped. It must be cleaned, de-greased, and sanded. A clean and dry surface will give the best painting results.

2. Once the surface is ready, spray it over with a high-quality primer, which serves as a sealer. It also eliminates the need for a second coating.

3. For this job, choose a quality paintbrush that has firm but flexible bristles.

4. Work in small sections, applying paint heavily to the surface. As the paint dries, it will level out. Make sure not to paint over an area if it’s already in the process of drying because the paint will smudge and the finish will be ruined.

5. Let the paint dry overnight. Acrylic enamel house paint can sometimes appear already dry but give at least 24 hours before touching it.

As a word of caution, don’t forget to put on a protective mask so you don’t inhale toxic paint fumes. Never work with acrylic enamel paint when you’re in an enclosed room.

Hire a Pro Painter

Let a professional painter take care of your house painting job. Seva Call offers a free service that will connect you with up to three reliable professional painters in your area, so all that’s left for you to do is choose the best contractor. What a time-saver! Try us now.

Essential House Painting Tools for Exterior Paint Jobs

Friday, January 10th, 2014

Essential House Painting Tools for Exterior Paint Jobs - Painters

Even with a great color scheme in mind for your home makeover, you can’t start any paint project without the right house painting tools. You’ll be doing yourself a big favor if you make sure to have all of these house painting tools ready before you begin painting your home exterior:

– Exterior painter’s tape to protect areas that are already painted and for professional-looking paint lines.

– Scraper or putty knife to remove peeling or cracked paint.

– Wire brush or steel wool to remove mineral salts leaching out of masonry and stucco.

– Sandpaper to get rid of surface defects. Make sure to get the right one for the specific surface you’ll be working on.

– Spray gun to paint the largest exterior surfaces most efficiently.

– Paintbrushes to apply the paint. Polyester blended and nylon paintbrushes are perfect to use with latex paints. For oil-based paints, varnishes and other coatings, go for a natural China bristle paintbrush. Choose the right size of brush: 4- or 5-inch for large spaces, 2 ½- or 3-inch for trimmings and corners, 1- or 2-inch for touchups, and detailing.

– Paint roller and roller covers to paint large and flat areas quickly. You can use rollers to apply latex or oil-based paint, and they work well with both gloss and semi-gloss paint. You can get the standard 9-inch roller, but 14- and 18-inch rollers will make painting larger, flat areas much quicker. Use a 7- or 4-inch roller for tighter areas such as around windows.

– Screw-on extension pole to extend your reach so you can paint ceilings and the top of walls.

– Paint tray to hold your paint when using a roller. Also, buy disposable liners for the tray so you don’t have to clean it up.

Other Useful House Painting Tools to Have

For sure, when you shop for house painting tools, you’ll see many other devices for all sorts of painting jobs. In addition to the above list, you may want to add the following tools below. They’re not exactly essentials, but they would make the job much easier.

– Paint pouring attachment: This is a clever plastic attachment that you clip onto the top of a regular gallon of paint to eliminate mess when you’re pouring paint to refill the paint tray. It’s very easy to clean and very cheap.

– Paint pail: With this in hand, you don’t have to keep on stepping down your stool to refill your paintbrush.

– Door hinge covers: If you’re painting your door, this will save you a lot of time. It eliminates the need to mask off the door hinges or remove the door.

Thinking about hiring a pro?

For any painting job that you won’t be able to handle, Seva Call can help you get the expert help you need – fast and free. Contact us now!

Refinish Wooden Deck

Thursday, January 9th, 2014

Refinish Wooden Deck - Painters

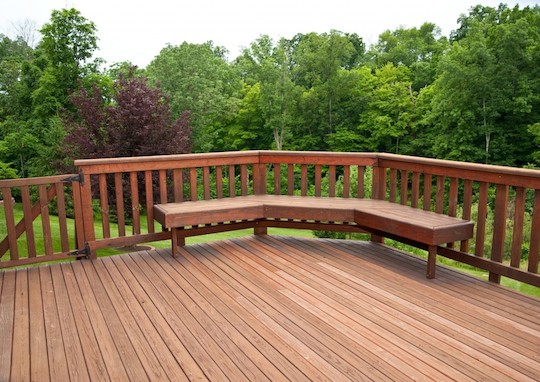
The wooden deck behind your home is a place where many memories are made. Be sure to protect and extend the life of the wood by refinishing the deck. Doing this will make your deck look fantastic as well as improve your home’s resale value.

Here are a few basic steps to help you refinish wooden decks.

Inspect the State of Your Deck

To start the refinishing process, begin by inspecting the wood deck for any structural problems. A wood deck endures many environmental challenges. There may be loose boards, as well as rotting or severely split wood. It’s best to fix those issues before beginning the actual process of restoring the deck.

Power Wash the Deck

The critical component of deep cleaning a wooden deck is to power wash it.  To do this, use a power washer with a water pressure that is as low as possible while still being effective. Cedar, pine, and other softwoods should have a water pressure around 500-600 psi. Increase water pressure for harder woods, but do not go higher then 1200-1500 psi.

Sand the Wood

After the power washing is complete, it is time to move on to sanding the wooden deck. The reason behind this is due to wood fibers that could have risen during power washing. These fibers do not go down and could cause splinters, so sanding the wood gives it a smooth, even finish.

Apply the Wood Stain

Once you have completed the preceding steps, it is time to get your tools and begin staining the deck!

Start with the handrails, and work your way down to the deck boards. Use a smaller brush for areas such as handrails and trim boards. Flat paint pad applicators can help cover large areas while providing a nice even coverage of the stain

Seek Professional Help

There are many stages of this process that you may not know how to do or possess the necessary tools to complete. For help, use Seva Call. We will connect you with professionals who can fit into your schedule. Contact Seva Call now, so you can begin preparing your deck for a wonderful spring!

Types of Outdoor House Paint

Wednesday, January 8th, 2014

Types of Outdoor House Paint - Painters

Any painting project needs good quality paint, but it’s particularly important when painting exterior surfaces that are exposed every day to varying weather conditions. Outdoor house paint must be able to withstand the harsh elements outside. Because of this, it is offered in various formulas that are specially designed to work with a particular substrate.

By being aware of the different types of outdoor house paint, you would know which one would be appropriate to use for your project.

Water-Based and Oil-Based Paint

Most outdoor applications use water-based paints, however, there are specific conditions when oil-based paints are preferred. The latter adheres and blocks stains better, so they are more suitable for surfaces that are chalky or stained. They are also ideal to use on corrosive metals and woods that bleed.

The downside of oil paints is they take much longer to dry, anywhere from 8 hours to a full 24 hours, while water-based paints dry completely in 6 hours at the most. Water-based outdoor house paint is great on house sidings since it expands and contracts and does not retain moisture. It also doesn’t crack and peel.

Types of Paint Based on Use

– Floor or Porch Paint: Used on porches, garages, decks and other concrete surfaces to protect them from the weather; Get superior results when you use 100 percent acrylic latex; Oil formulations are also available.

– House or Siding Paint: Withstands the adverse effects of severe weather; Specific paints for regional climates are available; Comes as oil or latex paint.

– Masonry Paints: Best for concrete and cement surfaces as well as stucco and shingles. Typically, latex and most other types need special bonding primer or pretreatment before application.

– Roof Paint: Can protect the roof from mildew and algae; Go for acrylic-latex paint; Do not use for sealing roof leaks or waterproofing the roof; Can be mixed with tint to match existing color of roof.

– Gutter Paint: Excellent adhesion to aluminum and galvanized steel; Available as oil and latex paints; Use oil-based paint for tin gutters for better results; Apply a primer suitable for galvanized metal prior to painting.

– Pool and Marine Paint: Choose paints that offer resistance to stain and abrasion. Use a polymerized and cement-based paint for concrete or granite swimming pools; Check that the paint is compatible with your pool or pool deck’s surface.

Need a Professional Painter?

Having quality outdoor house paint is not enough to ensure a smooth painting job. Get quality results when you hire an experienced and reputable painter. Seva Call can locate up to three qualified painters in your area to handle your painting job. Give us the details of your job and we’ll get you in touch with the best local professionals within a few minutes!

House Painting Estimates

Thursday, December 26th, 2013

House Painting Estimates - Painters

A brand-new, shiny coat of paint can beautify even the dullest property in record time. Some owners choose to paint the interior and exterior of their home on their own, while others decide to rely on professional house painting services.

People who would rather contract a team of experienced painters to get the job done are usually looking for accurate house painting estimates. Keep reading to learn how to determine the final costs associated with your painting job.

Phase 1: Take both Fixed and Variable Costs into Consideration

As tempting as it may seem to just purchase and apply primer and paint on your own, if you don’t want to settle for mediocre results, choose to hire a skilled painter. If you want to know how much you might end up spending on house painting services, start by evaluating both fixed and variable costs.

Determine the expenses associated with this home improvement project by analyzing important factors, such as square footage, production time, and the type, color, and amount of paint that you’ll need to use.

Phase 2: Use an Online Calculator

Modern technology lends a helping hand, allowing you to surf the web and find out exactly how much you’d have to invest in your painting project. Several contractors provide online job cost calculators, enabling you to decide whether or not you can afford to paint of repaint your house.

Phase 3: Discuss Your Options with an Expert

If you want to get accurate house painting estimates quickly and effortlessly, choose to contact several local providers of painting services.

Find the best ones in your area with TalkLocal, a free service introduced to put you in contact with dependable professionals who provide timely, inexpensive services around the clock. Use TalkLocal to simplify your life and make smart decisions on a daily basis.

Home Painting Companies

Wednesday, December 18th, 2013

Home Painting Companies - Painters

These days, one could easily find and purchase cheap tools and paints in almost any home improvement store. So why should you bother to contact some of the most respectable home painting companies in your area? Here are some of the most important reasons why most homeowners still need (and pay for) professional home painting services.

1. Painters Will Help You Address Common Problems before Painting Your House

Real pros always manage to anticipate and address all your needs. They will take the time to identify and solve common issues affecting the aesthetics of your property, like chipped siding or Chinese drywall, for instance.

Furthermore, they know how to prepare any kind of surface for painting, in order to come up with a flawless, resistant finish.

2. Protect Your Resources by Hiring the Best Home Painting Company

If you want to save time and money, don’t try to cut corners when it comes to painting your house. Go for professional services tailored to your schedule, ensured by reputable home painting companies that offer upfront, no-obligation estimates.

3. Profit from Expert Advice and the Very Best Painting Tools, Products, and Techniques

It’s rather difficult to paint your house on your own and take pride in excellent results if you don’t have any experience in this line of work. On the other hand, a specialist could recommend the best tools and products for this job and utilize the best techniques to trigger your complete, long-term satisfaction.

Moreover, true professionals usually offer a two-year guarantee for their services, enabling you to boost the curb appeal of your home in a time and cost-effective manner, without lifting a finger.

Ask an Expert

Looking for the most competent, licensed, fully trained experts employed by local home painting companies? If so, track them with TalkLocal, a free service designed to put you in contact with hardworking talents who live and work in your area.

Refinishing Teak Wood

Tuesday, December 17th, 2013

Refinishing Teak Wood - Painters

If you have teak furniture or a teak deck, you’ve probably noticed that after years of exposure to the elements, its yellowish-brown color has faded to grey. Moreover, the wood surface might be scratched and stained. If you want to restore its appearance and natural elegance, it might be a good idea to refinish it.

Here are some tips on what you need to do when refinishing teak wood.

 What You Need:

– Teak oil

– Lacquer thinner

– Sandpaper or a vibrating sander

– Chemical stripper for teak wood

– Soft cloths

– Protective gloves

Steps to Follow When Refinishing Teak Wood

1. Use protective equipment, and work in a ventilated space, preferably outdoors.

2. Clean the wood with a soft cloth to remove dust, and polish the surface of your teak furniture or flooring.

3. Take the chemical stripper and apply it to remove the existing finish. Wait for about thirty minutes.

4. Remove the remaining chemical stripper from the wood and apply lacquer thinner evenly over the entire surface. When applying products designed for teak wood, such as chemical stripper and lacquer, follow the instructions on the label closely.

5. Use a circular sander to sand the wood or sandpaper if you prefer. The circular sander will make your job much easier, and you’ll finish sanding your teak wood in a shorter time.

6. Now, it’s time to apply the new finish. You can restore the color of your teak furniture or flooring with an oil-based stain. If color is not your top priority, and you just want to give your teak wood a fresh look, you can forget about staining and leave it as it is.

In time, due to exposure to the sun, teak will regain a grey patina. It’s up to you to keep it that way or restore its original color from time to time.

Want to Leave Refinishing to the Professionals?

Not sure about refinishing your teak furniture or flooring yourself? TalkLocal can connect you with experienced local professionals in minutes, for free!

How Can I Stain Wood Furniture?

Friday, December 13th, 2013

how can i stain wood paneling - Painters

If you want to restore the look and color of your old pieces of furniture or create a luster for your unfinished pieces, you can apply stain. To do a good job when staining wood furniture, you need to go through several stages. Here are some tips that will make the process of staining wood furniture easier.

Check the Piece of Furniture You Want to Stain

If it’s damaged in any way, you need to repair it before you prepare the wood for staining. Otherwise, the finish will only make the blemishes more visible.

Look at the Type of Wood

How you prepare the wood for staining depends on what type of wood your piece of furniture is made of. Open-grained woods, which have larger pores, require filling prior staining. If your piece of furniture is made of two different types of wood, you might need to use a distinct treatment for each of them.

How Can I Stain Wood Furniture? What Stages Are Involved in the Staining Process?

Bleaching

To eliminate possible wood discolorations in the surface of your piece of furniture, you need to bleach it. Bleaching is done if there are stains or water spots, if the color of the wood isn’t uniform, or if the wood is blotchy.

However, it is advisable to check first if the wood can be bleached. Not all woods take bleaching well. For instance, avoid it completely if your piece of furniture is made of cherry. Cedar and redwood, for example, are hard to bleach, while others, such as mahogany, lose their distinctive quality.

The bleaching agent and the techniques should be chosen carefully, in accordance with different wood properties. Before you bleach your piece of furniture, make sure you are aware of its potential effect on the wood.

Sanding

This is a very important stage in the staining process, because the quality of the finish depends on how well sanding is done. The basic rule is to sand along the grain of wood, to avoid making scratches. Don’t press too hard, and change the sand paper as you progress, moving from coarse sandpapers to smoother ones. Above all, be patient.

Staining

The stain you opt for determines wood preparation, so it is important to read the label on the stain container, and prepare the piece of furniture according to manufacturer’s recommendations. For best results, you need compatible sealers and fillers, so check stain compatibility before you settle for a particular one.

Need Assistance?

If you’re not prepared to refinish your wood furniture by yourself, and need assistance with your home improvement projects, TalkLocal can put you in touch with the right professional immediately.