Archive for the ‘Painters’ Category


How To Paint Water Damaged Ceilings

Thursday, July 18th, 2013

How To Paint Water Damaged Ceilings - Painters

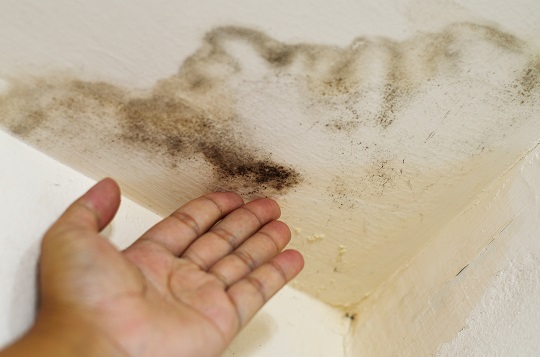
Normally, repainting your ceiling isn’t a big deal. However, if it has suffered from previous water damage, then a relatively simple paint job can become tedious in a hurry. Unless you take the correct steps, that big, ugly stain on your ceiling will just keep showing up, even if you paint over it a dozen times. Fortunately, you don’t need to replace your entire ceiling to keep that from happening. Here’s how to paint water damaged ceilings.

How To Paint Water Damaged Ceilings

1. Before starting, move any furniture out of the way to avoid soiling it. If an object is too large or heavy to move, cover it with a drop cloth or an old sheet.

2. Inspect the ceiling. If the leak was serious, the drywall may be coming loose from the joists. Test the area by gently pushing up on the stain. If it’s loose, use drywall screws to fasten the panel back onto the joist.

2. Water damage can also cause cracks and deviations in texture. In this case, fill in gaps with a high-quality spackle, and allow it to dry for the amount of time recommended on the package. Afterward, sand the area smooth. If you notice mold on the stain, apply a solution of bleach and let it dry.

3. Now you can get down to business. Because even a stain-resistant paint won’t keep water stains from peeking through, you’ll need to buy a oil-based, quick-drying primer, a product that is usually sold in an aerosol can. The oil in the primer seals the stain into the existing paint layer, allowing it to be painted over flawlessly.

4. Apply a water-proof paint that has been color-matched to the existing layer in smooth strokes. As you approach the outer borders of the stain, start using a dabbing motion. This produces a feathered effect that helps the new pain blend into the old. Two coats should be applied.

Need More Help?

While painting over water stains, many homeowners realize the true extent of the water damage. Because this often complicates things, it’s helpful to get an experienced painter to do the work for you. Fortunately, TalkLocal makes it easy to find one in your area. We’ll connect you with the right professionals in just minutes.

When To Use A Paint Primer

Wednesday, July 17th, 2013

When To Use A Paint Primer - Painters

Knowing why and when to use a paint primer are essential for a proper paint job. A primer could be the difference between a professional-looking paint job, and one that quickly fades.

Why Use A Paint Primer?

Primer is a sealant that facilitates the paint’s adhesion while protecting your wall. It ensures a smooth surface for your paint to glide onto as it seals any cracks or imperfections on your wall. It also makes painting drastically different colors much easier, such as painting a red wall white. Primer will increase the longevity of your paint job and prevent mildew, too.

When To Use A Paint Primer

Use a primer when you are painting drywall, latex-to-oil paint, oil-to-latex paint, bare wood, or concrete. In other words, you should almost always use a primer. If a wall is in good condition, you might not need to use a primer, however there are many benefits of using a primer which outweigh the costs of forgoing this important step.

Which Primers To Use

Primers vary depending on the type of paint you use. If you use a latex paint, you will need a latex primer. You will also use a primer in areas that are highly frequented, such as the living room. The daily wear and tear of greasy fingers, crayons, and any other elements can slowly damage the topcoat. A primer will allow the paint to hold up against frequent cleaning.  If you do not use a primer, the damage could be more expensive in the end. Primer is usually cheaper than paint anyway, so it is a good investment in order to protect your home.

Need Professional Assistance?

If you are thinking about painting your home, TalkLocal can help connect you with the best local painters. Simply enter our website, and provide us a brief description of the painting you need done, your availability for service, and your location. You will be speaking with up to 3 professional painters in just minutes.

Chair Rail Ideas

Monday, July 15th, 2013

Chair Rail Ideas - Painters

Chair rails were made to prevent chair backs from scratching and damaging walls when they were pushed against them. Chair rails have become a popular wall design choice and can add character and style to any room.

If you are thinking about adding something different to your walls, consider these easy chair rail ideas.

– Choose chair rails that match the molding around the floor and doorways. You may need to replace the molding or you may be able to find chair rails that match it perfectly. If you cannot find rails and moldings that match perfectly, look for some that are the same color. You can also paint your moldings and rails to match each other.

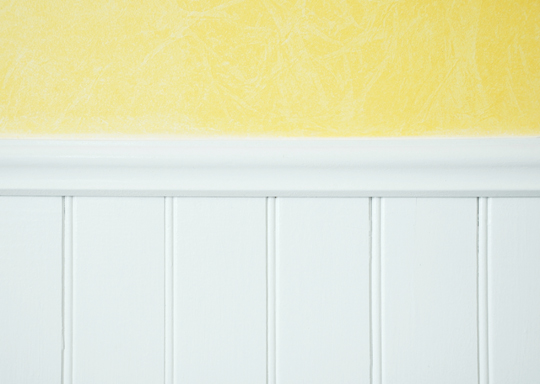
– Use chair rails to break up two different shades or colors of paint. Paint the top half of the room one color and the bottom a different color. The chair rails can be installed in the middle of the room and will create a nice contrast between the two colors. Many people prefer to paint the bottom half of a room darker than the top half.

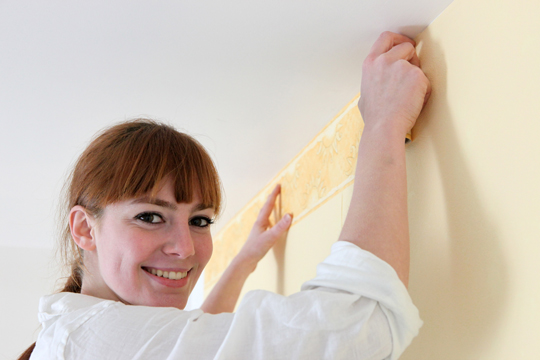
– If you like the look of wallpaper but do not want to cover a whole room in it, you can use chair rails to separate the room in half. Apply the wallpaper to the top or bottom half of your wall and paint to the other half. Add the chair rails between the paper and paint.

– Break up sections of paneling and drywall with the chair rails. This is one of the most popular chair rail ideas. You can choose to use chair rails that are made of the same materials as the paneling or choose to go with a different style for a unique look.

These easy chair rail ideas can help you change your plain and boring room into something special. Be creative and use chair rails however you want to complete a certain look or design.

Leaving It To The Pros

Maybe you are not particularly skilled in painting or installing chair rails. That’s all right. TalkLocal can connect you with service professionals who are. We’ll drastically cut down the search process so you can get right to work making your home look great.

How To Install Wallpaper

Sunday, July 14th, 2013

How To Install Wallpaper - Painters

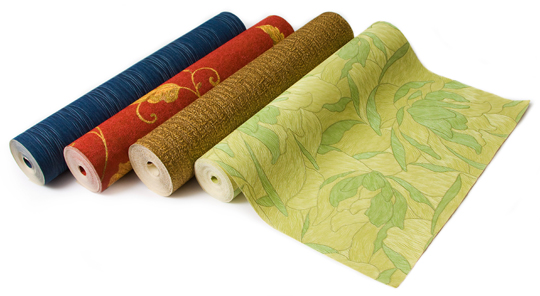
If you want to give a room in your home a different look, you may be considering adding wallpaper to it. Wallpaper comes in a variety of patterns, colors and textures and can change the style of a room dramatically. Once you wallpaper, though, it will be tricky to switch over to paint on a whim.

If you do not know how to install wallpaper, consider some of these tips. They will not only show you the basics of installation, but also how to get the paper smooth and prevent it from peeling or falling off the wall.

1. Create a water box or fill your bathtub with a few inches of water. You will need the water to wet the back of your wallpaper to activate the paste that will adhere it to the wall.

2. Unroll your wallpaper and cut it into manageable sections. If the wallpaper has a pattern, try to cut in location that will be easy to match to the piece that will be pasted beside it.

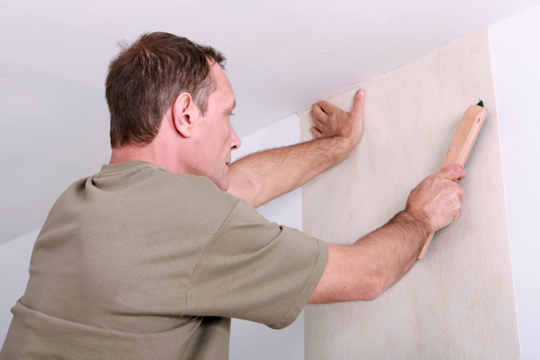
3. Hold the wallpaper up to the wall and smooth it from one corner to the next. Be sure to smooth out any wrinkles as soon as possible. Once the paste is dry, it will be extremely difficult to get the paper smooth and remove all the wrinkles.

4. Add the next piece of wallpaper to the wall. Make sure the ends match up and there are no gaps between the pieces. When you are learning how to install wallpaper, this can be the hardest part to master. Wallpaper that has patterns or pictures on it can be tricky to perfect. If you are not confident that you successfully install it, you may want to choose a solid color.

Once you have learned how to install wallpaper, you will be able to do it in any room that you please. Always take your time and make sure to smooth out each shape as you install it. Wallpaper can be a great way to change the look of a room if you install it properly.

Hire Someone For The Job

If you find yourself looking to hire someone to install wallpaper for you, visit TalkLocal first. We offer consumers all around the country a resource with which to connect with service professionals of all industries. Need a painter that can hang wallpaper? Submit a request and we’ll have you talking with someone who can help in just minutes.

Exterior House Painting Preparation

Saturday, July 13th, 2013

Exterior House Painting Preparation - Painters

Painting the exterior of your home is a big job. But you can’t just dive in and start painting. Following the proper steps for exterior house painting preparation can increase the lifespan of your new paint job. Consider these factors before you begin painting.

Access to the Work Site: You might need scaffolding or a ladder in order to reach higher places. Scaffolding might be better because it gives you more room to move.

Cover and Protect: Set up a tarp to catch dust and scrapings. Cover anything you do not want painted, such as shrubs, flowerbeds, lawns, or trees near your house. Use drop cloths instead of a plastic trap because it will allow your plants to breathe while being protected from paint.

Remove Fixtures: Remove any shutters, light fixtures, or external decorations from your home.

Proper tools You Will Need

Pull Scrapers: These will help you remove any old paint on the house. Scrape horizontally, not vertically, so that you do not damage the wood. Scrape any paint that comes off easily.

– Electric Sander: Use an electric sander to get off any remaining paint that the scraper could not remove. Keep moving the sander around in order to prevent damaging the wood.

– Molding Scraper: Remove paint around windows or other fixtures with a molding scraper.

– Infrared Paint Stripper: In order to easily remove paint, especially on narrow window frames, use the infrared paint stripper. Infrared radiation penetrates through the paint and releases the adhesion between the wood and the paint. Check with your local equipment rental store or home improvement retailer if you are going to use one.

Wash and Dry: Once you have removed all the old paint, wash your house to remove any debris. Allow your house to dry for a few days before you begin painting.

Caulk: Caulk any gaps in moldings, door frames, windows frames, and anywhere else that needs to be sealed, so that paint does not leak in and damage the internal layers of your house.

Prime: Once you have removed all the old paint and your house is dry, apply a primer. The type of primer will depend on the type of paint you use. For example, if you use latex paint, you will use latex primer. Primer serves as a shield against nature’s elements and allows for strong paint adhesion.

Hire A Professional Painter

If you are considering painting the exterior of your home, TalkLocal will connect you with the best local painters. Just tell us your what you need, where you are, and when you’re available, and we’ll find the professionals for you, in just minutes.

Installing New Wallpaper

Thursday, July 11th, 2013

Installing New Wallpaper - Painters

If you have just moved into a home and are not happy with the wallpaper, or you are just ready for a change from the wallpaper you hung yourself a few years ago, you may want to cover it.

While many people prefer to remove wallpaper before they add new, installing new wallpaper over the old can be much easier. It is similar to the process of painting over wallpaper.

You should be careful when doing this, because if you do not hang the new wallpaper correctly, it will easily fall off and expose the old paper. Here are some tips to help.

Apply a small amount of wallpaper adhesive to the old wallpaper. You need to test this old paper to see how it will react to the adhesive. If the paper seems to soak in the adhesive and pull away form the wall, installing new wallpaper over the old may not be a good idea. If the glue doesn’t have this effect, you are good to go.

Add some primer to the old wallpaper. This will create a rough surface that will be easier for the new wallpaper to adhere to. You can find primer that can be sprayed or painted on the wall. Be sure to let it dry thoroughly before you apply the new wallpaper.

Avoid matching the seams of the new wallpaper with the seams of the old wallpaper. This may seem like a good idea, but it will create raised edges and make the new wallpaper more likely to peel off the wall. Create new seams by cutting your wallpaper sheets longer or shorter than the old wallpaper sheets.

If you are ready to cover up all of your wallpaper and plan on installing new wallpaper over it, make sure you consider the tips above. After putting several hours into wallpapering your home, the last thing you want is for the new paper to peel off the walls.

When Do-It-Yourself Becomes Don’t-Do-It-Yourself

Not everyone has a knack for these types of home improvement projects. If you do not, help if only a phone call away. But who do you call?

Why not let TalkLocal do the work for you? We go out and find local professionals who can handle your needs. We also get them to call you, so you can sit back and wait for help.

Chair Rail Designs

Wednesday, July 10th, 2013

Chair Rail Designs  - Painters

Consider different chair rail designs when you are looking to create added interest in any room. A chair rail typically wraps around the center of the room and was originally designed to prevent chairs from dinging walls. It is now just as much a decorative piece as it is functional, and there are many design options on today’s market. It often stands alone, but can also be found atop wood paneling. Here are three basic options for chair rail designs in your home.

Two-Piece

This type of chair rail will actually consist of a backer board (designed for the purpose of holding a chair rail) and the chair rail itself. You can customize this design by choosing different cuts of trim with which to form the top piece of the chair rail.

Three-Piece

This type of chair rail consists of the backer board, a stop bead, and a layer of half rounds. The appearance of this type can be altered depending on the profile of trim you choose for the stop bead.

Ledge

This type of chair rail creates a small ledge at the top of the design. It consists of a bullnose piece that sticks out on top of a backer board, and a small piece of molding to finish out the angle where they meet.

These are the most popular types of chair rail designs, although there are certainly more. Additionally, not all chair rails are made of wood. There are many companies that supply all types of molding — chair rail included — in other materials. If no one in your house will touch your molding (like with crown molding, for example) they can make it in Styrofoam. In the case of chair rails, they will usually be constructed out of a durable polystyrene resin that only needs a coat of paint.

Not Sure?

If you are not sure where to begin, a professional’s help may be required. TalkLocal can find you the right professional for the job. He or she will be local, and our service is completely free. You will be on the phone with someone to answer your questions in minutes.

Are Chemical Paint Strippers Harmful?

Tuesday, July 9th, 2013

Are Chemical Paint Strippers Harmful? - Painters

We’ve all been there. Ten years ago, that orange and black striped theme for the living room really sounded good, right? But now, it’s not quite as appealing as you’d hoped. You need to start again, but the colors are so bold that painting over them is tough.

Trying to remove paint can be quite a challenge. Chemical paint strippers can make the process easier, but with all of the chemicals mixed into them, you might find yourself asking: Are chemical paint strippers harmful?

Here’s some information about chemical paint strippers that might come in handy when deciding if you should use them.

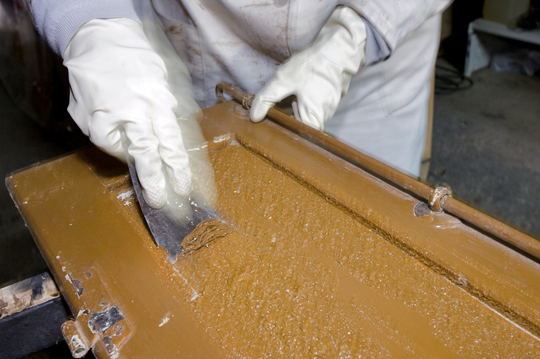
Origins: Chemical paint strippers became popular for removing old, lead-based paint without spreading the lead around the room like other techniques might. Although they are popular for keeping us safe from a harmful substance, it must be understood that they include chemicals in their make-up as well.

Chemicals: Different strippers have different chemicals in them, but most of them include some amount of methylene chloride and other abrasive chemicals which can cause paint to peel off. This chemical is typically considered by doctors to be harmful to your health if ingested.

Proper Precautions: Although the chemicals in paint strippers can be harmful, as long as you follow the proper precautions, your health will not be at serious risk.

1. Go outside. Using a chemical paint stripper indoors lets the chemicals build up in your breathing space, thus contaminating the air. If you can take the object you have stripped outside, then do it. If not, open all windows, and turn on fans to help the chemicals blow outside. Also, take many breaks for fresh air.

2. Protect yourself. Wear a good quality breathing mask, goggles, gloves, and long sleeves or pants.

3. Stay focused. Do not eat, drink, smoke, or otherwise ingest anything while using the chemical stripper. If you accidentally get the stripper on your skin or face, wash it off immediately.

Should You Use Chemical Paint Strippers?

Are chemical paint strippers harmful? Well, they can be harmful. If you’re pregnant or unable to follow the suggested safety procedures, then you should not use them. But as long as you do it the right way, you should be able to remove the paint easily and effectively. If you need professional assistance, TalkLocal can connect you with painters in your area who can help. Our service is fast and free.

How To Reuse Wallpaper

Monday, July 8th, 2013

How To Reuse Wallpaper - Painters

If you have leftover wallpaper laying around your house, you may be wondering how you can reuse it. Wallpaper can be expensive, and if you buy too much or change your mind about using it, you may not be able to return it. Reusing it can be a form of recycling.

If you want to avoid losing money, you can learn how to reuse wallpaper. There are numerous crafts and household uses for wallpaper. Here are a few of them.

Scrapbooking

Many people save their old wallpaper, or any extra pieces they have, and use them for scrapbooking. Wallpaper is easy to cut and can be pasted into a scrapbook or photo album just like other types of scrapbook paper.

Giftwrap

If your wallpaper scraps are large enough, you can use them as giftwrap. Since many types of wallpaper come in bright colors, fun patterns, and unique designs, knowing how to reuse wallpaper as giftwrap can really help make your gift stand out. It can also save you money since you won’t have to buy new wrapping paper for birthday parties and other special occasions.

Notebook

If you have several pieces of wallpaper left over, you can staple or bind them together to create a notebook or journal. The wallpaper will give your notebook a personalized look. You can use your notebook in the car or even keep it beside your phone to jot down quick messages.

Dollhouse Wallpaper

If you have a dollhouse or know someone who does, consider using your wallpaper inside the dollhouse. Simply cut it to size and paste it on the walls of the dollhouse. This will give your dollhouse a unique look and allow you to recycle the wallpaper.

When you learn how to reuse wallpaper, you will find that you save money and help the environment by recycling. Think of other creative ways to reuse your wallpaper and turn it into a masterpiece.

Need Help Wallpapering?

Installing wallpaper can be a tricky task. TalkLocal can get you the help you need. Submit a request on our website, and we will find three qualified professionals in your local area and get you on the phone with them. You can proceed to decide who is best for the job. You get results…instantly.

Remove Stubborn Wallpaper

Saturday, July 6th, 2013

Remove Stubborn Wallpaper - Painters

Adding wallpaper to a room can give it a unique look and help you create a theme in your decor. If you change your mind and decide you want to add paint to the walls instead, you will have to remove the wallpaper — that is, if you do not want to struggle with painting over the wallpaper.

Some wallpaper is easy to remove, and other types can be more difficult. If you want to remove stubborn wallpaper, you may need to use some special tools or techniques. Here are some suggestions.

Score the wallpaper to make it easier for water to soak in. Water will help remove the glue and make the wallpaper easier to remove. You can score the wallpaper with a knife or purchase a scoring tool from your local home improvement store.

Use a paint scraper to help you scrape and peel back the wallpaper. You will need to use the scraper to peel the edges back and work your way down each piece of wallpaper. The scraper can also help you remove the paper remnants that are sometimes left behind on the walls.

Use commercial liquid wallpaper remover to remove stubborn wallpaper. You can find this in many department stores and home improvement stores. It is applied to the wallpaper and allowed to soak into it. It helps soften the paper, dissolve the glue and make the paper easier to peel back. You can also make your own liquid wallpaper remover by combining vinegar and dish detergent with a little bit of water.

Removing stubborn wallpaper can take a lot of time a patience. If you use the right tools and methods, you can successfully remove the wallpaper in a reasonable amount of time and prepare your wall for paint or new paper. Remember to wash the wall thoroughly once the paper is gone.

Sit Back And Watch Someone Else Do It

Hiring someone for this gig can be a lot easier. But, it’s only easy if you don’t have to spend hours trying to find someone for the job. That’s where TalkLocal comes in. We do the searching for you based on information you give us through our website. We will find local, reliable professionals that are ready and willing to help, and then connect you with them directly.