Archive for the ‘Painters’ Category


Best Paint Solvent

Thursday, July 4th, 2013

Best Paint Solvent - Painters

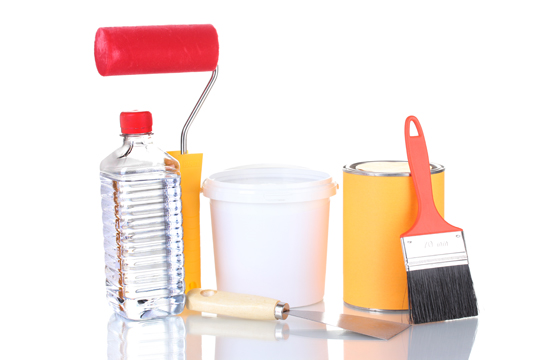
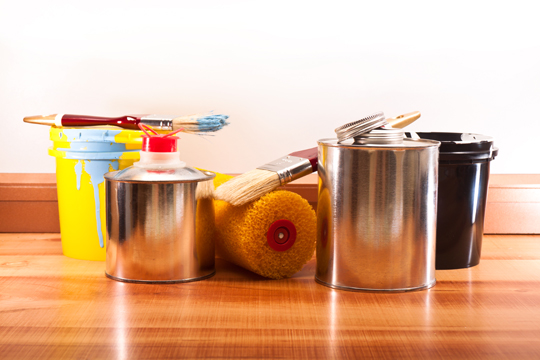
Like traditional paint strippers, paint solvents have a lot of uses, but one of the most popular ways they are used is to clean paint brushes. Many people are happy to throw away their brushes after they use them, but if you paint often, you can be wasting a lot of money this way.

If you want to save your brushes and use them over and over again, you should clean them thoroughly. To do this, you need to find the best paint solvent for the job.

Mineral Spirits

Oil paints are often used by artists and can be a bit tricky to remove from brushes. Many solvents cannot remove oil, and the ones that can are made especially for the job.

Before you attempt to clean your brushes, make sure you are wearing gloves and goggles so you do not accidentally splash any of the paint solvent in your eyes or on your skin. Mineral spirits are often the best paint solvent for removing oil paint from brushes because they can break up the oil and help it slide off the brushes.

You may need a paint comb to help you remove paint which turns hard and sticky or has partially dried on the paint brush.

Citrus Solvents

If you want to clean your brushes without using harsh chemicals, you can use a citrus-based solvent. Citrus solvents are fairly common and can be purchased from hardware stores and many department stores. Citrus is used in many cleaning products and is strong enough to strip the paint from brushes. It also has a pleasant scent.

Finding the best paint solvent can often be a matter of trial and error. Try several different ones and choose the one that is the most affordable and effective.

Need Professional Help?

If you are looking to remove stubborn paint from a wall or need help re-painting a room, use TalkLocal to find the right help. Skip paging through the phonebook. We get you results right away AND connect you with them via telephone.

Are Paint Solvents Harmful?

Wednesday, July 3rd, 2013

Are Paint Solvents Harmful? - Painters

Paint solvents, in their many forms, are used for a variety of reasons and are handy to have around if you do crafts or paint for a living. While solvents are common, they can also be harmful. How are paint solvents harmful? Read on to find out.

Toluene

Toluene is a chemical which is commonly found in paint solvents. It can be very harmful if swallowed or inhaled and is known to cause headaches, nausea, breathing problems, and confusion. It can even cause irritation if it comes into contact with skin.

Ethyl Acetate

Ethyl acetate is another chemical which is found in paint solvents, and if inhaled, can cause many health problems. This chemical can cause burning of the throat, nose, and lungs and can even damage your sinuses. It can also act as a anesthetic if swallowed or inhaled.

Risk To Children

Children are especially at risk to the dangers of paint solvents. If you are wondering ‘are paint solvents harmful?’, consider how easy it would be for a child to be exposed to it.

Many brands of paint solvents do not have child-proof caps and can be easily opened. The chemicals that make up paint solvents can cause life-threatening health problems if ingested, including liver damage, respiratory problems, kidney failure, and chemical burns.

Fire Risk

Many of the chemicals found in paint solvents are extremely flammable and should be considered a fire risk. To avoid this risk, paint solvents should be stored in safe locations, away from heat, flames, and electrical outlets.

If you have ever wondered: How are paint solvents harmful? You are not alone. Many people use paint solvents every day and have no idea that they are handling chemicals which are potentially dangerous.

Always use proper safety precautions when using paint solvents so you do not accidentally inhale or ingest any of them.

Looking For A Painter?

Professional painters are equipped to handle these hazardous chemicals. If you would rather a trained professional take care of your job, use TalkLocal to find one.

We will get three local painters to call you, and you get to choose the best one. You don’t have to ever make endless inquiring phone calls ever again.

How To Install Sheetrock

Saturday, June 29th, 2013

How To Install Sheetrock - Painters

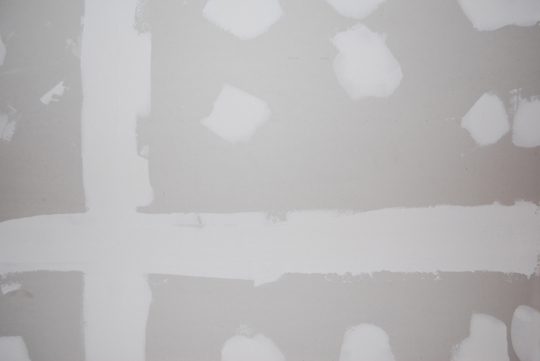
Sheetrock is also referred to as drywall. If you are remodeling your home and want to add new walls or replace existing or damaged ones, it is a good idea to know how to install sheetrock.

There are numerous contractors and construction companies that will install it for you, but these services can be costly. Doing it yourself will save you money and allow you to control when, and how, the work is done.

1. Locate the studs in the wall and measure the distance between them. This will help you determine how you should measure and cut the sheetrock that you want to install.

2. Measure the distance from the corner of the wall to your first stud. This will tell you exactly how you should cut the sheetrock. If the measurement is 24 inches, you would cut your sheetrock to 24 inches.

3. Measure your sheet of drywall or sheetrock and mark where you will need to cut it. Use a saw to cut to the right dimensions. Repeat with each piece of sheetrock.

4. Hold the sheetrock up to the wall. Make sure the corner of the sheetrock matches up to the corner of the wall and the length matches to the floor. Check that the width of the sheetrock reaches the stud.

5. Use your screw gun to place a screw in the sheetrock and through the stud. You should place a screw every 12 inches to make sure the drywall is held in place securely. If you are just learning how to install sheetrock, this is an important step that you cannot leave out. If you do not use enough screws, the sheetrock will fall down and your wall will be ruined.

6. Repeat these steps until every piece of sheetrock has been hung.

Knowing how to install sheetrock is valuable knowledge that does not only help you with your own home renovations, but allows you to help others as well.

Find Professionals With Experience Installing Sheetrock

Many professionals have the skills, knowledge and tools to complete these jobs quickly and efficiently. Some of them might be just around the corner from you, too.

Submit a request for a professional at TalkLocal. We will find help in your local area and connect you via telephone, so you can ask them questions about their services. We take the work out of your search.

How To Use Paint Solvents

Friday, June 28th, 2013

How To Use Paint Solvents - Painters

If you need to remove paint, you should use paint solvents. If you know how to use paint solvents properly, you can remove paint from a number of surfaces including concrete, patios, carpets, and walls. Here are some tips for using paint solvents the right way.

How To Use Paint Solvents

1. Apply a small amount of the paint solvent to the areas you wish to remove the paint from. You will need to make sure the paint solvent does not damage the area or surface where the paint is. Paint solvents can be very strong and can eat through certain surfaces. If the solvent removes the paint and does not harm the surface, it is safe to use it.

2. Use paint solvents to clean your paintbrushes and rollers. Simply fill a bucket or sink with paint thinner and submerge your brushes and paint rollers in the solvent. Allow them to soak for several hours or even overnight to clean them thoroughly.

3. Apply paint solvents to a steel brush or steel wool and use it to remove lacquer and stains from furniture and wood. You will need to scrub the solvent into the wood and allow time for it to eat through the shellac or lacquer. Many people do not know how to use paint solvents to remove lacquer and stains and fail to do it correctly.

4. Use paint solvents to thin out paint or create unique designs on your crafts. Combine a small amount of solvent with some paint and stir to mix thoroughly. You may need to add more solvent or more paint to get the desired effect.

When you know how to use paint solvents, the possibilities are endless. If you paint often, you should always keep some solvent on hand to use in any situation. Always remember to wear a mask and gloves when using solvents.

Do You Need A Professional Painter?

Painting a room or building is certainly an art form. When you hire a professional painter, you know the job will likely come out flawlessly.

If you need a painter, turn to TalkLocal. We’ll find a number of local painters and connect you with them directly. You can decide which person or company would be best suited for the job.

Installing Drywall Ceiling

Wednesday, June 26th, 2013

Installing Drywall Ceiling - Painters

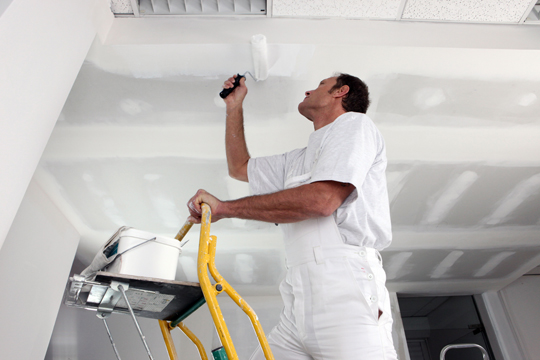
Drywall is a common type of construction material that is usually used to make walls and sometimes even ceilings. Drywall is pretty simple to repair and install, but when installing it on a ceiling, there are a few things you should remember. If you do not install the drywall properly, it could ruin the look of the room or building and cause other problems. Here are some tips for installing drywall ceiling pieces.

Cutting The Drywall

Before you install the drywall, you should measure the ceiling area and cut the pieces appropriately. Instead of trying to put large pieces up at one time, cut them into smaller, even pieces so they will be easier to handle. Drywall is easy to cut and really only needs to be scored and bent to get straight lines.

Mark For Fixtures

You want to make sure you cut out holes for your fixtures. Measure the fixtures and cut out the holes before you hang the drywall. It is much easier to cut these holes on a flat surface instead of trying to cut them once the drywall ceiling has been installed.

Installation

Drywall is not hard to install but it does take some maneuvering. If possible, ask a friend to help you. Drywall pieces are not heavy but they can be awkward and difficult to hold up alone. You should also use a drywall jack. This will help take all of the weight off your arms and help hold the drywall in place.

Installing drywall ceiling pieces is a great way to give your ceiling a new look. Most ceilings can be finished in just a day or two, so you can move on to other home projects. Not only is the installation fairly simple, but drywall is also inexpensive and will last for many years. Keep the above tips in mind when you install your next drywall ceiling.

Find Help In Your Area

When drywall installation proves especially tricky, consider seeking help. TalkLocal lets you bid farewell to the days of flipping through the phone book and placing call after call in hopes of finding someone who can help. Now, all it takes is a few clicks of the mouse and a little bit of information, and we’ll connect you to the local professionals who can help.

Painting Over Mold Stains

Sunday, June 23rd, 2013

Painting Over Mold Stains - Painters

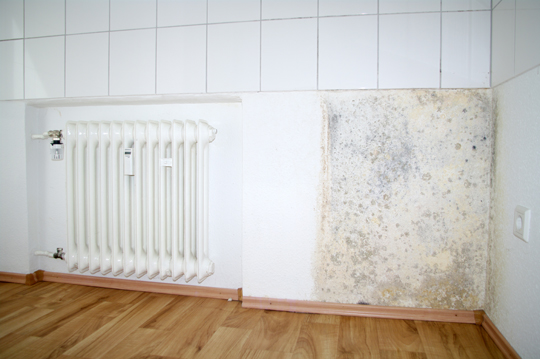
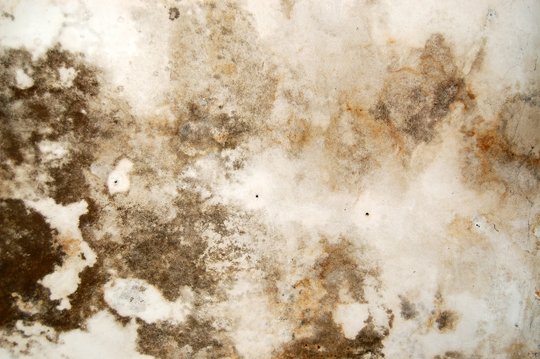
Unfortunately, mold is not uncommon within households throughout the United States. Various leaks or other moisture issues in a home can lay a breeding ground for this particularly harmful substance. Mold can stain walls, putting a major damper on the aesthetics of a room. More importantly, if not properly treated, mold can present serious health risks to you and your family.

Simply painting over mold stains is not going to remedy the problem. You must take a few extra steps that you might bypass when preparing a normal wall for paint.

Here are the extra steps to consider when painting over mold stains.

Identify and Repair the Source: Unless you fix the source of the problem, mold stains are going to continue coming back. Before you get any of your painting equipment out, figure out what is causing the mold and repair it.

Use Bleach and Water: You do not have to order special chemicals to disinfect the mold on your walls — the solution might be under your kitchen sink already. While it does not disinfect all types of mold, a simple mixture of bleach and water gets the job done in most cases. Spray the mixture on the stain and wipe it away. Continue this process until you have come as close as you can to eliminating the stain.

Repair Any Damage: If the mold damaged the wall in any way, use spackle to repair it.

First Apply A Primer: It is especially important to use a stain-covering primer before you start painting over mold stains. This ensures that the discoloration left over will not show through the finished product. Apply one or two coats of the primer.

Paint: Once you have taken those measures, you can go about painting your walls per usual. You can purchase some paints that have special mold-fighting ingredients in them for added protection.

Find Local Painters

This is all old news to professional painters, who make a living finding the most effective ways to make your home’s paint job look flawless. If you would rather hire someone for the job, try seeking out a reputable painter through TalkLocal. We will connect you with the right professional directly, in just minutes.

Easy Way To Remove Wallpaper

Wednesday, June 19th, 2013

Easy Way To Remove Wallpaper - Painters

At the time, you probably thought that paisley wallpaper looked good in your dining room, but now, you are ready to remodel, and that entails a more modern look.

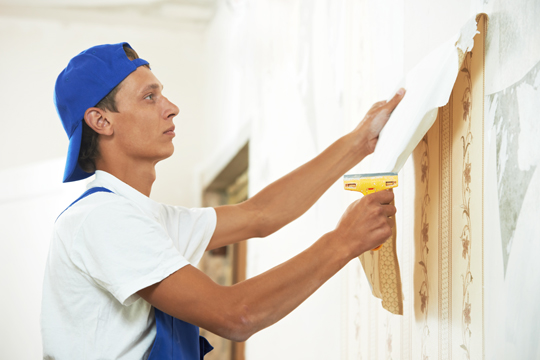
Many people avoid putting wallpaper in their home because they are afraid of how difficult it will be to take it down when they are ready for something different. Removing wallpaper can be difficult. Because paste is used to hold it in place, the paper often leaves behind a residue and paper remnants.

If you are like most people, you want to know the easy way to remove wallpaper. There are actually several methods that are both fast and easy. Here is one of them.

An Easy Way To Remove Wallpaper

1. Create a 50/50 mixture of hot water and fabric softener.

2. Add the mixture to a spray bottle.

3. Spray each crease in the wallpaper and allow several minutes for the mixture to soak into the wallpaper.

4. Continue to apply more spray to each crease until it is completely soaked into the paper. You may notice the creases start to peel back, this means the solution is working.

5. Use a drywall knife to scrape off the paper. Apply more of the spray to the paper if necessary. This may be the easy way to remove wallpaper, but it is also time-consuming.

6. Avoid tearing the paper. If it tears, it is much more likely to leave scrap behind. These can also be removed by soaking them with the solution and scraping them. However, it is much easier to remove the paper in large sections at a time.

7. Once the wallpaper is clear, you will still need to remove the glue. Use a sponge and hot water to scrub the wall clean.

Knowing the easy way to remove wallpaper will save you a lot of time and money in the long run. Remember to take your time and make sure every piece of paper and all of the glue has been removed before you install more wallpaper or try to paint the wall.

Finding Help For The Job

You can always hire out this sometimes arduous task. TalkLocal makes the search process easy, using information about your project to pin down three local professionals. We’ll get you on the phone with them and you can make a final decision. It’s that quick and easy.

Types Of Chemical Paint Strippers

Monday, June 17th, 2013

Types Of Chemical Paint Strippers - Painters

If you’re not a chemist, and we bet most of you aren’t, you might be a little wary about choosing which types of chemical paint strippers you’ll need.

They all smell funny and one wrong move might ruin your furniture, brushes, or cause some kind of crazy science mishap. It’s well worth your time to learn a bit about the various types of chemical paint strippers.

This might also be a good time to remind you to wear a mask and to use paint strippers only in a well-ventilated area, like an open garage, gazebo, or a covered (but not enclosed) porch.

Paint strippers come in several forms, each having their pros and cons.

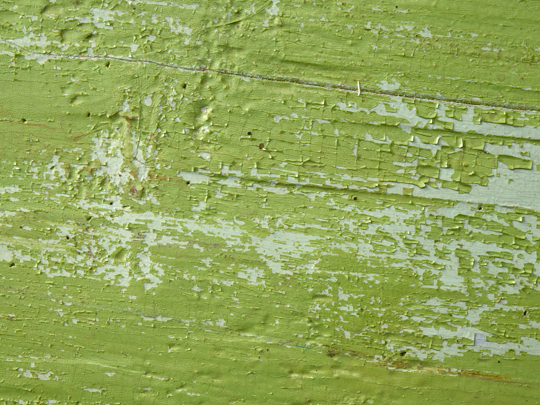
Spray-on paint strippers are simple and fast to apply. They work well on very thin coats of paint, such as spray paint. Spray-on products are less effective than others because they don’t penetrate as deeply, nor do they stay in place as well. Spray-on paint strippers are not a good option for projects that will remain vertical, like dressers.

Liquid paint strippers are thicker than spray-on, meaning that they will penetrate deeper and faster. They can be applied with a bristle brush or a sponge brush. Don’t bother using an expensive horsehair brush to apply stripping liquid. The coat doesn’t need to be smooth or even. It’s best to use cheap sponge brushes and then throw them out when the job is done.

Gel paint strippers are the easiest, safest, and most effective of the various types of chemical paint strippers. They are also the most expensive, but you’re usually only talking about a couple of dollars more. Gel paint strippers can be applied thickly and will stay put for long enough to do the job. They get into crevasses and detail work, and can be left for hours (wrapped in plastic) to give it enough time to remove thick layers of varnish or paints.

All types of chemical paint strippers work by penetrating the paint or varnish, then spreading out between the paint layer and the surface beneath. This causes the paint to lift from the object so it can be scraped off easily.

Check labels to be sure that the paint stripper you choose is right for the materials and for what you’re trying to remove. With a little knowledge and planning, refinishing is easy and fun enough that it’ll hardly seem like work at all.

Getting Help From Professional Painters Is Easy

Looking for a painter in your area? TalkLocal is the service for you. We take on the search process for you and get you on the phone with professionals that can help. You can sit back and let companies compete for your business.

Tips On Painting Over Stains

Friday, June 14th, 2013

Tips On Painting Over Stains - Painters

Is that beautiful paint job from two years ago starting to show its age? It’s not your fault. Normal household activities like cooking, smoking, or even small water seepage can cause discolorations on ceilings and walls. You’ve probably got half of a can of leftover paint around your basement. It shouldn’t take more than a few minutes to paint over the stain and end up with walls that look like new, right?

Wrong.

The truth is that if you don’t take time to properly prepare before painting, ugly stains can bleed through before the paint even dries. If you’ve got grease, tobacco, or water-related discolorations in your home, you’ll want to take a look at these tips on painting over stains.

Tips On Painting Over Stains

1. Start by cleaning the stained area fully. Soap and water work for many stains, while grease, mold, and oil-based discolorations will require bleach. Waxy stains like crayons may need to be sandpapered off. This is best done by hand.  If you must use WD-40, you’ll need to clean that off separately after the crayon is removed.

2. Let it dry. We can’t stress the importance of this enough. If the area to be painted is not completely dry, disaster awaits. Depending on your local humidity, drying can take two hours or two days.  Grab a nice long book, and wait.

3. Oil-based or enamel primers are least likely to allow stains to bleed through and are well worth the effort when covering stains. Dark discolorations may need multiple coats of primer.  Avoid latex paints and primers, and let each coat dry fully before applying the next.

4. Wall liners may be the very best pro tip on painting over stains. Wall liners are inexpensive and their ease of application is on par with traditional wallpaper — with no matching. Simply clean your wall, let it dry, then apply wall liner.  When that dries, your wall becomes a tabula rasa just waiting for your design ideas.

5. If you are repainting sections of wall with leftover paint, keep in mind that sunlight, time, and cleaning can cause paint to fade.  You may want to consider choosing a whole new color.

Ugly stains don’t have to be a fact of life if you keep these tips on painting over stains in mind. With some preparation and a little patience, your walls and ceilings can look magazine-cover ready.

Call In The Pros

Not everyone is confident with a paintbrush and paint. Those individuals are encouraged to log on to TalkLocal and put out a search for a qualified painter. A search that would normally take days now can be taken care of in a matter of minutes through our site.

How Can I Stain Wood Paneling?

Tuesday, June 11th, 2013

How Can I Stain Wood Paneling? - Painters

If you want to change the appearance of your home, possibly to update or modernize it, staining wood paneling is a simple way to do just that. Finishing any wooden fixtures in your house will bring out the natural colors of the wood, giving your home a delightful feeling of rusticness and modernity at once. If you are wondering, “how can I stain wood paneling?” this article will help you learn how to stain your wood paneling.

You Will Need:

–  A bucket

– Some rags

– Wax remover

– De-glossing liquid

– An empty pain can

– Some oil paint

– Paint thinner

– A paint stirrer

– Two paint brushes

How To Stain Wood Paneling

1. If you are staining wood paneling which is already installed, clear the floor below the paneling and lay down paitner’s tarp. If you are staining panels which have yet to be installed, lay each piece of wood paneling on a flat, level surface where it is safe to work, such as on a work bench in your garage.

2. Clean the wood paneling with soap and warm water using wash rag. Begin washing from the top and work downwards to prevent dirt from running onto the cleaner areas.

3. If your wood paneling has been waxed, remove the wax with wax remover. If you do not know if your wood paneling has been wax, play it safe and use the wax remover anyway.

4. If your wood paneling has a gloss coating, use a de-glossing liquid to remove the gloss.

5. Choose the stain that you would like to use on your wood paneling.

6. If your wood paneling is made of a soft wood like cedar or pine, you may want to use a clear conditioner. Soft woods can drain color from your stain, but a clear conditioner can help to prevent this.

7. Paint the clear conditioner onto your wood paneling before you apply the stain using a clean paint brush.

8. Read the package of your clear conditioner to learn how much time to wait before applying your stain, usually you should wait about fifteen minutes.

9. In an empty paint can, mix your stain with one quart of oil paint and 1/2-1/3 quart of paint thinner in order to get the exact color that you would like to stain your wood paneling with. Note that when you stain the wood paneling, it will appear lighter than you mixture will appear in the paint can.

10. Paint your mixture onto your wood paneling using the other clean paint brush.Make sure that you apply the stain evenly, using steady, long strokes with your paint brush.

11. Wipe the wood paneling with a clean rag from top to bottom. The stain will appear lighter than when you applied it after wiping it down. Apply more coats of stain as necessary.

Find A Painting Professional

If you want your wood paneling to be stained professionally, you can contact a professional painter to stain your wood paneling for you. With the help of TalkLocal, you can be on the phone in minutes with up to three, high-quality painting professionals in your area that are available when you are.