Archive for the ‘Painters’ Category


How To Finish Wood Panelling

Tuesday, March 12th, 2013

How To Finish Wood Panelling - Painters

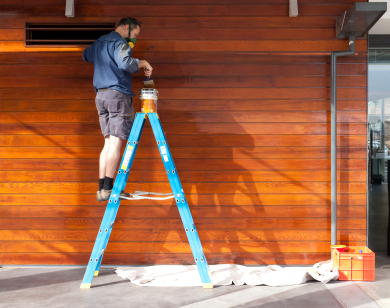
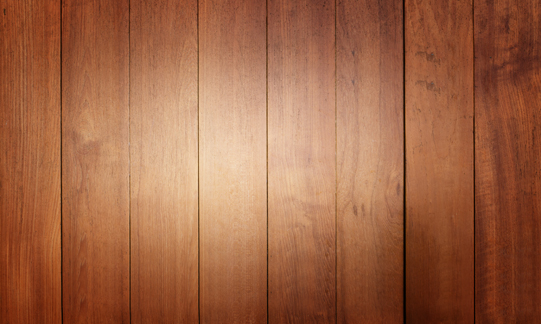
Real wood panelling can provide a wonderful rustic feel to a room, just like wood floors do. If you are looking to install this type of panelling and would like to save some money, you will need to know how to finish wood panelling yourself. It is much easier to finish this type of panelling prior to it’s installation than after it is already installed.

What you will need:

Instructions

1. Pick a well ventilated area where it is all right for you to make a mess. The garage tends to work best because you can open the door but are not exposed to the elements ,which may blow dirt and debris onto your wet finish.

2. Set up your saw horses.

3. Place one piece of panelling on the horses. Begin sanding down rough areas with medium grit sand paper. Go over the entire piece at least once regardless of lack of rough patches.

4. Brush off dust and repeat the process with fine grit paper to smooth out the piece.

5. Use a clean tack cloth to get all of the dust off of the wood.

6. Using a clean cloth, rub stain into the wood. A little goes a long way, but it is pretty simple to keep the color even.

7. Let it completely dry. This may take several hours. It is easiest to start the process in the evening and let it remain overnight to dry.

8. After it is no longer tacky, check for evenness of color. Lighter areas may need more stain and therefore more time to dry.

9. After the color is even and dry, it’s time to apply the finish. First, use a clean tack cloth to remove any dust that may have settled on the dry surface. Then, using a paintbrush, apply the finish evenly and according to manufacturer directions.

10. Let dry. Apply another coat if necessary.

11. Repeat this process with each piece of panelling. Try executing each step on each panel all at once.

Looking For An Expert Painter?

If you are a little unsure of how to finish wood panelling on your own, a professional painter can help. Once you determine your needs, TalkLocal can hook you up with a professional in minutes.

Refinishing Pine Furniture

Tuesday, March 5th, 2013

Refinishing Pine Furniture - Painters

When refinishing any wood surface, properly preparing the surface is incredibly important. An improperly prepared surface will, at best, look bubbly, dingy, or uneven. It might even peel off causing you double the work.

This is especially true when refinishing pine furniture. Pine is a very soft wood, so it needs a protective coating to put up with everyday wear and tear. You can provide this protection by painting it, or if you prefer the wood look, you can seal it with polyurethane.

The steps for using polyurethane are below, but paint can easily be replaced in the steps with less effort.

You will need:

The following is a common method of refinishing pine furniture:

Can’t Do It On Your Own?

If you still are unsure about the process, it’s best to contact a professional. He or she will know about proper ventilation and will be able to determine how to make your furniture look its best. TalkLocal can help connect you with a professional painter in your area. Best of all, our service is free!

Painting Around Chair Rail

Thursday, February 28th, 2013

Painting Around Chair Rail - Painters

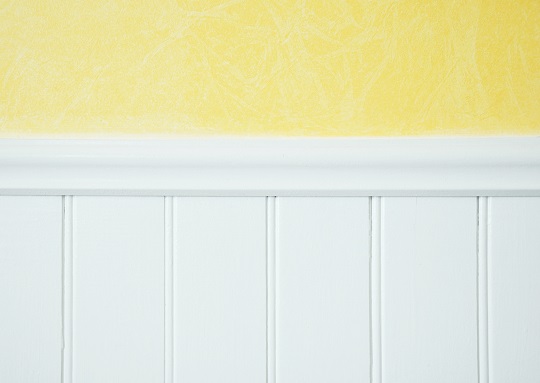
Chair rails, also known as dado rails, are decorative wooden fixtures that go around walls. Although they add class to any home, their main purpose is to protect walls against couches or chairs. Keep reading to learn more about painting around a chair rail.

These fixtures make painting a wall a little more difficult, but nothing you can’t handle. If you choose to paint the chair rail a different color than the wall, we recommend getting all of the appropriate supplies for a clean paint job:

– Paint

-A brush or a roller

– 2” painter’s masking tape. The tape is your most important tool because it will protect the chair rail from paint drips or brush strokes.

Painting Around Chair Rail

1. Place the tape along the edge of the chair rail where the wall meets the rail, but do not press the tape on the rail. It should create a tent above the chair rail to act as an umbrella against paint drips. Do this above the chair rail and below it. Get the tape as close as possible to where the rail and the wall meet so that you have a clean straight edge.

2. Paint your wall as usual around the chair rail. Your chair rail is safe from unwanted paint.

Chair rails give you the opportunity to paint your wall two different colors. Check out this article about two-tone paint colors to figure out what combination matches best. You can add some edge to your living room by mixing and matching colors.

You may also paint the wall one solid color. Usually if this is the case, the chair rail is painted glossy white, which contrasts nicely with a matte wall.

Additional Help

If you are looking for a professional painter to help you get the job done, use TalkLocal to connect you with up to three local painters. Simply enter our website and enter your availability, location and a brief description of what you need. You will be speaking with painting professionals in just minutes!

How to Prepare Wall for Paint

Monday, February 25th, 2013

How to Prepare Wall for Paint - Painters

Painting your room is the best way to achieve a new look for your home’s interior.  Repainting can give your home a completely different feel.  Turn your drab, old, white walls into ones that pop with color.  You can choose from pomegranate red or sea foam green.  A little bit of color change can truly brighten up your home.  You will need to prepare your wall before you begin to paint.

How to Prepare Wall for Paint

The first thing you need to do when painting is remove everything from the room so it does not get covered in paint.  This includes all of the furniture, rugs, and decorations.  If you cannot take some stuff out you should cover it with a plastic sheet.  This will protect the furniture from any damage.  Lay down sheeting on the floor as well to make sure that paint does not get all over your floor or carpeting.

Dusting and cleaning the walls is the next step to preparing for painting.  You should use a damp towel and be sure to reach all corners of the wall. You should also vacuum the wall as strange as this must seem.  If you are wiping down walls in a bathroom or kitchen in order to paint make sure you use a gallon of water with three teaspoons of laundry detergent.

You also need to scrape anything that is remaining on the wall.  There may be cracked or flaking paint, or glue from the wallpaper.  Use sandpaper to get rid of any stubborn imperfections.

Tape up anything attached to the wall that you want to keep paint off of such as sconces and electrical outlets, or along the ceiling.

When you start painting make sure you use a cutting in method with your paint brush that is angled.  Also apply paint around the trim and corners with smaller brushes so that the paint does not get in places it shouldn’t be.  Another good tip when painting is to first paint a large W pattern and then go up and down through it to get an even spread of paint.

Additional Help

If you would like some professional assistance for painting your house, just come to TalkLocal.  We will connect you with up to three painting contractors in your area, who will be available to help you when you need them.

How to Stain Wood Floors

Sunday, January 20th, 2013

How to Stain Wood Floors - Painters

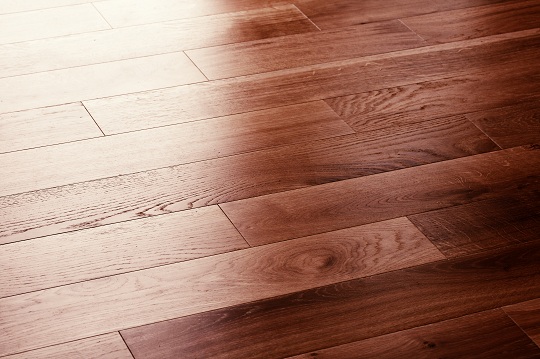
If you have a wood floor that looks unfinished, you may want to stain it to make it look more polished. If you do not know where to begin, this article will tell you how to stain wood floors. To get the best results, it is important that you stain your wood floor in the correct manner.

Supplies You Will Need:

– vacuum

– cloth

– paint roller or cloth

– stain

– polyurethane finish

– sandpaper

How to Stain Wood Floors

1. Vacuum the floor. Make sure the you clean the floor well by vacuuming any dust. Also, if you have just put the floor in, make sure that any debris from sanding is gone as well. After the floor is the thoroughly vacuumed, wipe down the entire floor with a cloth.

2. Pick your stain. Make sure that the stain will not change the grain the of the wood. Stains are normally matched to the grain and color of the wood, so pay attention to these details when buying a staining product.

3. Put your stain onto a paint roller or a piece of cloth. Roll your roller or wipe the cloth along the grain of the wood in an even manner. Make sure that the room you are staining is ventilated properly or else you risk harm from the vapors of the stain. Let the stain dry for an hour after you have finished applying it.

5. Apply the polyurethane finish, which will give your wood floor a smooth feel and protect it from damage. Again, make sure you are following the grain of the wood and painting the coat on evenly. When you have completed your coat of polyurethane finish, allow it to dry for six to eight hours.

7. Lightly sand the floor with a fine sandpaper. Make sure to wipe up all the debit after you have sanded the floor so that you can apply a second coat of polyurethane finish.

8. Apply a second coat of polyurethane finish. Let it dry overnight before using the floor.

Additional Help

If you do not wish to stain your wood floor yourself, you can contact a painting professional to do it for you. With the help of TalkLocal, you can be on the phone in minutes with up to three high quality painting professionals in your area who will know how to stain wood floors, and are available when you are.

Should I Wear a Mask when Painting

Friday, December 7th, 2012

Should I Wear a Mask when Painting Painters

Home renovations/redecorating can be fun but also dangerous if you’re not safe enough. If you’re planning on doing significant painting work or renovations, you may be asking yourself or others, “Should I wear a mask when painting?”  Wearing a mask can be one of the most important precautions that you take.  You often times will need to sand off old paint or do other prep work that will release harmful particles into the air that are extremely harmful if inhaled.  So the bottom line is this: Yes, you should wear a mask if you plan on painting.  You still need to make sure that you’re using the mask effectively to provide the best protection you can get!

The Right Mask

Check that the type of mask you’re currently using fits the type of job you’re doing.  Often times, a simple disposable dust mask will be effective to protect you against the majority of your renovations and painting.  The packaging for the masks will always tell you the recommended uses and applications, so be sure to choose accordingly.  Make sure to also choose a mask with a moldable metal insert so you can fit it to your face.

Facial Hair

Facial hair may create a looser seal, potentially allowing you to inhale harmful dust particles (but not so much for paint fumes).  Shaving your facial hair will allow the mask form to your face and create a tighter seal. 

Use the Double Straps

Masks with double straps will help hold the mask to the top and the bottom of your face, forming a more fitting seal.  Likewise, you’ll want to put the mask on before you put on goggles or any other types of eye wear so they can help create a tighter seal.

Take Breaks

Using a mask keeps all the moisture and heat contained near your face, making extended use extremely uncomfortable, so take frequent breaks to avoid becoming overheated.  Put an alarm on your phone or watch to remind you to take at least a five minute break every hour.  

Wearing a mask during paint renovations is a must for your health and safety.  If you don’t want to deal with wearing masks at all, you can always use TalkLocal to find a local high quality painter to do your paint job for you!

Why is my Paint Peeling in the Bathroom?

Wednesday, December 5th, 2012

Why is my Paint Peeling in the Bathroom? Painters

You notice that your bathroom walls are not looking so good and you keep asking yourself,  “Why is my paint peeling in the bathroom?” The most common reason for paint peeling in a bathroom is the sheer amount of moisture absorbed by the paint. If your bathroom paint is frequently exposed to moisture, eventually it will peel. When getting out of the shower or bath, try not to get too much water on the walls. Some factors, on the other hand, are out of your control, such as the water vapor after a shower, which will occur no matter how careful you are. The easiest solution is to always turn on the bathroom ventilation fan after a shower to quickly drain away the moisture before it soaks into your walls. If you don’t have a ventilation fan, leave the bathroom door open after a shower.

If it’s too late, and paint is already peeling in your bathroom, here are some tips for a more water resistant paint job when you redo your walls.

1. Use a scraper to remove the old and peeling paint from the walls.

2. Fill up any cracks you find to make the wall as smooth as possible.

3. Use a mold and mildew resistant primer that binds tightly to paint.

3. Select paint with a high sheen, as the higher the sheen the less moisture it will absorb. Satin or semi-gloss paints are the best for bathrooms.

4. Use an oil-based paint as opposed to a water based paint. However, if you use an oil based paint, make sure the room is well ventilated as oil-based paints can be toxic when wet. To check if the paint in your bathroom is water based, rub it with ethanol; the paint becomes soft and comes off, then it is water based.

A moist bathroom that has peeling paint also has a high chance of having mold behind the paint, so you should get a professional painter’s evaluation of your needs. He/she will recommend the paint that’s best suited to your bathroom. To find a professional painter, use TalkLocal for free to book an appointment on your schedule right now!

Is it Safe to Paint while Pregnant if you Wear a Mask

Tuesday, November 27th, 2012

Is it Safe to Paint while Pregnant if you Wear a Mask Painters

You’re pregnant and preparing for the newborns room so you might be wondering, is it safe to paint while pregnant if you wear a mask?  If you have already inhaled paint fumes, do not worry because there is only a small chance that birth defects will actually result.  However, the following is a list of precautions alongside some information to keep you informed so you can make the best decisions for you and your child when painting while you are pregnant.

Wearing a mask can be beneficial if you are painting while you are pregnant.  However, it is very important to pay attention to the type of masks you are purchasing along with taking other necessary precautions to reduce the risk of birth defects.  Wearing a mask is a great option when painting while you are pregnant but if you take other precautions, wearing a mask may not be necessary.

Are there preferred styles of masks to buy?

Yes – buy respirator masks. Check on the back of the box to make sure they are approved to keep out both debris and fumes.  Many masks are made to simply keep out debris but the main issue with paint while you are pregnant is the fumes.

What type of paint is the safest?

The safest paints to use are latex (or acrylic) paints.  Latex paints are not made with the more harmful materials that are used in other paints.  Working in well-ventilated areas is imperative while using even latex paints.  In addition, if you feel sick at all, take a break and get some fresh air.  Check out this helpful link to gather more information – painting while pregnant.

What types of paints are more harmful than others?

Oil-based paints are more harmful than latex paints and should be avoided.  Exposure to oil-based paints has a much higher risk of miscarriages.  If you do have to be around oil-based paints, make sure the area is well ventilated, your skin is covered and your time is limited in the exposure area.

What is something that I may not be aware of?

Remember lead paint?  Even if you are not painting with lead paint, you should still take precautions.  Be aware that you are not sanding or scraping any old paint that may be lead paint.  This will release the fumes into the air and may cause major problems for you or your child.

These precautions only reduce the chances of harm; none of these steps will completely eliminate the threats.  In order to keep yourself and your child completely free from harm, hiring a painter is the best option.  To find a painter that will come at the exact time that fits your schedule and is in your area, use Seva Call.  You will be directly connected to mutliple highly rated painters within minutes.

What Color Paint goes with Cherry Wood Cabinets?

Wednesday, November 21st, 2012

What Color Paint goes with Cherry Wood Cabinets? Painters

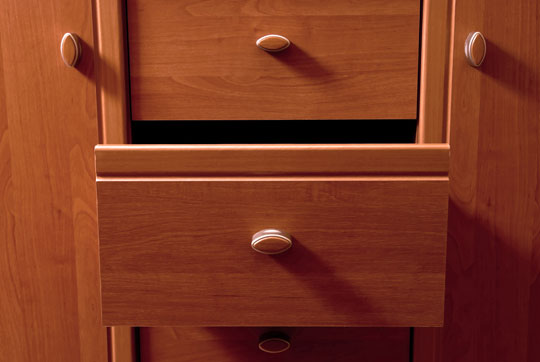
Thinking about painting your kitchen, but want to make sure the color is consistent with the theme you already have? In this situation, is important to correctly accent the color of your wood cabinets. If you’re wondering what color paint goes with cherry wood cabinets, consider the following tips.

Dark Colors

The natural color of cherry wood makes it stand out against dark colors. Dark reds or browns will allow the wood to blend in perfectly. Using dark colors is good for rooms such as a library, dining room or study for a cozy feel.

Earth Colors

Earth colors work as well because they compliment the cherry wood natural color. Colors such as olive green, celery green or sand give you a nice subtle and neutral color. Earth tones give cherry wood cabinets a modern twist.

Warm Colors

Warm colors will complement the cherry wood’s warmth. Go with oranges, reds or yellows to give the room a cozier feel. Warms colors are also good in the kitchen because of their airy and vibrant feel.

Light Colors

Use the light colors to make the small room feel bigger, more inviting and appealing. Light blue mixes with the reddish wood and breaks the color up. This makes the cabinet pops up.

Tips on Picking a Color

1.      Use paint chips to experiment with different colors in a room.

2.      Avoid certain reds. They can clash with cherry cabinet’s natural red.

3.      Look at the style of the room and find out what its need. Does the room need to be more comforting, airy or calm?

If you’d like to hire a professional painter to help you choose a color or do the job for you, consider using TalkLocal. TalkLocal will connect you to up to three professional painters in your area within minutes.

Is it Safe to Paint a Room with a Baby in the House?

Wednesday, November 7th, 2012

Is it Safe to Paint a Room with a Baby in the House? Painters

Painting rooms is always a complicated task because the fumes that come with the process can be dangerous.  Having an infant in the house adds to the risk of painting because children are much more susceptible to the fumes than adults. Is it safe to paint a room with a baby in the house?  There is a way to paint your house even if you have young children, you just need to be sure to take the necessary precautions.

It is always best to keep the baby out of the house for the time you are painting and while the paint is drying.  Many paints today are a lot safer than they used to be.  Before, lead paint was very common but once the adverse side effects were discovered the paint companies changed their process.  Paint that is considered “non-toxic” is a lot more acceptable. Get the highest rated non-toxic paint shipped overnight from Amazon starting at $12.95. While it is still not good for you, small ingestions will not kill you.  Paint companies are attempting to make paint a more easy to use product by making the fumes less harmful and making the painting process safer for all adults and infants.

When painting a room in a house with an infant you should turn on the exhaust and open all the windows so that the fumes are not trapped within the house.  You should also try to keep the baby as far away from the room being painted.

Types of paint you should stick to:

1)     Latex paint: You can find some of the best latex paint options on Amazon and have them shipped overnight starting at $8.27.

2)     Paints without solvents

3)     Zero volatile organic compound (VOC) paints: You can find some of the best zero volatile organic compound (VOC) paint products on Amazon and have them shipped overnight starting at $28.52.

4)     Paints without cancer causing solvents

5)     Harmony paints/ paints for children’s rooms

The owner of this website is a participant in the Amazon Services LLC Associates Program, an affiliate advertising program designed to provide a means for sites to earn advertising fees by advertising and linking to Amazon properties including, but not limited to, amazon.com, endless.com, myhabit.com, smallparts.com, or amazonwireless.com.

If you are not 100% sure that your paint is fume free and safe, you should seek professional help.  Use TalkLocal to be put in contact with reliable local painting company almost immediately.  Simply input your problem. location and availability, and TalkLocal will do the rest.  Within minutes you should be on the phone with a qualified painter who is willing to help.