Archive for the ‘Painters’ Category


Colors of Paint to Use for Rooms with No Windows

Thursday, October 18th, 2012

Colors of Paint to Use for Rooms with No Windows Painters

Color options may feel limited when you are painting a room with no windows–you don’t want a shade that is gloomy, yet you don’t want a shade that is tacky and bright. The key to selecting colors of paint to use for rooms with no windows is replacing the effects of natural sunlight. Surprisingly, this can be done with both light and dark colors. Consider the following tips before settling for a plain white room.

Light colors

People usually use light colors to brighten a windowless room. Light colors make a room appear inviting and more spacious. You can paint the trims along the ceiling a few shades brighter to bring the eye upward. If you are daring, use vibrant shades like fushia or canary yellow to give the room more life. If you are looking for calmer choices, you can try pastel colors like lilac or mint for a subtle effect. Neutral colors are always a safe bet and can easily match an array of furnishings. Try colors like beige, taupe, sandstone, and gray.

Dark colors

Although most dark colors make a windowless room seem even more cramped, some dark colors are flattering for windowless rooms. Select colors that mimic the natural world; this color scheme will be reminiscent of the outdoors, which will open up the room. Try a dark forest green for a woodsy feel. Use a deep teal to capture the vastness of an ocean. A burgundy shade has the warmth of red roses, and can give a room a romantic touch.

Your color choice can change the entire mood of a room, so spend some time testing a few colors. Remember to view your color choices under indoor lighting rather than natural lighting because that is how the color will appear on the walls. Hire a professional painter through TalkLocal to ensure great craftsmanship. TalkLocal selects high quality service providers based on ratings and reviews, social reputation, and call analytics. Log on to TalkLocal’s website to fill out a short service request. A beautiful room is just a click away.

What Brand Paint has Best Coverage?

Monday, October 15th, 2012

What Brand Paint has Best Coverage? Painters

Figuring out what brand of paint has best coverage is important when budgeting a home renovation, and eventually choosing paint color and brand. Is it worth paying more money for a brand of paint that will work in just one coat or is it better to buy a cheaper brand that requires multiple coats? This all depends on the time you want to spend on the room, as well as the look you want to achieve. This article reviews six popular brands of paint and evaluates how they measure up in regard to coverage.

Popular Paint Brands

Benjamin Moore/Duron – Very high quality although more expensive than other brands. Generally worth the cost as only one coat is usually needed and it covers up dark colors well.

Sherwin Williams – Sherwin Williams is a high quality brand, but requires multiple coats and primer to get the exact color on the paint chip. For additional help, check out Sherwin Williams’ paint color selection helper.

Pratt and Lambert  High quality brand, but also requires multiple coats and primer to match color swatch.

Ralph Lauren – Good color selection with high quality. Higher costs for the color selection and quality.

Valspar – Less expensive than the higher quality paints and generally needs more than one coat to cover dark spots.

Behr – Generally thinner and requires more than one coat over darker colors. Overall, good quality paint with medium price.

Finding Painters

If you need to hire a painter, check out TalkLocal. They have already connected customers with high quality professionals who can help them not only paint, but also determine the best paints for you. TalkLocal connects you (for free) to professionals right in your neighborhood that can come when is most convenient for you and your schedule.

Waterproof Paint for Bathroom Walls

Wednesday, October 10th, 2012

Waterproof Paint for Bathroom Walls Painters

Bathrooms are moist places that likely to harbor mold and mildew over time. If you’re repainting these rooms, you probably want to consider the types of paint that will help to repel the moisture that builds up and causes this unsightly mold and mildew.

There are several types of paint, and here’s a short list and description of each one, leading up to the best waterproof paint for bathroom walls:

Flat paint has a matte coating and is not glossy, which makes it prone to absorbing moisture. Probably something you don’t want in your bathroom.

Eggshell paint has slightly more sheen to it and is washable. Similar to flat, it absorbs moisture, so this would not be the most effective choice.

Satin paint has more gloss than the previous two, and would be most appropriate for lower-use bathrooms such as “powder” or guest bathrooms.

semi-gloss and high-gloss are your best choices for bathroom paint. These types have gloss that repels water, reducing the buildup of mold and mildew spots.

There are also specific types of paint for bathrooms that claim to be mold and mildew resistant. You can find these at any typical paint retailer such as Sherwin Williams or a home improvement store like Home Depot.

If you are having trouble finding the best paint for your bathroom, or would like some professional help in completing the job, try using TalkLocal to locate painting contractors near you. TalkLocal is a free service that will connect you with top-quality, reputable painting professionals in your neighborhood, within minutes. Simple enter in your specific problem, location and availability and TalkLocal will contact multiple companies, who will then call YOU directly, ready to help.

How Many Coats of Paint for House Exterior?

Wednesday, October 3rd, 2012

How Many Coats of Paint for House Exterior? Painters

If you are planning to re-paint your home and are wondering how many coats of paint for house exterior are needed,  one coat of paint will usually do the job. It is important, however, to make sure that the paint is less than 10 years old and is not severely weathered. A proper surface preparation is important, or no amount of coats will give lasting protection to your home.

If you can afford a second coat of paint, the paint job will endure a bit better and retain a better sheen and color. An extra coat will not double the life of the paint job, but it may add a year or two to the longevity. Weigh the benefits against the extra cost to determine the best value.

If you’re not so experienced with painting or you’re looking for a second opinion about the job, consider hiring a professional. Use TalkLocal to connect you to a local, highly rated painter within minutes. Simply visit www.TalkLocal.com and enter a brief description of your service needs along with your location and availability, and Seva Call will do the rest. In less than 90 seconds you will be connected to up to three painting companies willing to help.

How to Paint a Popcorn Ceiling Yourself

Tuesday, October 2nd, 2012

How to Paint a Popcorn Ceiling Yourself Painters

Have you ever wanted to take on a painting project but worried it may be to difficult to do on your own? Stop worrying, and start doing! Learn how to paint a popcorn ceiling yourself with one of these two techniques that will get the job done in no time.

Method 1: Hand Painting a Popcorn Ceiling

First, make sure to cover all flooring and furniture because the paint will splatter. Cover the entire room with heavy-duty plastic sheeting and remove any items that cannot be properly covered. Next, add a large quantity of paint to the basin of the tray. Try to move the roller in a single direction instead of moving back and forth. This prevents the ceiling from becoming saturated in paint and reduces the risk of peeling. Make sure the paint has completely dried before painting the next coat.

Method 2: Spray Painting a Popcorn Ceiling

Since spray painting can get quite messy, this method involves a bit more preparation than hand painting. In addition to covering the floor and all furniture, drape heavy-duty plastic on the walls to prevent overspray. You can use 2-inch masking tape to hold the plastic in place and to provide a definite edge for the paint. For easy application, you should use an air spray pole gun. These are available at most hardware stores and come in various lengths. Paint can be added directly to the holding compartment of the airless spraying device. Usually paint will spray without any problems, but if the material is not flowing well, try adding 10%-20% water. Paint should be applied in two separate coats. Complete the first coat by spraying in one direction until the entire ceiling is complete. Be sure to slightly overlap each individual line of sprayed paint to prevent dry edges appearing. Allow the ceiling two hours to dry before applying a second coat of paint. The second coat should be sprayed in the opposite direction to the first in order to promote maximum coverage and a consistent finish. Remember that popcorn ceilings that have never been painted before can be extremely porous and several coats could be necessary before an even texture of paint is achieved.

If you experience any difficulty with this job, you should consider hiring a professional to help you out. Use TalkLocal to connect you to a highly rated, local painter within minutes. Simply enter a brief description of your service needs along with your location and availability, and TalkLocal will do the rest.

How Much Does Painting A Room Cost?

Monday, October 1st, 2012

How Much Does Painting a Room Cost Painters

When it’s time for a change in your house, what’s the best way to achieve it?  Repainting your rooms can give your home a completely different feel. It can take you from drab plain old white walls to walls that will pop with pomegranate red or sea foam green. A little bit of color change can truly brighten up your home. How much does painting a room cost? If you’re working with a budget, don’t worry, repainting your walls can be a cheap and quick upgrade to any room in your house.

Things to consider:

1)     Paint

2)     Accessories

3)     Contractor

4)     DIY vs hiring

Paint for interior spaces can cost anywhere from $12/gallon for cheap quality to up to $50/gallon for the best kind.  If you are painting a simple 12 foot by 12 foot room, you will need about $25-$100 worth of paint.  While it seems like a rip off to pay $50 for a gallon when you can get the same color and same mount for $12, it may not be worth it in the long run.  Cheap paints can leave runs and appear less smooth whereas high quality paints will last much longer and look better.

The accessories you need when you paint a room can vary.  This can include primer, brushes, rollers, paint clothes and painter’s tape, and possibly more depending on the job.  If you are only painting one room, you should plan to spend about $50 on these products.  If you want to do more than one room, you will run a bill closer to $200-300.  As with the paint, you will need to consider quality.  Cheaper brushes may leave behind bristles or fuzz, and cheap tape may not do its job properly.  You shouldn’t spend an exorbitant amount of money on these accessories, but you should put some consideration into the quality as they are nearly as important as the paint.

If you hire a contractor you will have to factor in some additional costs.  The estimate, the actual cost, and the additional manpower will all have to be compensated and paid for.

If you are doing only one room, you may want to consider the option between doing the job yourself or hiring people to do it.  You should remember that you will be charged for moving the furniture, painting the crown molding and other miscellaneous expenses in addition to the actual painting job.  These extra costs can really add up and make the simple job a lot more financially taxing.

Finding the right help

If you want to seek another opinion or are looking for to hire someone to paint your house, you should seek professional help.  Use TalkLocal to be connected with reliable local painters within minutes.  Simply give a brief description of your service needs along with location and availability, and TalkLocal will do the rest. Within minutes you will be put in contact with up to three local professionals willing to help.

Exterior Home Painting Tips

Friday, September 28th, 2012

Exterior Home Painting Tips Painters

Painting the exterior of your house takes a lot of effort and preparation. If you do not paint your house carefully, you will end up with an unattractive and blotchy paint job, which decreases its life expectancy. There are many factors that contribute to a well-painted house that can be easily overlooked. So before you begin, read over these exterior home painting tips.

The first step you take should be to check the exterior of the house. Check for dirt stains, mildew, paint that is chipping, etc. It is important to get rid of obstructions to create a smooth surface for the paint. You can even sand down the walls before painting. A power hose washer is also strong enough to get rid of these obstructions. More specifically, you can use a mildew remover solution which is available at many hardware stores. If this area on your house is highly susceptible to mildew, you can also purchase a mildew resistant additive you can put into your paint for future protection.

This is also a good time to take care of rotting wood. Repair small pieces of rotting wood with caulk, or replace the rotting wood completely. Also check for leaky gutters and pipes, as well as pests and rodents that may cause damage down the road.

After checking the exterior of your house, it is time to prepare the painting materials:

– You will need a ladder and—depending on how sturdy the ladder is—someone to hold it steady. The ladder you use may also mark up the walls. Tape a towel to the tops of the ladders in order to avoid marking up the walls. To prevent streaking, paint your house from top to bottom.

– Make sure to use painter’s tape for windows, lights, and doors. This will help maintain straight and clean edges.

– The fastest and most efficient way to paint is to use an airless paint spray. If you do not have one, you can rent one. Remember that the paint particles will drift some distance in the wind, so keep cars and other valuables at a distance.

– If you do not want to use a air spray, use a paint roller at first and then use a three to four inch bristle brush to touch up the spaces you could not reach with the roller.

– Use an oil primer in addition to latex or acrylic to add extra protection.

– If you are using multiple cans of paint for the exterior, try to mix them all together so that the paint remains consistent throughout the whole house.

– If you are painting the ground, it would be best to add sand into the paint. This is beneficial because it adds traction while walking.

If you feel like you cannot handle the job, use TalkLocal to find a professional painter.


Interior Home Painting Tips

Thursday, September 27th, 2012

Interior Home Painting Tips Painters

Follow these 10 interior home painting tips to make your painting projects go smoother and faster with a professional quality finish.

1. To avoid lap marks, roll the full height of the wall and keep a wet edge – Lap marks are those ugly stripes caused by uneven layers of paint buildup. They occur when you roll over paint that’s already partly dry. To avoid lap marks, it is important to maintain a “wet edge.” To do this, start near a corner and run the roller up and down the full height of the wall, moving over slightly with each stroke. Move backward where necessary to even out thick spots or runs. Reload the roller often so that it’s always at least half loaded. Keep the open side of the roller frame facing the area that’s already painted. That puts less pressure on the open side of the roller, so you’re less likely to leave paint ridges.

2. Mix several cans of paint in a large bucket for a consistent color throughout the room – Paint color may vary slightly from one can to the next. If you have to open a new can in the middle of the wall, the difference may be noticeable. Mixing the paints together eliminates the problem. The best way to do this is to estimate the amount of paint you’ll need and mix it in a 5-gallon bucket (a process called “boxing”).

3. Let the paint dry, then cut the tape loose for a perfect edge – Once paint dries, it forms a film between the wall and the tape. Simply removing the tape tears pieces of dried paint off the wall. To avoid this, cut the tape loose for a perfect edge. Wait at least 24 hours for the paint to dry, and then use a sharp utility knife or box cutter to slice through the film. As you cut the paint, pull up the tape at a 45-degree angle.

4. Paint the trim first, then the ceiling and the walls – Professional painters follow a certain order when painting a room. They paint the trim first, then the ceiling, then the walls. They do this because it’s faster and easier to tape off the trim than to tape off the walls. When painting the trim, you don’t have to be neat. Just concentrate on getting a smooth finish on the wood. Don’t worry if the trim paint gets onto the walls (you’ll cover it up later when painting the walls). Once the trim is completely painted and dry, tape it off (using an “easy release” painter’s tape), then paint the ceiling, and then the walls.

5. Prime and texture wall patches to avoid a blotchy finish – A quick coat of primer will eliminate flashing and texture differences. To match texture, prime with a roller, feathering out the edges. Choose a roller thickness to match the surrounding wall texture.

6. Clean dirty surfaces so the paint can form a strong bond – Paint will easy chip or peel off if painted over dirty, oily surfaces. Before painting, clean dirty areas with a deglosser or heavy-duty cleaner intended for pre-paint cleaning. Wipe the cleaner in a circular motion using a lint-free abrasive pad. Start at the bottom and work up. Be sure to wear rubber gloves and eye protection when using theses cleaners.

7. Roll paint along the edges for consistent texture – Corners and areas next to trim that are painted with only a brush have a noticeably different texture than the surrounding paint. To create a consistent texture, brush on the paint, then immediately roll it out with a 3” roller before the paint dries.

8. Use cotton drop cloths rather than plastic – Spills and splatters will happen regardless of how careful you are, so it is important to prepare for them. Use canvas drop cloths in your work area to protect the floor from spills. The thick canvas stays in place, so you don’t need to tape it, and you can use it to cover any surface.

9. Feather out paint where you can’t keep a wet edge – You can’t cover large areas like ceilings, extra-tall walls or stairwells in single, continuous strokes. The best way to minimize lap marks on these areas is to feather out the paint along the edges that you can’t keep wet. The thinner, feathered coat of paint will avoid the buildup that causes the lap mark.

10. Sand trim between coats for an ultra-smooth finish – For a smooth finish, sand the trim with a fine-grit sanding sponge before applying each coat of paint. Let the first coat of paint dry for at least 24 hours before lightly sanding again and applying the second coat of paint. After each sanding, vacuum the trim and then wipe it down with a tack cloth to remove the dust.

Painting Over Wallpaper

Wednesday, September 26th, 2012

Painting over wallpaper Painters

Most home improvement experts do not recommend painting over  wallpaper because the results are usually less than perfect. The practice demonstrates poor craftsmanship because wallpaper textures and seams can show through. The paint job will not last as long as painting on a clean surface because the moisture from the paint can weaken the wallpaper’s adhesive, which will create bubbles in the paper. Painted wallpaper is also difficult to remove later on, which is a pain if you expect to renovate in the future.

Should you remove the wallpaper before painting?

On the other hand, removing stubborn wallpaper can create further problems, such as crumbling drywall or plaster. So for some homeowners, painting over wallpaper is the lesser of two evils. Keep in mind that patchy wallpaper cannot be painted; you must work with wallpaper that is in good condition–with curling or loose edges at most.

If your wallpaper is peeling and patchy, continue reading “How to Remove Wallpaper” below. If your wallpaper is in good condition, skip this next section and read “How to Paint over Wallpaper” below.

How To Remove Wallpaper

Materials:
Wallpaper scorer
Hot Water
Fabric Softener
Spray Bottle
Wide Putty Knife
Dish Detergent
Bucket
Sponge
Towel

1. Spread drop cloths around the base of the walls.

2. Remove all switch plates and outlet covers.

3. Create holes in the wallpaper with a wallpaper scorer.

4. Mix 3 parts hot water and 1 part fabric softener in the spray bottle.

5. Spray a small section of the wall. You should be able to strip the wallpaper from this section within 15 minutes.

6. Let the solution soak for three minutes.

7. Pull an edge of the wallpaper upward. Use the putty knife to help separate it.

8. Repeat steps 5 through 7 until all the wallpaper is removed.

9. Mix a tablespoon of dish detergent with hot water in the bucket.

10. Wipe the walls with this solution using the sponge.

11. Rinse the walls with water.

12. Dry the walls with a towel.

How To Paint Over Wallpaper

Materials:
Strong Adhesive
Stain-killing Paint
Emery Board
Paint

1. Glue down any curling edges with a strong adhesive. Press and hold until secure.

2. Apply two coats of stain-killing paint. Let it dry between coats.

3. File down any visible seams with an emery board.

4. Apply the top coat of paint.

Best Paint to Use on Concrete

Monday, September 24th, 2012

Best Paint to Use on Concrete Painters

There are many types of paints available for purchase at your local hardware store, and it can be hard to know where to start looking for your project’s needs. The basic categories of paint you will be choosing from are acrylic, oil-based, and epoxy resin—each available in interior and exterior use varieties. Acrylic paints are typically the cheapest, while epoxy resins are the most expensive. If you are looking for an epoxy resin paint, you can purchase it from Amazon starting at $77.70.When deciding what the best paint to use on concrete, there are a couple of things to take into consideration.

First, what is the type of concrete surface you will be working on? Is it a garage floor, wall, stairs, or an exterior surface? This will make a huge difference in your ideal paint choice. If you are painting a concrete wall, whether it is interior or exterior, you should be able to use acrylic paints as long as the walls are in relatively good condition (you can use exterior paints inside but not the other way around). Cheap acrylic paint might not adhere well to wall surfaces that are cracked or crumbling however. It is also important to know that acrylic paints will not stick to a wall that has been painted with oil-based paint; surfaces that already have oil-based paint should only have other oil-based paints used on them. If you are looking for acrylic paint, you can purchase it from Amazon starting at $32.98.

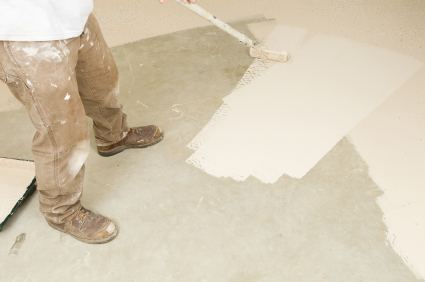
If you are planning on painting a concrete floor, like the one in your garage, you should stay away from acrylic and go for either oil-based or epoxy because acrylic paints do not hold up well against the wear and tear that concrete floors are subjected to. Epoxy, though more expensive, is the best bet. Oil-based paints can be slippery on concrete, which is a definite no-no for something like a garage floor. Epoxy resins are much more durable, last longer, and leave your floor less slick; they are also much easier to clean. If you are looking for an oil based paint, you can purchase it from Amazon and have it shipped overnight starting at $8.87.


Some concrete surfaces are so damaged, cracked, and porous that no type of paint will stick to them well. In these situations you may want to opt for a concrete stain rather than actual paint. Concrete stains work just like wood stains by seeping into the surface and changing its color. Applying a concrete stain can be a little complicated and may be too big of a job for the inexperienced do-it-yourself painter. If you want to go with this option, you should use TalkLocal to find a professional painter in your area. All you need to do is enter a description of your project requirements and TalkLocal will automatically connect you with someone who can meet that specific need.

The owner of this website is a participant in the Amazon Services LLC Associates Program, an affiliate advertising program designed to provide a means for sites to earn advertising fees by advertising and linking to Amazon properties including, but not limited to, amazon.com, endless.com, myhabit.com, smallparts.com, or amazonwireless.com.