Archive for the ‘Plumbers’ Category


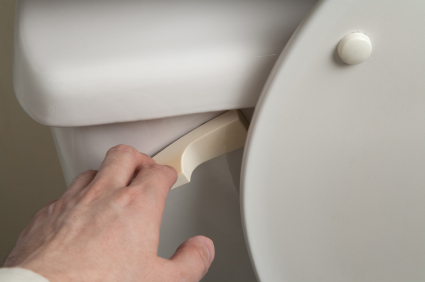
Toilet Handle Doesn’t Come Back Up

Wednesday, October 3rd, 2012

Toilet Handle Doesn't Come Back Up Plumbers

It’s a very annoying problem when your toilet handle doesn’t come back up. Before calling a plumber or attempting to replace the handle completely, try these tricks that might help you get it working again.

– Press lightly on the handle. Sometimes the latch inside the reservoir behind the seat gets disconnected from the water pump.

– Pushing the handle down can sometimes reconnect a loose wire. Bring the handle up and down a few times to feel for restored tension in the handle. If you are lucky, this may be all that is needed to get the piece working correctly again.

– If it still doesn’t work, lift the lid from the reservoir and check the pump inside. If the chain has slipped off the metal arm that connects the pump, pick up the disconnected hook and reattach it to the pump arm. After you reconnect the chain from the handle to the pump, try flushing the toilet to see if it works. If the arm is old or the chain is broken, visit a home supply dealer for replacement parts. If the problem involves the pump or something else, you may need to contact a plumber.

– When the toilet handle gets stuck, one of the parts can be jammed. Gently try to press the handle up and down. If there is any movement, you may be able to restore more range of motion and get the handle working properly again. If it’s still jammed, remove the lid from the back of the toilet and examine the parts inside. Check to see if the pump is broken or loose. Try moving each piece with your hand to see which part refuses to move. This will help to identify the problem area and determine if it’s fixable.

If you tried all these solutions and nothing worked, use TalkLocal to get in contact with expert plumbers immediately.

Drain Stopper Not Working

Tuesday, October 2nd, 2012

Drain Stopper Not Working Plumbers

Drain Stopper Not Working

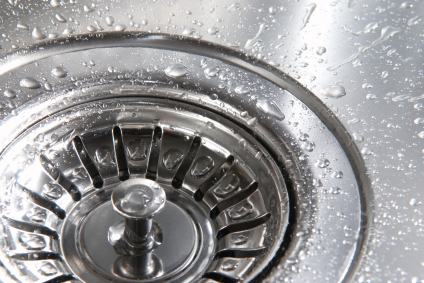
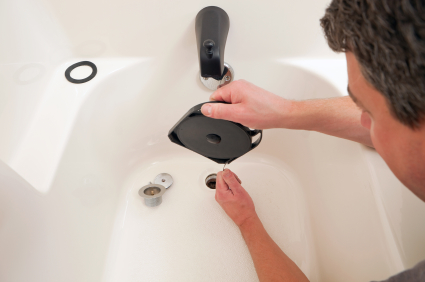
A drain stopper is a plug that is used in bathtubs or sinks to create a seal and prevent water from draining out. You probably have several in your home right now, and perhaps one of them isn’t functioning correctly. Common problems with stoppers range from wear and tear that leaves them not fitting the drain well to more complicated issues with more sophisticated stopper systems. So what do you do when a drain stopper is not working? Sometimes these problems can be solved with a quick fix or replacement part that will not require a visit from the plumber.

The first step to fixing a problem with your drain stopper is to determine what kind of stopper you are working with.  There are four basic types of drain stoppers: rubber, threaded, pop-up, and plunger.  Rubber stoppers are simply rubber plugs sized slightly larger than the drain to create a seal, often connected to a chain or handle to pull it out. Threaded stoppers are similar and also fully detachable, but differ from rubber stoppers in that they form a seal by screwing into the drain with metal threads. Pop-up style stoppers are most commonly found in sinks and function with a lever that raises or lowers the stopper in to place. Plunger style stoppers, usually found in bathtubs, are also activated by a lever, but work by activating a non-visible interior plunger to plug the drain. The type of stopper that you are using will be the main factor determining how to go about fixing your problem.

If you are using a rubber or threaded stopper that is no longer working because it has become worn down or cracked, the solution is as simple as purchasing a new stopper from your local hardware store. Basic stoppers like these are very cheap—just make sure to get one that is the correct size for your drain. Pop-up and plunger style stoppers, on the other hand, are a little more complicated.  Because they are located in the interior of the drain, plunger stoppers can be difficult for the average do-it-yourself-er to handle. Generally, any problem with a plunger stopper is going to require a plumber to fix. Pop-up stoppers are slightly more manageable, but may still require professional help. Check out this page for a guide to fixing several common problems with pop-up style stoppers on your own. If you follow the steps there but are still having problems, you can use TalkLocal to get in touch with a local plumbing company.  All you have to do is enter your name, contact info, and a description of your problem and TalkLocal will automatically have someone who can help call you in minutes.

Glass Stuck in the Garbage Disposal

Friday, September 28th, 2012

Glass Stuck in the Garbage Disposal Plumbers

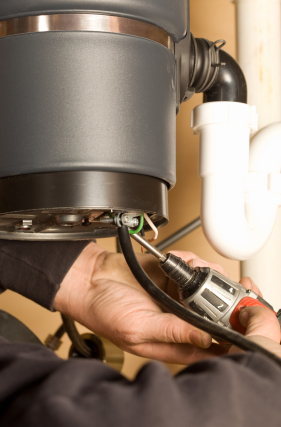
The garbage disposal in your kitchen is a convenient way to remove scraps and leftovers, but when objects, such as glass, get stuck, the mechanism can become jammed and stop working properly. Read the following methods to find out how to clean out the glass stuck in the garbage disposal.

1) Disconnect your garbage disposal appliance from the main power source — This is to make sure that its not accidentally turned on while you remove the glass, which could cause serious injury.

2) Remove any large pieces of glass with pliers — Use needle-nose pliers to remove all the large pieces of glass that you can find.

3) Dislodge the glass — If you can’t move the glass, you’ll need to dislodge it first. Remove all pieces of glass you can easily reach with pliers.

4) Vacuum the garbage disposal — Use a wet-dry vacuum to remove smaller shards of glass. Simply hold the opening of the hose over the top of the garbage disposal and let the vacuum run until you can’t hear anything be sucked up anymore. If the sink isn’t wet, you can use a normal vacuum if you cover the end of the extension tube with a nylon stocking secured with a rubber band.

5) Reset the garbage disposal

a. Reconnect the garbage disposal to the power source.

b. Partially cover the drain with a plate.

c. Turn on the cold water.

d. Turn the garbage disposal on.

e. If the disposal still jams, there’s probably glass stuck in it. Turn it off, turn off the water, and repeat the process from the start.

6) Remove the garbage disposal from the sink

a. Use your product manual to remove the garbage disposal from the sink.

b. After you remove the disposal, carefully remove any remaining glass.

c. Reinstall the garbage disposal following the instructions on your manual.

If you still have questions or problems with your garbage disposal, use TalkLocal to get in contact with a professional who can help you now.

What to do when Water Leaks from the Ceiling

Thursday, September 27th, 2012

What to do when Water Leaks from the Ceiling Plumbers

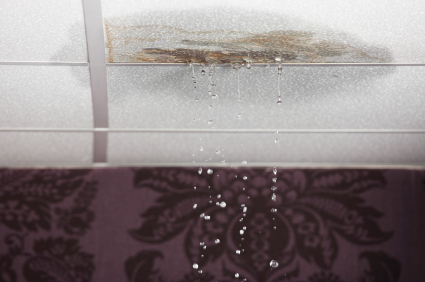
Locating the source will help you figure out what type of professional to call. If there is a floor above the leaking ceiling (i.e. a second story above a first story ceiling), then the leak may be coming from several sources.

Check out this list of possibilities about what to do when water leaks from the ceiling.

Possibilities:

Toilet – If the wax ring between the floor and the toilet is worn out, every time the toilet is flushed it produces a leak flowing through the ceiling. You can purchase a new toilet wax ring and have it shipped overnight from Amazon starting at $8.99.

Shower – If the leak is happening while the shower is running, this may be due to a cracked tile or the shower faucet. If there is leakage while the shower is not running, there is a problem with the water pipe.

What to do when water leaks from the ceiling:

1. Place a bucket under where the ceiling is leaking to catch the water. You can purchase a bucket from Amazon and have it shipped overnight starting at $5.60.

2. To avoid the ceiling collapsing in, poke a small hole in the ceiling to allow the water to drain into the bucket.

3. Determine if the leak is a result of plumbing in your home or if it is due to the ceiling. If the leak only occurs when it is raining, that is indicative of a roofing issue. On the other hand, if there is water leaking when there is not a storm, the problem is most likely due to a plumbing issue.

To check if it is a roofing issue:

1. Wait for the roof to dry and climb to that area of the roof.

2. Check the shingles around the leak source and remove any damaged shingles with a pry bar. This is an easy and common fix.

3. Replace the damaged shingles with the new shingles by working your way from the bottom of the leaky area to the top.

a) Slide a few inches of the last row of new shingles under the old shingles.

b) Add a bit of roofing tar along the top and bottom of the new shingles that you slid under the old shingles and press down for a few seconds to allow them to set. You can purchase roof tar from Amazon and have it shipped overnight starting at $4.71.

c) To repair the appearance of the ceiling after the plumbing or roof is repaired, use some spackle and paint.

If a leak still persists or you cannot figure out the source of the leak, a professional may be the best option to avoid damaging your home further or hurting yourself in the repair process. To reach a high quality plumber or roofer in your neighborhood immediately, call TalkLocal. You will reach a professional who can fix your problems at a time that is most convenient for you.

The owner of this website is a participant in the Amazon Services LLC Associates Program, an affiliate advertising program designed to provide a means for sites to earn advertising fees by advertising and linking to Amazon properties including, but not limited to, amazon.com, endless.com, myhabit.com, smallparts.com, or amazonwireless.com.

Help with Unclogging a Drain

Wednesday, September 26th, 2012

Help with Unclogging a Drain Plumbers

A clogged drain can be your worst nightmare if you don’t know how to fix it. It’s often simple enough to do yourself, but many people don’t have the time or patience to deal with it. If you do, here are a couple of tips and tricks to help with unclogging a drain.

Unclogging a Drain with Baking Soda

Before you attempt to clear your drain, try pouring a mixture of baking soda and white vinegar (about one cup) into the drain. Next, try stopping it up with an old rag and then rinsing with hot water after a few minutes. If that opens the clog, ta-da, you’re done! If that doesn’t work, gather your tools for some basic plumbing maintenance.

Remove the Trap

You might need to remove the trap (the U-shaped pipe under the sink) to open a clogged drain. Put a bucket under the trap to catch any water when you remove it. Clear out any residue in the trap before reattaching it. If you’re still having plumbing problems after removing the trap, try plunging the sink.

Use a Snake

If neither of those tips work, try using either an manual or electric snake. A snake is a metal spiral that you push into the clogged drain. You turn the crank and that makes the snake reach further into the clog. This makes you be able to break it up and pull it out.

Seek Professional Help

If your drain is still clogged, it may be time to call a plumber. One way to seek immediate service help for your drain problem is through TalkLocal. This free online service will contact plumbing services in your area for you. Just tell them your service need, location, and availability to talk to a professional on the phone in minutes.

How to Stop a Toilet from Running Constantly

Tuesday, September 25th, 2012

How to stop a toilet from running constantly Plumbers

Want to stop losing money from the constantly running water in your toilet bowl? Want to stop that pesky toilet sound of the water refilling? Here are a few helpful tips and tricks on how to stop a toilet from running constantly.

First, get acclimated to the state of your toilet; flush the toilet a few times with the cover off and observe the flushing process. Wiggle the handle a few times and if this doesn’t work, check out these helpful tips!

1. Make sure the guide rod and chain are straight and not twisted.

2. Release the flapper. The most common issue leading to a running toilet is the flapper being stuck open. To remedy this issue, reach in and close the flapper with your hand so the pipe is sealed off. Make sure the flapper (or ball, depending on your toilet model) are aligned with the hole and go directly into the hole when being lowered. If you lift the ball and realize there is water in it, the ball itself will need to be replaced. You can purchase a new ball to your local home improvement store.

3. Correct the water level. Another cause stimulating leaking toilets is an excess of water in the tank. The water level should be about one inch (2.5 cm) below the top of the overflow pipe. If the level is too high, there is excess pressure in the tank, which produces leaks. If this is the case, bend the float arm down. If there is not enough water in the tank, bend the float arm upwards.

4. Use a dye test. Place food dye or a dye tablet into the tank and wait 15 minutes. If you see the dye in the bowl after the 15 minutes, there is a leak in your toilet that needs further correction.

If you have tried the above tips or if the dye test is positive, a plumber is your best option to target the source of the leak. TalkLocal is a great resource that will connect you directly with a plumber who can  fix your faulty toilet.

Why Do I Need a Sump Pump?

Monday, September 24th, 2012

Why Do I Need a Sump Pump? Plumbers

If you’re wondering “why do I need a sump pump?”, here is the answer. Sump pumps are installed in many homes which have moisture issues in the basement. They work to keep water out and away from the foundations of your home to keep your house clean and dry, while maintaining a healthier living environment.

Some homes have extreme moisture issues when it rains, while other homes suffer from less noticeable ones.  There are several ways you can check your basement to see if your home has these issues. One way is to tape down a two-by-two foot piece of plastic on the floor. Put one in several spots on the floor if basement moisture is unnoticeable. Let the plastic sit for 2 days, then pick them up and feel for moisture. If the plastic or ground is wet, you have a moisture issue.

If moisture content is not a large problem, try placing a dehumidifier in the room. Dehumidifiers help to remove moisture in the air, and may be just enough to get that extra moisture out of your basement. Be sure to pay attention to how quickly the water tank fills up as you will need to periodically dump the water.

If moisture in the basement is a common problem, you may also want to take a look at where your rain gutters are draining. Rain water should be drained at least six feet away from the foundation of your home. If they are leaking or draining too closely, a simple fix or extension of the gutters will solve your basement moisture problems.

If all else fails and you still have moisture problems in the basement, it’s time to get a sump pump professionally installed. You buy a new sump pump at your local home improvement store. TalkLocal can match you with a high quality plumber who can install it for you. Just fill out a short service request online to talk to a local plumber on the phone within minutes!

What to do when a Pipe Bursts

Thursday, September 20th, 2012

What to do when a Pipe Bursts Plumbers

A burst pipe is a major water emergency and you must act fast before water damage affects your home and belongings. Read the following tips to learn what to do when a pipe bursts unexpectedly.

1. Turn off the water supply. The valve is usually located either under the kitchen sink or in the area where the main service pipe connects to your home. If there’s no water running through your pipes, then water can’t come out of the burst pipe.

2. Drain your pipes by turning on all the cold water taps and flushing all your toilets. Turn off the hot water heater and then turn on all your hot water taps. Also turn off your electricity immediately, as the water may have soaked through your electrical system as well, making it extremely dangerous.

3. Locate the burst pipe:

a) Check first for areas with obvious water damage. If there’s a wet spot in your home that’s not usually there, it’s probably a sign that the burst pipe is nearby.

b) Check all the indoor parts of your home that have pipes, which would be around any fixture that uses water. Remember to check your water heater too!

c) If you can find no sign that an indoor pipe has burst, check outside for an area on the ground that’s especially soft and mushy, especially if it isn’t usually.

d) The burst pipe may also make a hissing, splashing, or thumping sound. If you hear any strange noises coming from the inside of your walls, that’s where it might be.

e) If the leak is very tiny, consider using electrical tape to repair it yourself. Start by wrapping the tape diagonally in a place before the leak, and then proceed to wrap the tape around the pipe until the tape is in a position after the leak. If you want, double wrap it in the other direction for greater security.

4. Get professional help! If it’s a big leak, or if the leak was in the main pipe, you must replace the pipe. An electrician needs to check and fix any wiring that had been ruined by the water leak. Also, you need to assess the water damage in your house, as it could cause a variety of huge issues, such as a rotting foundation. Because a burst pipe can affect so many different parts of your home, use TalkLocal to find all the quality professionals you need immediately. Best of all, the service is free.

Low Pressure From Shower Head

Wednesday, September 19th, 2012

Low Pressure in Shower Head Plumbers

Taking a shower is one of the most relaxing things that someone can do.  It can either wake you up and get rid of drowsiness or it can relieve the stress of a day and help you unwind.  But what happens when there is not enough pressure in the shower head?  Washing your hair or trying to shave can become a tedious process because it takes longer to rinse off.

The federal Energy Policy Act of 1992 restricted all faucets to the maximum water flow at or below 2.5 gallons per minute at 80 pounds per square inch.  This is a maximum water pressure of 60 psi.  This is a countrywide regulation that makes it difficult to find faucets with other specifications. But even with this restriction, you can still enjoy a nice shower with strong water pressure.

There are a few reasons that there might be low pressure from shower head.  This could be the result of partially closed valves, hard water blockages, or a low water supply. If the supply valve is not opened completely, then the pressure of water coming from the faucet will falter.  You should turn it all the way to the left to ensure it is completely open.

Another possibility is that hard water calcification on your showerhead causes blockages. The minerals form around the water release holes so that the water spits out sporadically and at a lower pressure.

A municipal water supply shortage could also cause low pressure in your shower. It feels like you are not getting enough water through your faucet, this may be the cause. This means that there is not a problem with your plumbing, but with the area’s water supply.

If you do feel like you have low water pressure you can do two things.  You can always look into buying a booster pump to increase the volume of water available to all the appliances in your home.  You can also do research into buying a showerhead that is engineered for low water pressure.  This is a specially made showerhead that will build pressure when there is a low amount.

Continuing Problems

If you continue to have problems with your water pressure you should seek professional help.  Use TalkLocal to be put in contact with reliable local plumbing businesses within minutes.  You don’t have to do any work! Simply input your problem and availability and TalkLocal will do the rest.  Almost immediately you will be connected with someone who can help you out on the phone.

Faucet is Clogged

Thursday, September 13th, 2012

Faucet is Clogged Plumbers

If the water flow from your faucet is slow or essentially non-existent, your faucet is probably clogged. You can make sure this is the case by checking other faucets in your home. If you have a normal water flow from your other faucets, you can be sure the problem is an isolated clog and not a water system failure. Read on for solutions if your faucet is clogged.

Repairing a clogged faucet is fairly simple. First, inspect the debris that is blocking the water flow. Remove the aerator screen from the faucet and observe the particles.

If the particles look like soap build-up: Simply soak the aerator screen in hot water for a few minutes to dissolve away any particles.

If there is other debris: Clean the aerator screen more thoroughly. Use a toothbrush or a pin to dislodge the particles.

After cleaning away all types of debris, reattach the aerator screen.

Preventing Clogged Faucets

Extremely hard water can eventually block faucet water flow. If the particles on the aerator screen look like mineral buildup, you may want to consider adding a water softener to the water supply lines. Affirm this need by checking both the hot water and cold water lines for sediment buildup. If both lines cause mineral buildup, you will likely need a water softener. If you find that only the hot water causes buildup, then the problem may lie in the water heater. If this is the case, you may need to replace the water heater dip tube, the anode, or the water heater itself.

For professional help, use TalkLocal to find a reliable plumbing professional near you! Just go to TalkLocal’s website and state your location, availability, and service need. Within minutes of submitting your request, you will receive up to three phone calls from local service professionals that can help you.