Archive for the ‘Plumbers’ Category


How to Make Toilet More Water Efficient

Monday, September 10th, 2012

How to Make Toilet More Water Efficient Plumbers

Saving water is good for both your wallet and the environment.  Instead of buying and installing a toilet that uses less water, review the tips provided below to learn how to make your toilet more water water efficient.

How to Make Toilet More Water Efficient: 

Do you have an empty plastic bottle or a brick/rock?  Fill the bottle with a bit of sand/pebbles and fill it the rest of the way with water.  Put the cap back on, and seal it.  The idea is to make the container heavy enough so that it will submerge, and stay submerged in water with little to no movement.

Next, locate the tank of your toilet – this is the topmost box that your back touches when using the toilet.  Open the top cover and put it aside gently.  You will see that the tank is somewhat full of water – submerge the bottle/rock you found in that water in a way that the thing you put in isn’t interfering with the mechanism inside.

Put the cover back on and flush the toilet two times.  You should notice that your toilet is using less water to flush itself on the second flush and thereon.  The normal amount of water used to flush the toilet has been reduced by the volume of the object you placed inside the tank.

The object you placed inside the tank is now displacing the actual amount of water used to flush the toilet.  The tank fills itself only up to a certain height with water, and with an object taking up space inside, the tank will fill up to that certain height with less water, thus flushing with less amount of water.

If you use too big of an object, you may even find that there isn’t enough water to flush the toilet at times – you will want to find a small object to replace the current one if this is the case.  It is important to find the right balance.

Additional Help

If you feel like you need professional help adjusting your toilet or purchasing a new one, use TalkLocal.  This completely free service will connect you to up to three plumbers in your area who are willing to help.  Within minutes, you should be on the phone with a highly rated professional.  Save time searching for the right professional and have them call you.

How to Increase Toilet Water Flow

Tuesday, September 4th, 2012

How to Increase Toilet Water Flow Plumbers

If you have an older toilet and you are experiencing an unusually slow refill time, it might be a result of an old toilet water supply house. Over time, these hoses can become clogged or kinked, restricting the water flow into the toilet tank.  Read this article to learn more on how to increase toilet water flow.

In order to fix this problem and increase the flow of toilet water, you must replace the toilet water supply hose.  To do so, pick up a new hose, an adjustable wrench, and a pair of slip joint pliers at your local hardware store. Twist the knob where the hose connects to shut off the water supply and unscrew the valve from that end. Finish detaching the hose from the other end by unscrewing it where it attaches to the bottom of the toilet tank. You might need to use pliers for this part if it’s tightly screwed in.

Next, use Teflon tape to wrap around each end where the hose is inserted. This helps to seal the connection after the new hose is installed. When you’re ready to reconnect, take the large end of the new hose and connect it to the end of the flush valve. Then, take the other end and attach it to the shut off valve. Use your wrench to make sure the fitting is tightened all the way.

When you’ve finished, you can turn the water supply back on by turning the valve all the way counterclockwise. This will ensure that the hose allows the highest volume of water to flow back into the tank.

If these directions seem a little too complicated or this didn’t fix your problem, you should call a local plumber to check it out for you. Try using www.TalkLocal.com to help you book a highly rated plumber in your area within minutes.

Fixing Leaking Pipes

Thursday, August 30th, 2012

Fixing Leaking Pipes Plumbers

When you get those pipe leaks, it’s time to carefully examine the pipes to come up with a proper solution. Some pipe leaks can be fixed by a simple patch, which you can find at your local hardware store and install yourself. Other leaks will need to be more carefully fixed, often with the replacement of a section of piping. When deciding whether or not to patch or replace piping, keep in mind that a patch is only a temporary solution; the pipe will need to be replaced entirely sooner or later. Read on for tips on fixing leaking pipes.

If you prefer to be handy and perform the work yourself, there are a few steps you will need to keep in mind before you begin. If it is an active pipe that constantly moves water through your home from the water department, you will need to turn off the water in your house. This is a safe precaution to do when doing any pipework to prevent further damage.

Find the water main and shut it off. It is typically located in one of two locations: outside your home or in your basement. If you are looking outside your home, it can sometimes be found below a deck or porch, or on the side of the house. If you have difficulty locating the main water valve, call your local water department; they should be able to assist you.

After you have located and turned off your main water valve, be sure to check that the water is completely turned off by opening faucets within the house. Once you are certain the water is not running, follow instructions to patch a pipe and take extra precaution if you are welding a new piece of pipe. Refer to these instructions for a variety of pipe fixes. Once the work is done, test the connection by turning the water back on in your home. Carefully look for any drops of water or leaks, and fix as necessary.

If you are uneasy fixing your own pipes, TalkLocal can connect you with a local plumber in minutes.

Leaking Toilet Causing High Water Bill

Tuesday, August 28th, 2012

Leaking Toilet Causing High Water Bill Plumbers

Do you have a leaking toilet causing high water bill in your home?  Check out these tips to help decrease that money going down the drain.  Leaking toilets can waste up to 200 gallons of water per day – more than doubling your family’s water bill.

Many times, wiggling the toilet handle will help solve the problem.  However, is this does not fix the problem, you must first identify the source of the leak.

Flapper issues

A common issue with high water bills and leaks in your toilet is an issue with the flapper.  The flapper is the small plastic thing that covers the hole to the toilet tank.  Sometimes the flapper does not close all the way, and this issue is not visible from the outside of the toilet.  Check out this helpful link to help you fix your flapper.

Fixing your flapper is an easy fix and one you can do on your own. This will decrease your water bill significantly if indeed there is a leak.  Another way to test if your water bill is higher due to your leaking toilet is to do the dye test.

What is the dye test?

The dye test is a common test to determine if a leaking toilet is causing a high water bill.  Place a drop of coloring into the top of the toilet.  If after 15 minutes the bowl begins to color, there is a leak in the toiler that needs to be fixed.

If your dye test is positive or you cannot figure out the source of the leak, use TalkLocal to direct you to a plumber in your area for free.

What to Do with Frozen Pipes in House

Monday, August 27th, 2012

Frozen Pipes Ruined your Home Plumbers

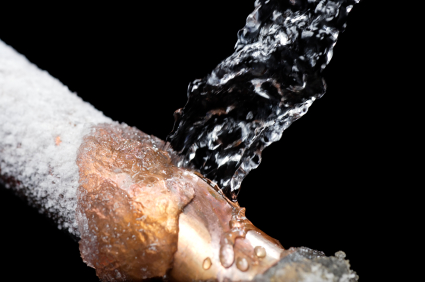
Winter is a wonderful season full of snowy days, hot chocolate, and fun holidays. But it can also cause frozen pipes that can burst at anytime. The first sign that your pipes are frozen is if your water does not come out of your faucet. If this happens, you need to immediately shut off the main valve and open the faucet nearest to the frozen pipe. This allows the water to drain as the frozen pipe thaws. You should then waterproof the area around the frozen pipe with containers and plastic drop cloths in case leaks occur.

What to Do with Frozen Pipes in House?  There are several methods to warm the frozen pipe. One is to use a hairdryer as if it were a torch, blowing hot air back and forth along the pipe until it isn’t frozen anymore. Do not use an actual blowtorch. Though it may thaw the pipe, it can also boil the water and cause the pipe to burst. A heat lamp is another method. For pipes behind walls, floors, or ceilings, beam a heat lamp eight or more inches from the surface. If you don’t have access to a heat lamp or hairdryer, try wrapping the pipe in rags and pour boiling water on it. Make sure the rags are thick enough to hold a good amount of boiling water against the pipe. If you have a heat pad, you can wrap this around the frozen pipe to thaw it.

Another method to fix the frozen pipes after you turn off the main shutoff valve is to get professional emergency repair. If you go to TalkLocal’s website, you’ll get immediate help for your pipe repair problem. This free online service will contact plumbing services in your area that can help you with your frozen pipes.

Bathroom Sink Drains Slowly

Thursday, August 23rd, 2012

Bathroom Sink Drains Slowly Plumbers

Does a clogged drain have your sink looking like a bathtub? Most people pick up a chemical drain cleaner from a convenience store if their bathroom sink drains slowly, but there are some cons to this store-bought solution. Chemical drain cleaners are dangerous to humans who inhale or touch the product; the harsh chemicals can also corrode your sink pipes and harm the environment. There are plenty of safer ways to fix a clogged drain using materials already in your home. Read on to find out how.

Using Hot Water

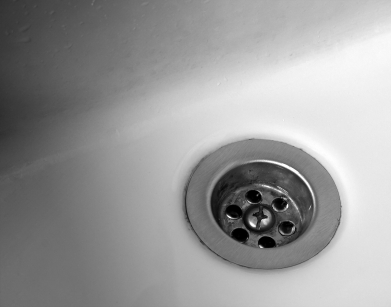
First, try running very hot water down the drain. Sink drains can collect a variety of gel-like substances including toothpaste, soap, and other personal hygiene products that can be dissolved with hot water. Flush the stopper with hot water, too —ensuring the water runs through small holes of the stopper.

Using a Clothes Hanger

1. Cut a wire clothes hanger at the bottom two corners using wire cutters or pliers. You will be using the long straight piece of metal.

2. On one end, bend a 3-inch piece to form a small loop, so that the end with the loop sticks out perpendicular to the rest of the wire. This part will work as a handle.

3. On the other end, curl the metal to form a small hook. It should be small enough to move around in the drain, but big enough to grab debris.

4. Lower the hook end into the drain.

5. Twirl the hook around to feel for debris.

6. Drag the hook out when you feel something.

7. Continue fishing for debris, inserting the hook into a different hole if the drain is divided by a filter.

8. Turn on the water to test the drain.

Using a Plunger

1. Plug the overflow hole with paper towels.

2. Spread a thin layer of petroleum jelly around the edge of the plunger to give it more suction.

3 . Fill the sink until it can cover the base of the plunger.

4. Put the plunger over the drain.

5. Push the plunger all the way down.

6. Pull up against the suction.

7. Repeat step 5 and step 6 until water begins draining quickly.

Using a Homemade Drain Cleaner 

1. Boil a gallon of water in a large pot.

2. Add half of a lemon to the pot.

3. Pour a 1/2 cup of baking soda directly down the drain.

4. Pour a cup of white vinegar directly down the drain.

5. Pour the water mixture down the drain.

If the above suggestions do not work, you can try using a store-bought drain cleaner or contacting a local plumber through TalkLocal. Just fill out a service request online or on the phone and TalkLocal will connect you with up to three service providers in your area who can help you.

Water Heater Leaks from the Top

Wednesday, August 22nd, 2012

Water Heater Leaks from the Top Plumbers

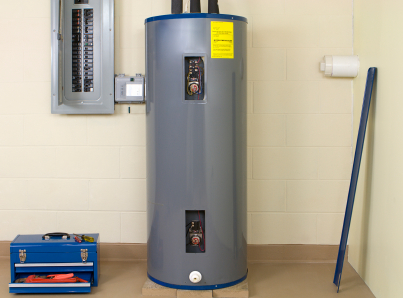
If your water heater leaks from the top, the first step in fixing it is identifying the source. The water is coming from one of three connection areas on the top of the water heater. The connection marked with blue is for incoming cold water and the connection marked with red is for outgoing hot water. The third connection is the pressure release valve, which relieves pressure from the vessel before it becomes damaged.

If the water is coming from one of the water valves, it may be caused by a loose fitting. Use a wrench to tighten it. If there is rusting in the valve, it will need to be replaced.

If the water is coming from the pressure release valve, it may be caused by a recent interaction with it. Sometimes the valve will leak if it is opened for the first time. Try opening and closing it a few times to allow it to re-seat itself. If the leak does not stop after a day or two, you need to replace the valve. You can also replace the pressure release valve on your own using the followings steps:

Materials:

Pipe wrench

Teflon tape

Pressure release valve

1. Turn off the gas, or flip the breaker, to your water heater.

2. Close the blue valve.

3. Open the pressure relief valve and the valve at the bottom of the tank to relive pressure and drain some of the water.

4. Remove the overflow pipe. If it is permanently attached to the tank (glued or soldered), you will need to cut it off.

5. Unscrew the pressure release valve.

6. Wrap the threads of the new pressure release valve in Teflon tape.

7. Screw in the new valve. The opening should be facing outward.

8. Reattach the overflow pipe.

9.Wrap Teflon tape around the threads.

10.Open the blue valve to let cold water in again.

Check the water heater in a day for leaks. If it continues, contact a high quality local plumber through TalkLocal. Just fill out an online request stating your problem, availability, and location. Up to three plumbers in your area will call you within minutes to help you with your leak.

How to Stop a Leaky Faucet in Bathroom

Monday, August 20th, 2012

How to Stop a Leaky Faucet in Bathroom Plumbers

Leaking is the most common problem that occurs in faucets and it can be an expensive one, too. It doesn’t take long for the dripping water to start affecting your water bill significantly, so don’t ignore a leaky faucet! Luckily, a leaky faucet is also one of the easiest problems to repair on your own.

When the faucet is turned off, the watertight seal (usually a washer) is pressed against the faucet seat. Turning the faucet on removes the seal from the faucet seat which lets the water out. A leaky faucet signifies a broken washer or faucet seat, and all you need to do is replace the washer or repair the faucet seat.

Directions on how to stop a leaky faucet in bathroom:

1. Turn off the water for either your home or—if you have individual switches—for that specific area of your house.

2. Remove the faucet handle that is attached to the main faucet. There’s a small screw on top or on the back that may be hidden by a cap that you need to either pop or screw off.

3. Remove the packing nut with an adjustable wrench.

4. Unscrew the stem from the faucet by turning in the same direction as you would to turn on the faucet.

5. Remove the screw that holds down the washer.

6. Examine both the washer and the stem, replacing one or the other if they are damaged.

If you can not tell whether your washer and stem are damaged, are having issues unscrewing the faucet, or do not have the time needed to fix your leaky faucet, use the free TalkLocal to find a qualified plumber in your area right now! They will do the searching for you and match you with up to three local professionals who can help you with your problem at your convenience.

Hot Water Plumbing Problems

Thursday, August 16th, 2012

Hot Water Plumbing Problems Plumbers

Few people enjoy waking up to a cold shower. However, diagnosing and fixing hot water plumbing problems can take half the day! To speed up the process, troubleshoot your hot water issues with the following steps:

1. Check the power supply. Make sure there is power going to the boiler. The panel light should be on and the pressure gauge should be showing around one bar.

2. Make sure your pump is working by feeling the side of the pump for motion. If it doesn’t seem to be working, you may need to call a professional to investigate.

3. Check to see that your thermostat is on and not too low. Check that the power switch is turned to on and that the thermostat controlling the water temperature is set high enough.

4. Make sure the pilot light goes on when needed. If not, relight it by following the steps in your water heater instructions.

When you are in the shower and the water temperature suddenly changes, it is a result of a water pressure change from water being used elsewhere in the house. To fix this unpleasant surprise, install a pressure balance device. This device works to balance changes in water temperature before water is able to scald or freeze you.

If you are tired of waiting a long time for the water to turn hot before showering or brushing your teeth, then you should install a hot water recirculation system. The system uses a small pump to speed up how quickly hot water reaches the faucet. Though convenient, this system can cause a spike in your water bill so look for an energy efficient pump that only circulates hot water when needed.

If you continue to have hot water problems after these tips, use TalkLocal to find a reliable plumbing professional in minutes!

Water Leaking from Under Refrigerator

Monday, August 13th, 2012

Water Leaking from Under Refrigerator Plumbers

You are raiding the kitchen for a midnight snack when you step in a water puddle from under refrigerator.  Water leaking from under refrigerator is never a good sign. First, you need to determine if the water is due to a leak or condensation.

If there is condensation on the outside of your refrigerator, it may indicate that there is not enough insulation. Check the rubber gasket that surrounds the door because it is responsible for keeping cool air inside and warm air out. To see if it is broken:

1. Put a lit flashlight into the fridge. Make sure it is facing outward.

2. Close the door. If light is visible when the door is closed, you need to replace the gasket.

However, puddles under your fridge are likely due to a leak rather than condensation. Consider the following problem areas and their solutions.

Leaking Drip Pan

1. Pull out the grill from underneath the fridge.

2. A drip pan is located beneath the drain tube, on top of a set of condenser coils. Remove the drip pan.

3. Take the drip pan to your faucet and fill it with water.

4. Check to see if it leaks. If it does, replace it.

Clogged Defrost Drain

1. Locate the defrost drain, a round hole or channel located at the bottom of the freezer or fridge.

2. Check the drain for debris.

3. Clean the drain using a baster filled with hot water. The hot water should clear out any interference and drain into the drip pan.

Loose Valves

1. Move the fridge away from the wall.

2. Locate the copper water-supply line that connects the house water line and the fridge water-supply valve. You many need to remove a back panel with a screwdriver to find it. Tighten the supply valve with a wrench where necessary.

3. Check the copper supply line and plastic supply tube for a leak. If those are broken, you need to buy a replacement.

a. Turn off your water supply before removing the leaking tube.

b. Take the tube to a hardware store to find the correct replacement.

If the above suggestions do not work, consult with a local plumber through TalkLocal. Just fill out a service request online or on the phone and TalkLocal will connect you with up to three service providers in your area who can help you.