Archive for the ‘Plumbers’ Category


Garbage Disposal Not Working But Humming

Wednesday, November 21st, 2012

Garbage Disposal Not Working But Humming Plumbers

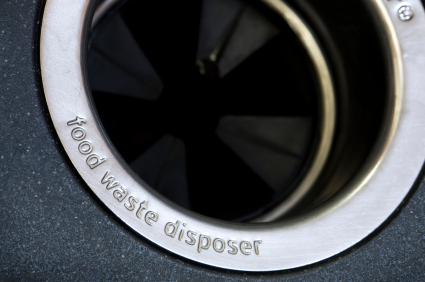
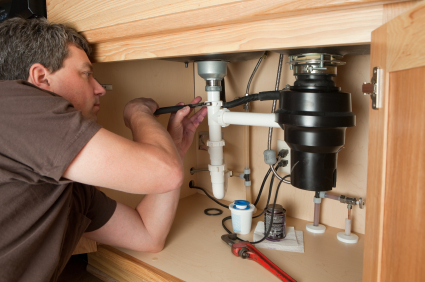
With Thanksgiving coming up in just a few days you don’t want a broken garbage disposal. If the garbage disposal isn’t working and only makes a humming sound when you turn it on, the flywheel is most likely stuck or there’s an obstruction between it and the impeller blades. The humming noise is a result of the motor unsuccessfully attempting to spin the blades. Fortunately, the solution to solve the problem is simply to move the blades in the opposite direction to dislodge the obstruction. Read more if your garbage disposal is not working but humming instead.

Important: Turn off power to the garbage disposal for your safety and never put your hand into the garbage disposal chamber.  If you are unsure of how precisely to turn off the power, it would be best to call a plumber to take care of this problem; your safety should be your first priority.

1. Take the Allen wrench that came with your garbage disposal and insert it into the flywheel-turning hole in the bottom of the wheel.  If you cannot find the allen wrench, pick one up from the hardware store that sold your garbage disposal.

2. Turn clockwise to loosen the impeller blades from the obstruction. It should be able to turn the flywheel freely when the blades are unobstructed.

An alternative method of fixing your garbage disposal is to use a broom handle or another wooden object to free the impeller blades.  All you have to do is place the broom against the impeller blades and then apply leverage to free the flywheel. The flywheel once again should turn completely freely once the obstruction is cleared out.

However, if at any time you don’t feel safe or are unsure of what you are doing, you can always use TalkLocal to contact local high quality plumber to look at your garbage disposal in just minutes!  You’ll be talk to a real live plumber almost immediately for free!

How to Replace a Toilet Seal

Monday, November 19th, 2012

How to Replace a Toilet Seal Plumbers

How to Replace a Toilet Seal

Potty, john, loo, lavatory, the toilet. It goes by many names but it’s here for the same thing. A toilet is an integral part of our everyday lives. Furthermore, the toilet seal on your commode is very important because it prevents damage to your floor. Read more to learn how to replace a toilet seal.

The seal is located at the bottom of the toilet. It rests on the floor and is a gasket made out of a ring of wax. If you want to replace it you should be able to get another one from any hardware store. It is an inexpensive part, yet it prevents major damages to the floor and sub floor. Replacing your flooring is a lot more expensive than just the seal.

Before doing anything with the toilet or the seal, you should shut off the water supply in your home.  Flush a few times to empty out both the tank and the bowl.  You should also use a sponge to soak up and remove any water left behind.  When replacing the toilet seal, you need to wear gloves and make sure that the temperature is set at at least 70 degrees Fahrenheit so the wax that makes up the seal is very pliable.

The first thing you should do when replacing the toilet seal is remove the caps and nuts that hold the base of the toilet bowl to the floor. You should now disconnect the water supply line. Gently move the toilet bowl around to break the current seal completely. Remove all the old wax remnants.

Now unwrap the new seal and place it all around the toilet opening round side up. Make sure that all the bolts are in place. Lift the toilet and place it over the flange/seal. Now you can do the actual sealing. Make sure the toilet bowl is level before replacing the nuts and caps and tightening them. Then, reconnect the water line and turn the water supply on. Flush and make sure that the water levels are correct. Make sure to wash your hands with anti-bacterial soap.

Continuing Problems

If you continue to have problems with your toilet bowl seal you should seek professional help. Use TalkLocal to be put in contact with reliable local plumbing businesses within minutes.  You don’t have to do any work! Simply input your problem and availability and TalkLocal will do the rest.  Almost immediately you will be connected on the phone with someone who can help you out.


How to Find Main Drain Cleanout

Thursday, November 15th, 2012

How to Find Main Drain Cleanout Plumbers

Are your toilets, sinks and showers all stopped up?  You might have a clog in the main drain that connects to the city’s plumbing system.  In this case, you need to find the main drain cleanout in order to clear the clog.  Read on for more info on how to find the main drain cleanout.

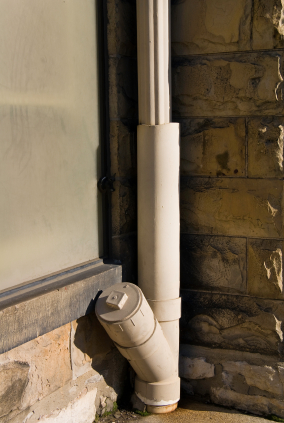
A main drain cleanout will look like a 3- or 4-inch wide pipe with a cap that has a square knob on the top.  It will most likely be popping up from the ground.  The first place you should look is outside your home.  Try looking in the front yard, close to the walls and behind/under bushes near your home.

If you can’t find it there, try looking on the sides of your house.  Again, stay close to the walls, and focus on the areas near the bathrooms.

If you fail to find it outside, you may need to look inside your house; try the basement and near/behind your toilets.  In some cases, the main drain cleanout may be behind or covered up by drywall.  You could choose to tear down parts of the drywall to look for it, but beware that this may get a little messy.

Once you find the cleanout, you will need a pipe wrench to loosen the cap.  Twist and remove the cap slowly, as you will likely see water flowing out as you loosen it.  After removing the cap, clear out the contents at the surface.  Wear gloves and keep a trash-bag nearby.  You might need a plumber’s snake to reach further down into the pipe to clear out the rest of the clog.

If you can’t locate the main drain cleanout, it is also possible that your house does not have one.  In this situation, you will need to contact a plumbing company for other solutions.  Use TalkLocal to connect you to multiple highly rated plumbers in your area.

What to do when Pipes Freeze in House

Wednesday, November 14th, 2012

What to do when Pipes Freeze in House Plumbers

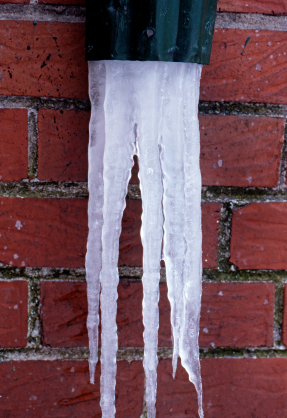
The last thing you want to happen when you’re stuck inside during a blizzard is to lose water due to frozen pipes. Unfortunately, this happens to homeowners fairly often during the cold winter season. Frozen pipes are both inconvenient and dangerous because the freezing water is capable of rupturing pipes. There are several at-home methods you can try if you are caught in this problem. Keep reading to learn more about what to do when pipes freeze in your house.

The first and most successful method would be to wrap electrical heat tape around the pipe and wait for it to thaw. This can be purchased at your local hardware store. When using this method, be careful not to wrap the tape back over itself because this will cause it to overheat.

Another method you can try would be wrapping the pipe with a towel and pouring hot water directly over it. Place a pan or bucket underneath to catch the water. This might take several tries until it thaws, so be patient. You can also try using a hairdryer to unfreeze the frozen section of the pipe.

If you have a heat lamp lying around your house, try positioning it about a foot above the frozen portion of the pipe. Wrap the pipe in aluminum foil so the heat does not melt or scorch the pipe. Be careful when working with electricity around water. Use common sense and take precautions like drying the area where the lamp will be sitting before you plug in the lamp.

If you’re unsuccessful in thawing your pipes and it results in a rupture, you should contact a plumber as soon as possible to prevent any further damage to your home. Try using TalkLocal to connect you to a highly rated plumber in your area within minutes of entering your service request online.

Reduce Water Pressure Faucet

Monday, November 12th, 2012

Reduce Water Pressure Faucet Plumbers

When the faucet water pressure is too high, it can become a major problem. Not only does it waste water, it also can cause damage to your plumbing system. To reduce water pressure in your faucet, install an aerator. An aerator is a device that is fitted at the end of the faucet which mixes air with the water and controls and reduces the pressure of the water coming out of the faucet.

Installing an Aerator

First, check to see if your facet has an aerator. If there is no aerator at all, then buy one (they can be found at all home improvement stores). Here is how assemble it:

1. Put the flat plastic plate into the plastic cup.

2. Insert the whole thing into the rubber cover.

3. Put the rubber liner on top.

4. Place the cap on top of the rubber liner and screw it all the way in.

Now once the aerator has been assembled, unscrew the head of the faucet. Screw the aerator onto the pipe and then the faucet onto the aerator. This way the water pressure is now controlled.

If you already have an aerator and you still need to reduce the faucet water pressure, then you need to buy a new reduced pressure aerator. On the other hand, if you are having problems with low water pressure, your aerator may be broken or clogged.

Install Pressure Regulator

A pressure regulator is a valve that will control the water pressure throughout your house and not just on your faucet. You can buy either a single stage regulator or double stage regulator. The main difference is that the double stage regulator maintains the water pressure progressively in two areas.

Additional Help

Another way to reduce water pressure is to use a reduced diameter pipe for the water.  No matter what, never try to control the water pressure by partially closing the water outlets. If you need more help from a plumber, TalkLocal can help you find high quality plumbers in your area.


Causes of Low Water Pressure

Thursday, November 8th, 2012

Causes of Low Water Pressure Plumbers

You use water in many aspects of your life: washing your hands, doing dishes and laundry, watering your garden, etc. However, these everyday tasks become more time consuming when you have low water pressure. It could be a serious problem, so you should try and resolve it as soon as possible.

The first thing you need to do is determine how big of a problem the low water pressure is.  You need to see if it is affecting one area such as the bathroom versus the entire property.  If the low water pressure exists in only one fixture, you should seek help for that specific area.  If the entire house is affected, the cause could be corroded piping, a restricted line due to a failed pressure relieve valve, or a low municipal water flow.

To explore the causes of low water pressure in your home, you should buy a hose bib water pressure gage.. These devices are simple to use. You should first make sure there is no water running in the home.  Turn all faucets off, stop using any machines, and stop using hoses. You will need to thread the pressure gage into any hose bib and turn it on.  Record the resulting pressure reading as your static water pressure.

Most urban areas have a water pressure from 20 to 100 psi, but typically you will find your reading to be 50-75.  If your recording is below 40, then you have a problem with the flow of water through your plumbing system.  If the pressure is below 20, then you should contact your local water supplier because it is not an issue with just your house.

Your piping could corrode because of mineral buildup over the years as well as wear and tear.  Unfortunately, there is no good solution to this problem besides replacing the pipes.  If you have partially closed valves this may also cause low water pressure.  You need to ensure that the shut off valve is completely open.  All other valves should also be opened further to verify that water has open pipes to flow through.

Continuing Problems

If you continue to have problems with your water pressure you should seek professional help.  Use TalkLocal to be put in contact with reliable local plumbing businesses within minutes.  You don’t have to do any work! Simply input your problem and availability and TalkLocal will do the rest.  Almost immediately you will be connected with someone who can help you out on the phone.

Water Coming from Under Toilet

Wednesday, November 7th, 2012

Water Coming from Under Toilet Plumbers

Water coming from under the toilet is an easy problem to fix.  However, if the problem is ignored it can cause serious water damage.  Avoid a leaky toilet disaster with the following instructions.

Diagnosing the problem

Usually, a failed wax seal causes water to pool around the toilet, but in some cases, the problem lies elsewhere.  To find the source of the problem, soak up the water from the floor with a sponge and dry off the toilet.  Wait until a new puddle appears on the floor.  Then check to make sure the water is seeping out from under the toilet and not coming from a loose supply tube, faulty shutoff valve, or cracked tank.

If the water is in fact leaking from under the toilet, you might be able to stop it by tightening the closet bolts that secure the toilet to the floor.  Use a slotted screwdriver or putty knife to pry off the caps that cover the bolts.  Then, use a wrench to alternately tighten each bolt, a little at a time.  Be careful not to apply too much pressure because this can crack the toilet’s base.  Hopefully, tightening the bolts will stop the leak.  If not, you will have to remove the toilet and replace the wax gasket.

Removing the toilet

First, turn off the water at the shutoff valve.  This is usually located behind the toilet, or in the basement or crawl space directly below it.  Turn the handle all the way in a clockwise direction to turn off the water.

Remove the tank lid, flush the toilet and hold down the handle to drain as much water as possible from the tank.  Wipe up the remaining tank water with a sponge.  A small paper cup will help you remove any water left in the bowl.

Disconnect the water-supply tube by loosening the compression nut on the shutoff valve.  Pry the caps from the closet bolts, and then use a wrench to remove the nuts.  Grab the rim of the bowl directly below the seat hinges, and gently move the toilet back and forth to break the wax seal.  Lift the toilet off the floor and lay it on a blanket or piece of cardboard.  Use a narrow putty knife to scrape off the old wax gasket from the bottom of the toilet and from the closet flange in the floor.

Check the flange to make sure it is not cracked or bent.  If you discover that a large piece of the flange is broken off, you will have to replace the entire flange, install a full replacement flange, or fill in the missing piece with a repair strap.  Using a repair strap is the easiest and least expensive option.

To install the curved metal strap, first loosen the two screws that secure the flange to the floor.  Insert a new closet bolt into the slot in the strap before sliding the strap under the flange.  Tighten the flange screws to lock the to lock the strap into place.  Then install the remaining closet bolt in the flange.  If the bolts won’t stand upright, pack a little wax from the old gasket around the base of each one.  Take a new wax gasket and set it down on the closet flange, making sure it’s perfectly centered.  Make sure the new gasket is secured to create a tight seal.

Once you’re ready to replace the toilet, you might want to consider hiring a plumber to help you replace it correctly.  Use TalkLocal to connect you to a highly rated plumber in your area within minutes.

How to Increase Water Pressure in your Home

Friday, November 2nd, 2012

How to Increase Water Pressure in your Home Plumbers

Low water pressure can make washing the dishes or taking a proper shower a lot harder to accomplish. Learning how to increase water pressure in your home can be easy if you follow these simple directions.

The first step is to find what is causing the low water pressure in your home. The low pressure can be attributed to a couple of different things, so isolating the problem is key. Low water pressure may be caused by valves that aren’t in their proper position. There are usually two valves that control water pressure – the home valves and the customer valves. The home valve is often in front of the house where the water line enters the home and looks almost like a wagon wheel. To check and see if this valve is in its proper position, turn the valve clockwise to temporarily shut off the water and then turn it counterclockwise as far as possible to open the valve completely, while also getting rid of anything that may have been deposited within the valve. The other valve, the customer valve, is located in your meter box. You will also want to check and see if this valve is on, while utilizing this same method if it is not.

If both of these valves are on and fully functional, the problem lies elsewhere. The pressure regulator is another area where water pressure can be controlled. The pressure regulator is a valve that works to automatically maintain a certain level of pressure. These valves are often located near the water main outside the house. Once you have found the valve, you must adjust the screw to alter the water pressure. Tightening the screw (by rotating it to the right) will increase the water pressure in your home. A couple, controlled rotations should be all you need to increase your water pressure. Make sure not to increase the pressure by too much or you risk damaging your pipelines. One quick way to test the pressure is by keeping a sprinkler on nearby, allowing you to see how your adjustments impact the water pressure.

Utilizing these methods should allow you to easily increase the water pressure in your home. If none of these methods work, find a plumber because it is possible that other issues might be at play, such as a leaky pipeline or deposits within pipes that have mineralized over time. If you do need help, consider using TalkLocal to find a plumber. TalkLocal is a free service that will connect you with top-quality, reputable plumbing companies in your neighborhood within minutes. Just enter in your specific problem, location and availability, and up to three companies will call YOU directly, saving you the time and stress of finding one yourself.

How to Fix a Leaky Faucet

Wednesday, October 31st, 2012

How to Fix a Leaky Faucet Plumbers

Does your faucet continue to leak even after tightening it completely? You’re not alone. A leaking faucet is both a common annoyance and a waste of water. Fortunately, there are ways to save money by fixing it on your own.

If your faucet is leaking, it could be for one of these two reasons: loose nuts or a worn out or improperly installed washer. The majority of all leaking faucets are caused by washer problems, but loose nuts are usually the problem when the leak is coming from the base of the handle.

Learn how to fix a leaky faucet by following these six simple steps:

1. Turn off the main water supply. The shut-off valve is usually located underneath the sink you are working on.

2. Loosen the packing nut with an adjustable wrench by turning it counter-clockwise. Then use the faucet handle to pull out the entire valve.

3. Locate the old washer, which will probably be at the bottom of the valve unit.

4. Replace the old washer with the new one matching its size.

5. Replace the valve unit.

6. Tighten the packing nut and turn the water back on.

If after completing these steps your faucet still leaks, you should call a plumber to fix the problem. Visit TalkLocal to be connected to a local service professional in your area to help you with your problem.

Fixing Leaking Pipes under Sink

Friday, October 26th, 2012

Fixing Leaking Pipes Under Sink Plumbers

Tired of waiting for your spouse to fix the leaking pipes? Here are a few helpful tips to assist you with fixing leaking pipes under the sink without wrecking the place. Identifying the leak source and replacing old parts are key steps to a having fully functioning sink.

How to stop a leaking pipe under your sink: 

Whether you have brass pipes or PVC (plastic) pipes, these tips are for you. To begin, place a bucket under where the leak is taking place to catch the dripping water. Next, dry the pipes with a towel. Identify if the leak is coming from the incoming pipe or outgoing pipe. Plug the sink and run the faucet. If you see a leak at this time under the sink, the incoming water pipes are the issue. If you do not see a leak, unplug the sink and allow the water to drain. If a leak occurs, the problem is with the outgoing pipes.

The highest damp point usually indicates the start of the leak. Depending on the location, there may be various things to look for. For example, a pipe may have a crack, the shutoff may be bad, or the nuts could be loose. If the shutoff is the problem, check out this article. If a nut is loose, a basin wrench will do the trick to tighten them up. Sometimes the washers or nuts are worn out and need a replacement. If that is the case, you can find these parts for replacement at your local department store. Replacing the worn parts is a cheap and efficient fix if the leak is not too large.

If you don’t have the correct tools or would like someone else to fix the problem, use TalkLocal to find a plumber that will come at your convenience. The service is free and will quickly connect you to a high quality plumber near you.