Archive for the ‘Roofers’ Category


Roof Sagging in Between Trusses

Friday, November 30th, 2012

Roof Sagging in Between Trusses Roofers

When you notice a roof sagging in between trusses, it is usually the result of a damaged or broken roof rafter.  Before fixing the problem, however, it is important to identify the exact cause of the problem.  Other potential causes include damaged roof decking or even an underlying foundation problem.

Inspecting the roof from the underside is the only way to effectively determine the cause of the sag.  Enter the attic and inspect the rafters and the decking.  Take special note of the rafters and decking below the sag that is visible from the outside. Look for:

–  Broken or cracked rafters

–  Broken or twisted metal or plywood gusset plates – used where the lumber members meet on a truss

–  Damaged, rotten roof decking

The best method of repairing any roof damage is to remove the weather sheathing, underlayment, and then the roof decking itself.  However, this is not always possible due to the time of year and/or budget constraints.

Repairing a damaged roof truss or rafter:

The easiest way to bring a rafter or truss member back into shape is to use a piece of steel “L” channel, at minimum 1.5” x 1.5” and at least 2 feet long.

1.  Drill four 3/8” holes in the base of the steel angle stock and four holes in the side. Place the side holes about 1” to the right of the two left side base holes and about 1” to the left of the two right side base holes.

2.  Remove any broken splinters of wood that may prevent the rafter or truss member from re-aligning itself. This can be accomplished with a chisel or reciprocating saw.

3.  Using 3/8” x 2” lag bolts on the bottom of the steel “L” channel, mount the steel “L” channel stock to the truss member or rafter end that is the most difficult to access.

4.  Drill through the holes in the side of the steel “L” channel and insert 3/8” x 2.5” carriage bolts and washers.

5.  With one end of the steel “L” channel securely fastened to the rafter or truss member, draw the broken piece into position.

6.  Choose a lag bolt 3/8” diameter x 1.5” to 2” longer than the gap between the steel “L” channel and the bottom of the truss member or rafter. You want the lag bolt to enter the damaged rafter or truss member by at least an inch before it begins to draw the steel “L” channel to the lumber.

7.  Tighten both of the bottom lag bolts until the washers under the bolt heads are flush with the steel “L” channel. Then tighten the bolt farthest from the crack until the other bolt head is about ¼” from the steel.

8.  Tighten the back bolt so that it is snug against the steel. Start tightening the front lag bolt again and do so until you obtain the ¼” separation on the back bolt. Tighten the back bolt and continue going front to back until the truss member or rafter is snug against the angle steel.

9.  Drill two holes in line with the holes in the side of the steel angle and insert carriage bolts so that the nuts and washers are against the steel angle. Once the truss member or rafter has been reconnected, you may want to add some additional support to that area with a couple 2×4’s.

Damaged or broken gusset plate:

A gusset plate is used to hold the members of the truss together where they meet.  Gussets that are inserted in residential construction are usually very difficult to remove.  Therefore, it is almost impossible to reinstall a metal gusset plate properly in the field or on site.  If you have a gusset plate that has partially or fully pulled away from its lumber members, the best method of repair is to remove the metal gusset and replace it with a ½” thick plywood gusset on both sides.

Damaged roof or decking:

Damaged roof decking can only be properly repaired from the topside of the roof. This entails removing the roof sheathing and the damaged decking in the area where the damage exists.

TalkLocal will help you find reliable roofing professional in minutes!

Different Types of Roofs for Homes

Thursday, November 29th, 2012

Different Types of Roofs for Homes Roofers

When designing and building your own home, you can choose from a variety of different types of roofs for homes.  These styles range from modern to traditional.  Listed below are different types of commonly used roofs.  See which one will work for you and your future home.

Mansard Roof

This type of roof is made up of four slopes, two on each side of the home. The lower slope is always steeper than the upper slope. The flatter upper slope may or may not be visible from the ground.

Gambrel Roof

The Gambrel Roof is very similar to the Mansard Roof. The main differences are that the gambrel has vertical gable ends and the roof hangs over the façade of the home.

Saltbox

The Saltbox roof gives a home a more modern feel. It is an asymmetrical long pitched roof with one short side and one very long side. It often results in a home that is one story in height on one side of the building and two stories on the other side.

Pyramid Roof

As the name suggests, this is a roof that is shaped like a pyramid. This roof is typically used on small portions of a roof, like this, or on small structures such as a garage or pool house.

Hip Roof

The Hip roof is very similar to the pyramid design, but instead of coming to a point the roof is flat on top.

Gabled Roof

This type of roof looks like triangles from the front of the home. It can come in a variety of types, including the Cross Gabled Roof.

Flat Roof 

As the name implies, this is a roof that is completely flat. This design is more common in modern home designs and sometimes has rooftop access, a perfect place to entertain guests on a beautiful day.

Skillion Roof

This type of roof is a single sloping surface. It is often used on just one portion of the home, or used in modern designs on a multi-level home to create unique shapes and patterns.

Curved Roof

The curved or arched roof is typically used on a single portion of the roof, such as the entrance to a patio. However, some modern designs have a curved roof over the entire structure.

If you’re looking for a contractor or roofer to do the job for you, use TalkLocal.  This completely free service will connect you to up to three service professionals in your area who are willing to help.

Install Roof Shingles Tips

Tuesday, November 27th, 2012

Install Roof Shingles Tips Roofers

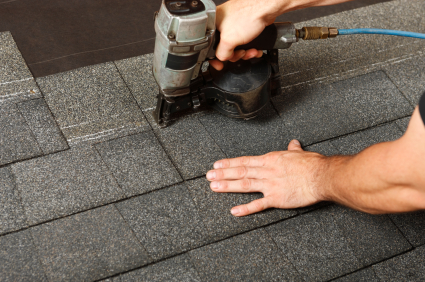
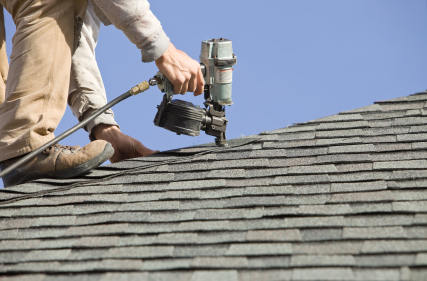
Installing shingles can be easy, yet dangerous. Being on a roof brings potential risk of injury and does not guarantee that the job will be done. If you still decide to tackle the job on your own, here are some tips on installing shingles.

Work with Others

Have at least one person working with you on the roof. If an injury occurs, they help you immediately. Another person also speeds up the process of repairing shingles such as preparing the shingles for the roof. Try to have two people to work with you, one on the roof and one on the ground. The one on the roof can stop potential injury and speed up installation, while the ground person does the preparation.

Use Felt

Felt is the layer before the shingles are being installed.  Some people believe felt is unnecessary because proper installation of shingles is enough to stop water leakage. Others say felt will help you with roof leakage down the road. Mistakes can occur during installation and more protection does not hurt, so using felt is a precaution.

Install Flashing

Flashing is where a roof connects to something that is non-roof, like a chimney. These sections are where the roof leaks most of the time from improper installation of flashing. Flashing is usually a thin piece of aluminum which is installed before the shingle installation. To install flashing:

1. Measure and cut the flashing to appropriate length for needed section.

2. Apply flashing to the section with the middle of the flashing in the groove of the valley.

3. Staple one inch from the edge of the flashing.

4. Begin roofing and applying fascia board.

5. Use tar for extra protection.

Measure Carefully

1. Put the end of the measuring tape on the bottom edge of the roof.

2. Walk straight up to the roof’s peak. Record the distance.

3. Measure the roof from side to side in the same way. For triangular section, measure the distance along the edge of the roof and the distance to the peak of the triangle from the center of the bottom edge.

4. Multiply length and width measurements to find square footage.

5. Add ten percent to the total square footage.

6. Divide the total square footage by 100 for the total squares of shingles needed.

These tips should help you into the right direction in installing shingles correctly and saving your home from water damage. If you want a home improvement professional for the inspection of your roof, use TalkLocal. TalkLocal can connect you with high quality professional in your area for free.

Should I Shovel Snow Off my Flat Roof

Saturday, November 24th, 2012

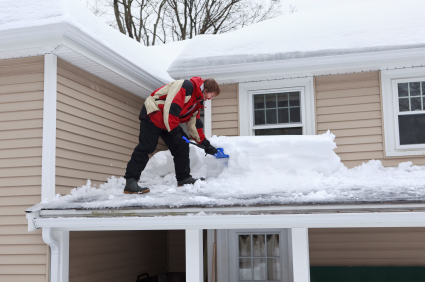
Its snowing outside and you are probably wondering, should I shovel snow off my flat roof.  Here is a simple rule of thumb you can use to help if you are concerned: shovel snow off your roof if it exceeds two feet in depth. If you want to play it safe, do not let the snow exceed a foot or a foot and a half. Two feet of snow weighs about 30 lbs per square foot (more details below), which is about how much the average house’s roof can withstand. Some stronger roofs in areas with great snowfall can withstand over 40 pounds of snow per square foot.

The earlier calculation of 30 lbs is based on a 25% moisture density. On average, saturated snow weighs approximately 20 pounds per cubic foot. The moisture content of snow ranges from 1% to 33%, which means that snow can weigh from 1 pound per cubic foot to over 21 pounds per cubic foot.

Calculation: S x 1.25 = P

  S = inches of snow on the roof (depth)

  1.25 = weight of 1 sq ft of snow for each 1 inch of depth

  P = Pounds per square foot (lbs/sq ft)

Example: If the snow on your roof is 20-inches deep, should you shovel it off?

20-inch roof snow depth x 1.25 lbs/sq ft = 25 lbs per sq ft of snow load

In this example, you should shovel it off since it is very close to the roof’s limit.

Important: If there is any ice build-up on the roof, you need to account for this in the formula. Add 5.2 lbs for each 1-inch of ice depth.

Remember you can always check your roof snow load by cutting a one foot by one foot square of snow from your roof and weigh it in a plastic bag to determine is getting close. Don’t forget to account for ice build-up as well.

Please be aware of the potential dangers of shoveling or raking snow from a roof. Besides the potential damage to your roof, there are other factors to worry about such as a person sliding off the roof or falling off the ladder.

If you want more information on what your roof can withstand, TalkLocal can help you find a local roofer to consult with.

Roof Shingles Lifting Up

Wednesday, November 21st, 2012

Roof Shingles Lifting Up Roofers

Shingles that lift up are usually a problem with homeowners who have recently installed a new roof within the past six months. There are several possible reasons, but the most common one is that the shingle adhesive hasn’t had enough heat to fully seal yet, which causes the shingles to lift up. Lifting shingles usually occurs on the north side of the house, as that side gets less sun. If you think that this is the case, wait a bit longer for the adhesive to seal and the shingles will naturally fix themselves. Glue works best when the temperature is above 50 degrees F. Roofs installed just before the cold months might take until the next summer to lay completely flat.

Wind can also cause roof shingles to lift up. If you want to fix this yourself, you will need: a caulking gun, roof sealant, and a utility knife. Follow these steps to fix your roof shingles lifting up.

1. Cut the opening of the roof sealant at a 45 degree angle.

2. Load it into the caulking gun.

3. Take off the shingle with the utility knife.

4. Apply a generous amount of roof sealant.

5. Press the shingle back in place.

6. Weight it down with a heavy object, such as a brick, for at least 24 hours.

Defective shingles may also be a problem, as some are not as resilient to temperature and moisture changes and are more prone to becoming bent out of shape. If you think this may be the case, call the shingle manufacturer.

Roof shingles could lift up due to a variety of reasons, and in order to get the best idea why, you should find a reliable inspector to examine your roof. It’s also not a good idea to fix a problem that affects a large area on your own. Use the free service TalkLocal to find a reliable and highly rated roofing company to help you with your lifting shingles!

What Does a Roof Replacement Cost

Monday, November 19th, 2012

What Does a Roof Replacement Cost Roofers

What does a roof replacement cost? Replacing a roof yourself generally costs less because you don’t need to pay yourself for the labor for the project. However, you should remember the risks involved in doing jobs like this yourself. If you are inexperienced or working with a difficult roof, you may accidentally injure yourself. If you are preparing for inclement weather or need the roof replaced quickly, it is best to hire a professional team to assist you.

As far as materials go, here are the corresponding prices–assuming that the roof replacement is done for an average-sized house.

Roofing Prices by Type

Asphalt: $700 – $3,700 per roof

Slate: $17,000 – $84,000 dollars per roof

Wood Shingles or Shakes: $7,000 – $20,000 per roof

Concrete Tile: $8,000 – $21,000 per roof

Ceramic Clay Tile: $12,000 – $21,000 per roof

Steel: &5,000 – $22,000 per roof

Aluminum: $12,000 – $24,000 per roof

Copper: $25,000 to $40,000 per roof

You will also need to purchase the correct tools for the job. Purchase at your own discretion. Some of the materials are not necessary, but will make the job a lot easier. For example, the chalk line will be easier than trying to hold the tape measure in place to create a straight edge.

Suggested tools

Hammer

Crowbar

Ladder

Tape Measure

Chalk line

Caulking gun

Roofing Nail Gun

Shovel

Box cutters

Hammer Stamp

Other Factors in Pricing and Hiring a Professional

Provided that you hire a professional to do your job for you, there are various factors that can affect the pricing. One of them is the accessibility of the roof. If your roof is higher up from the ground and requires more effort to reach, the workers will charge you more.

Another aspect of accessibility is the slope (angle) of the roof. Steep roofs require more labor, driving up the price. Additional costs may be added to the job depending on where you live. Hurricane-prone areas have special requirements for the roofs, further increasing labor.

TalkLocal can help with finding the best local roofers to fix your roof quickly, saving you time and energy in a stressful situation.

What is Roof Decking Material

Thursday, November 15th, 2012

What is Roof Decking Material Roofers

What is Roof Decking Material?

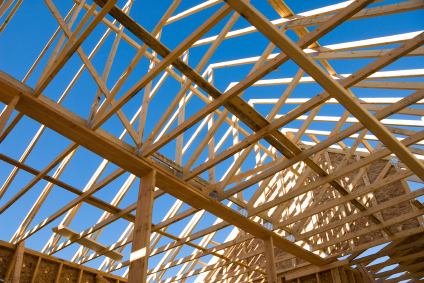
If you’re dealing with your home’s roof, you may be asking yourself “What is roof decking material?” When people refer to roof deck, they are referring to a special layer of roofing material.  This is the layer put down between the primary structure of the home, such as the trusses and joists, and the insulation/weatherproofing layer. This is a very important part of roofing because is ties all the structural parts of the roof together.

There are many different types of roof decks.  You can get roof pavers, OSB sheathing, plywood sheathing, wood groove, corrugated metal, reinforced concrete, or grancrete encapsulated polystyrene.  Some of these materials are specially engineered to be stronger so that they can hold more weight.  This is helpful because then you can then put in roof patios or gardens.

Roof decking creates the base for the roof covering and increases its rigidness.  Installing roof decking is similar to the process of installing wall sheathing.  The only difference is that the material is much thicker.  There are certain requirements for roof decking, so you should always first check the building code for your area.

Roof decking protects from rain, cold weather, shingle damage, etc.  It provides more protection and lays flatter so that it stands stronger against any severe weather.  The roof deck of your roof can be compared to the foundation of your home because it is the most important part.  It ties all the structural components together.  The point of the roof deck is also to shape the roof so that the shingles will form properly.

Other inquiries

If you have more questions about roof decking materials, try talking to a professional so that you can get the best help possible.  The easiest fastest way to get in contact with reliable local roofing companies is to use TalkLocal. Just put in your problem and availability and let them do all the work.  Within minutes you will be connected to someone who should be able to help you out.

How to Check for Cracks in Ceiling and Roof

Tuesday, November 13th, 2012

How to Check for Cracks in Ceiling and Roof Roofers

If your roof or ceiling is leaking but you cannot figure out where the leak is coming from, this article will help you figure out how to check for cracks in your ceiling and roof.

Checking for Cracks in a Flat or Low-Slope Roof

– Check to see if any roof drains in the area around the leak are plugged or draining slowly. Drains are usually designed so that water can only flow down, so if they are plugged, they are unlikely to be waterproof.

– Check any seams in the area around the leak. Run a flat blade along the lap, if it slides in two inches or more, then there is a good chance that the leak is coming from the seam.

– Check for visible issues such as holes in metal flashings, shrunken pitch pan fillers, decaying caulking, and curled flashing flanges sticking up through the roof membrane.

– Check all blisters to see if they have been cut.

– Check that expansion joint seams are working correctly.

– Keeping your feet close together, walk around the leaking area, taking small steps in every direction and see if the roof comes apart between your feet. If it does, then there is a split in your roof.

– Look under any debris, especially if it has been on your roof for a long time.

– If you cannot find a problem with your roof, check the ceiling in your attic.

Checking for Cracks in Steep-Slope Roofs

– Check for holes and damage around the leak area.

– Check for exposed nails that make rusted leaving hole. These are called “shiners.”

– Check for mortar damage on chimneys.

– If you have stucco, check for cracks in the stucco.

– Check your gutter and see if it full of debris. If water is backing up, it may be going through the inside of your wall.

– If you cannot find a problem with your roof, check the ceiling in your attic.

If you are still unable to find the cause of your leak after reading this article, you may need to contact a roof repair professional. With the help of TalkLocal, you can be on the phone within minutes with up to three high quality roof repair professionals in your area that are available when you are.

How to Measure Roof Size

Thursday, November 8th, 2012

How to Measure Roof Size Roofers

Measuring the size of your roof can be very tricky.  Your roof is slanted, and therefore has more surface area than one floor of your house has.  To measure your roof, you need to take exact measurements in order to be as close to the correct number as possible. Learn how to measure roof size with the information we’ve provided below.

If you have perfectly rectangular roof sides, then measuring the size of your roof is fairly easy.  You need to concentrate on three things: the rake, (the length of the side that slants down, most likely the shortest length on the roof,)  the length of the house, and overhang on either side are the other two components.  Add the amount of the overhangs to the length of the house and multiply this by the rake to get the total amount of surface area for this part of the roof.  Repeat these steps for each side and add all your results to figure out how much roofing you have.

You can also try to count the amount of shingling currently on your roof in order to figure out how much area it covers.  This is helpful if you are trying to replace the shingles on your roof.  You can use a shingle count method or a sheet count method.  The shingle count is based off of each three tab singles and the sheet count is based off of the panels of shingles needed for each side of the roof.  These two measuring methods are most commonly used when one is trying to reroof their house.

It might be easier to hire a professional to help you with your roofing issues.  Use TalkLocal to be put in contact with reliable local roofing businesses today.  Simply input your problem, location and availability, and TalkLocal will do the rest.  Within minutes you will be connected with someone on the phone who is ready to help you out.

Temporary Roof Leak Fix

Wednesday, November 7th, 2012

Temporary Roof Leak Fix Roofers

After any big storm, there is a frenzy to find roofers to repair the damages to your home. Due to the high demand, you aren’t always able to receive help right away. The following is a guide on how to make temporary roof leak fix  after a storm. There are certain precautions and steps you should take to evaluate and repair your roof.

Precautions

– Make sure everyone is in a safe place.

– Use caution as you near the room or area you are looking to evaluate.

– If the lights are out in the damaged room, do not enter the room because there may be power or electrical lines free.

– Never climb on a roof that has been damaged because the roof may not be sturdy enough to have additional weight on it.

Keeping the damage contained

– If there is a water leak coming from the roof, place a towel on the floor and place a bucket on the towel to catch the water drips. Follow the water tracks to evaluate the damage and see if mold is involved.

– Use a tarp and weather tolerant tape to cover the hole until further help and repair can come.

– If just a few shingles have come up during the storm, you can use roofing cement to hold them down until you can replace them with new shingles.

These tips should keep the damage to a minimum until professional help can restore your home to its original state. Check out TalkLocal to find a professional near your neighborhood. TalkLocal is free to use and will connect you to a professional that can come at the time that is most convenient for you and your schedule.