Archive for the ‘Roofers’ Category


Different Parts of a Roof

Monday, October 29th, 2012

Different Parts of a Roof Roofers

Understanding the different parts of a roof is not only interesting, but it can be extremely beneficial if you are having a leak or if you are wondering if your roof will really hold during a big storm.  In addition to the actual infrastructure of the roof, there are various names for areas of the roof.  The following is a list of common roof terminology and areas:

–  Dormer:  The structure protruding from the roof that surrounds a window.

–  Roof Truss:  The system of beams making the foundation of the roof.  In addition, rafters are part of the roof truss and run from the top to the bottom of the roof.

–  Hip:  Where two sloping roofs intersect and create an external angle.

–  Valley:  The internal angle where two sloping roofs intersect.

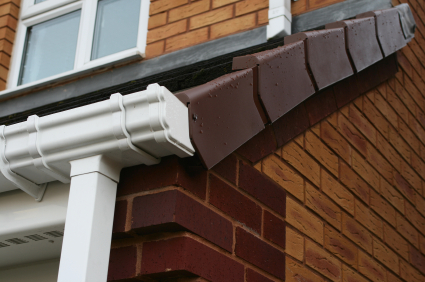
–  Fascia:  The covering of the end of the rafters that is usually used to attach gutters to.

–  Ridge:  The highest point running along the length of the roof.

–  Starter Strip:  Protects the roof from wind and fills in gaps.

–  Eave:  An eave is the lower overhanging of a roof.

–  Gable:  A gable is the triangle projection coming from the roof that is below the highest point on the roof but above the main house.

Check out this roof parts link to get acquainted with the anatomy of your roof and to have a great visual of the layout.  If any issues come up with your roof or you need help now, use TalkLocal to get in touch with a high quality roofer in your area.

Roof Deicing Systems

Wednesday, October 24th, 2012

Roof Deicing System Roofers

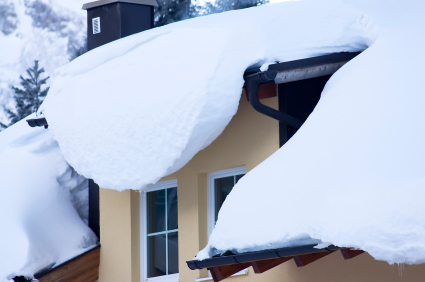
When winter rolls around, the snow can be a gift and a curse. A light flurry may give your yard a seasonal touch, but a terrible snowstorm can collapse your roof. When too much ice and snow collects on your roof, ice dams form and prevent water from draining properly. The ice dams can cause water to collect and freeze in the gutters, which then forces the water to flood into poorly insulated areas. This water can damage your walls, ceilings, and roof structure–resulting in costly repair bills. The worst case scenario is your roof collapsing from the weight of the snow.

Homeowners can avoid this fate by regularly sweeping their roof. Some people who experience frequent snowfall install deicing systems to prevent snow and ice buildup on their rooftops. Roof deicing systems are usually comprised of heated cables or panels installed under roofing material to melt snow and ice. They are installed near the roof overhang where ice dams tend to form.

There are many reasons people opt for this useful technology. For one, it is a long-term and reliable investment; many deicing systems have a warranty that covers up to 10 years, which is good for homeowners who plan to stay in a cold area. A deicing system is convenient way to combat winter weather; without it, homeowners have to manually remove the ice which requires time and effort. A deicing system is also a safer alternative because it doesn’t require people to climb onto the roof.

However, if you still wish to manually remove snowfall from your roof, invest in a roof rake. This is a rake equipped with an extra long flexible handle, a long blade to pull snow off a roof, and wires opposite the blade to break up the snow. It is a great tool for anyone who lives in a snowy area. If you are dealing with occasional snowfall and don’t want to purchase a special rake, you can use a regular one. Be careful not to hit your shingles with the blade. The roof does not need to be scrapped clean, but rather, relieved from a good majority of the snow’s weight.

If you need to find a roofer to repair damages, TalkLocal can connect you to top quality professionals in minutes.

Roof Gutter Replacement

Monday, October 22nd, 2012

Roof Gutter Replacement Roofers

A rusted or leaky gutter dirties the walls and causes erosion. So it is generally a good idea to replace the gutter before it’s too late and the damage becomes too extensive. Replacing your gutter isn’t too much work and it’s cheaper to do a roof gutter replacement than to redo your house to fix up the property value.

How to Replace Your Roof Gutter

First, mark the locations of the gutters before taking the old gutters out. Make sure that your marks are lined up parallel to ground level so that the water won’t rush to one side and flood the gutter when it rains. The marks are best observed by a bright color seen some distance away.

Once the markings are up and ready, carefully dispose of the old gutters. Unscrew the screw in the way that it does not damage the base the gutter was screwed into. You should do this by keeping the screwdriver steady and working slowly.

Using the new parts, install the drop outlets first. You will want to put them in the same spots unless you had problems with overflowing; they are usually spread out about 30 to 40 feet apart from each other.

Install the brackets for the gutters next, taking into account the evenness of each bracket. An unusually high or low bracket will disrupt the consistent flow of water on your gutters. Make sure that the brackets are even by placing a long wooden stick across the brackets.

Then attach the gutter sections, attach the ends to the gutter sections, and secure the down spots to finish up the job. You may want to make sure there are no leaks/unevenness in the replacement. For that, get a garden hose and spray water on your roof to simulate a rainfall. If you see irregular or wrong water flow, identify and fix the problem.

Additional Help

If you feel like you need professional help on roof gutter replacement, TalkLocal can help with finding the correct local experts in this case, saving you time and energy in what may be a stressful situation.

Repair Roof on Mobile Home

Friday, October 19th, 2012

Repair Roof on Mobile Home Roofers

There are a few signs that suggest when it is time to repair the roof on your mobile home. Consider the following symptoms to know when to take action:

– The silver coating material of your roof start to appear thin and accumulate cracks.

– You might see some gaps where there is metal folded over itself.

– At worse, you may start to notice leaks inside your mobile home, signaling holes in the roofing materials.

If you consider yourself a handyman or woman, you might try to attempt repairing the roof yourself. It is extremely important to take precautionary safety measures when completing a task like this. You want to make sure to be stepping on the stable beams of the roof, not between them. Make sure to use a ladder that is tall enough and don’t try to pull yourself up by the materials or pipes on top of the roof.

It is also important to note the specific roofing material that you will need, acquire the correct tools, and maybe even get some help with the project to make everything easier.

If you don’t have any experience with roofing or don’t feel comfortable completing a project like this on your own, contact a roofing specialist. Check out TalkLocal, a free service that will help you locate roofing repair specialists in your area, within minutes. All you need to do is enter your specific problem, your location, and your availability, and TalkLocal will contact top-quality, reliable roofers who will then call YOU directly, ready to help.

How to Install Roof Shingles

Wednesday, October 17th, 2012

How to Install Roof Shingles Roofers

Learning how to install roof shingles on your own is a somewhat complicated process; it’s extremely important that you follow the proper process and take heed of certain precautions. An improperly installed shingle roof won’t be waterproof and may cause water damage. However, if you carefully follow the process outlined below, you should be able to properly install roof shingles without worrying about water damage.

Step 1: Put down underlayment

Before you install the first shingle, you should put down self-adhesive waterproof underlayment three feet to six feet up the eave, so that windblown rain or snow can’t force water up the roof edges. This will guard against any seepage that may damage your home during winter and inclement weather. Likewise, you’ll need to make sure that you already have the proper underlayment and roof edging for the rest of the roof. The type of underlayment and roof edging will be determined by the local building inspector, so call them to figure out what specific building codes apply to your home. When you install the underlayment, there should be at least a two-inch overlap between the sections. Afterwards, nail a drip edge along the side of the eaves and the rakes.

Step 2: Install the Starter Course

Find the center of the roof and then snap a vertical chalk line. Most of the time, people use this line to work left and right toward the rakes, but certain shingles may start along the rake edges, so check the shingle specifications. For the first row of shingles (the starter course), you’ll need to cut the tabs off and then apply them with self-sealing adhesive strips along the eave. There should be a slight overhang past the drip edge.

Step 3: Install the Shingles

You should use four roofing nails per shingles or more if you live in a high-wind area. The first regular row of shingles should be laid on top of and flush with the starter course. Make sure that there are five inches of the tabs exposed, where the bottom tab meets the top of the cut-out. Continue installing shingles until you are finished!

Installing a roof is a moderately involved, multi-day project, so if you don’t have any sort of roofing experience at all, it’s highly recommended that you find a local roofer or handyman to help you out.  TalkLocal is a great way to instantly connect to high-quality professionals in your area so you can get this done fast!

Types of Roof Damage after a Storm

Tuesday, October 9th, 2012

Types of Roof Damage after a Storm Roofers

Save yourself the time inspecting your roof and ask yourself these questions first. If your answers to any of these following questions are yes, it’s time to check up on your roof.

1. Does any part of the ceiling leak inside your house?

2. Do you observe any missing tiles/shingles on your roof?

3. Have you observed strong wind current/hail on your area recently?

Wind Damage

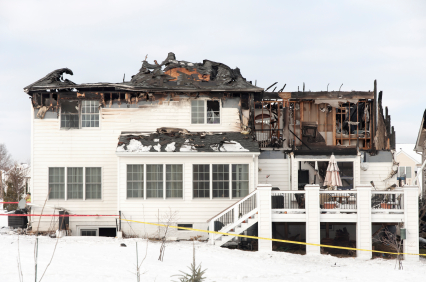
The most common of all the storm damages is wind damage. Wind can either blow and carry away the shingles of your roof or it may blow other objects into your roof, chipping away at the shingles. In extreme occasions you may see that the wind has knocked down or broken off a tree branch. If you are lucky, the tree branch has just fallen on the ground instead of crushing someone’s car or damaging someone’s roof.

If a tree branch does damage your roof, you will need to leverage it if not replace it entirely. Take care to address these damages as soon as possible, because a tear in your roof, along with water buildup, can rot the wooden material below and cause extensive damage.

Hail Damage

One of the other types of damage is the hail damage. This one is pretty straightforward – a block of ice collides into your roof, denting it or knocking out shingles and tiles. Hail damages can be extensive depending on the area you reside. Some areas get hail all the time, while others don’t at all.

It should be remembered that the main factor behind hail damage is the density of the hail, not the size; a small block of ice hurts more than a big ball of snow if thrown into your face. Typically, the kind of hail the makes a sharp noise when hitting your roof causes the worst damage.

Additional Help

If you feel like you need professional help on identifying types of roof damage after a storm, TalkLocal can help with finding the correct local experts in this case, saving you time and energy in what may be a stressful situation.

How to Replace Asphalt Roof Shingles

Friday, October 5th, 2012

How to Replace Asphalt Roof Shingles Roofers

Storm damage, wind, and even time can cause damage to your asphalt roofing. As a result you may notice that it is necessary to replace a few or several of these shingles. Assuming there is no underlying roof or water damage, this is an easy do-it-yourself job with the right materials and an understanding of the steps to follow. Keep reading to learn more on how to replace asphalt roof shingles.

While you could just acquire some cement roofing and re-plaster the loose or slightly damaged shingles, it may be a wiser, longer-term choice to replace these damaged shingles with new ones. Take one of the old shingles to a home improvement store to get a good match of the particular asphalt roof shingles you need.

Wear some work gloves, grab a hammer and some long roofing nails, and head up to the roof with the new asphalt shingles. Start at the top layer of damaged shingles. Use the opposite end of the hammer head to remove the nails. Be sure to inspect the roof underneath for any damages or holes. Work your way down, inspecting the roof as you go.

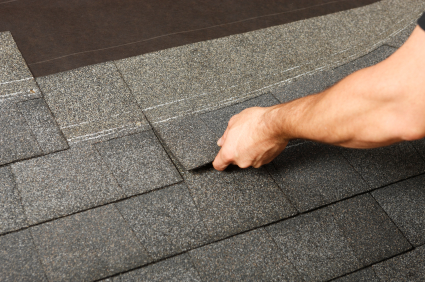
Now, work your way up when replacing the shingles. Start at the bottom layer, and lay a new shingle in place. Nail in the shingle on each side. For this, you will have to slide the shingle under any already existing panels and secure a nail under these overlapping portions as well. As you nail in each one, work your way up until you have replaced all of the damaged shingles.

Check out this extremely helpful step-by-step video to easily replace asphalt roof shingles in minutes.

If your job is too big or difficult to handle yourself, try using TalkLocal to locate a roofing company near you. TalkLocal is a FREE service that will connect you with top-quality, reliable professionals in your neighborhood, within minutes. Simply enter in your problem, location and availability and TalkLocal will contact multiple contractors, who will then call YOU directly, ready to help.

Repairing Roof Shingles

Monday, October 1st, 2012

Repairing Roof Shingles Roofers

Roof shingles experience a significant amount of wear and tear through hot summer days and cold snowy winters. Harsh winter weather conditions can cause the tar and fiberglass in the shingle to harden and crack. If you notice any broken or missing shingles on your roof, use this guide for repairing roof shingles in a few simple steps.

Check your roof for any loose-ended shingles before you begin your repairs. This can be easily fixed with a bit of roofing cement. However, once a piece of the shingle is broken, it is not worth it to try to reattach it. Check your local hardware store for shingles that match the ones on your roof, and purchase a pack that will fit your needs. You will also need a flat pry bar to loosen broken shingles, a heavy-duty knife, a smaller putty knife, a hammer and roofing nails, a tube of roofing cement, and a ladder. Pick these up at your local hardware store if you don’t have them at home.

When you’ve gathered all your supplies and are ready to begin, start removing the broken shingles. Break the asphalt sealer that is holding the broken shingle to the roof and remove the nails holding it in with your knife. If the broken shingle has still not come loose, use the pry bar to finish the job. Be careful not to damage the surface of any good shingles underneath the broken ones.

Once all the broken shingles are removed, you can begin installing the new ones. Make sure to start with the lowest shingle and work your way up. Line up your new shingles with the row you are installing it to, and nail in each tab notch as well as each end. Use about a ¼ inch of your roofing cement to seal any loose tabs.

When repairing roof shingles make sure you follow all safety precautions. This includes wearing sneakers with a lot of grip, enlisting the help of a “spotter,” and using ladder attachments to secure the ladder to the roof. If you do not feel comfortable doing this yourself, call a local service professional to do the job for you. Try visiting TalkLocal to be instantly connected to a professional roofer in your area who fits your schedule.

How to Replace Roof Shingles

Wednesday, August 22nd, 2012

How to Replace Roof Shingles Roofers

You may think you need a professional to replace your roof shingles, but people can actually do it by themselves. However, you must first understand that working on the terrace is dangerous and take all the necessary precautions for it. Use a ladder, let people know you are working up there, and have them steer clear of the area below you. Be careful while working near power lines or TV antennas. Don’t work during wet or windy weather. Most importantly, wear heavy, rubber soled shoes with a non-skid tread.

Now that you know the basics, measure your roof and buy the necessary number of shingles. Make sure you buy a few extra in case your measurements are off or a few shingles break. Also, make sure you choose the right type of shingles if you are only replacing a few damaged ones.

Here are the steps on how to replace roof shingles:

1. Loosen the adhesive under the tabs in the row above the damaged shingle.

2. Loosen and lift the tabs in the first row above the damaged shingle.

3. Take off the exposed nails.

4. Loosed the tabs of the damaged shingle.

5. Remove the tabs.

6. Place a new shingle in the same position from which the sample was removed.

7. Attach the shingle by nailing it in place.

If you have any edges that are loose, pick up roofing cement from your local hardware store. Apply a little to the problem area and wipe away the excess. Once you take care of the minute details, that’s it—you have a brand new roof!

If you are at all uncomfortable with repairing roof shingles yourself, don’t take the risk. There are plenty of roofers in your area who would love your business. Let TalkLocal help you find the best ones who can meet your needs and your scheduling availability.


How to Install a Roof Ventilator

Monday, August 20th, 2012

How to Install a Roof Ventilator Roofers

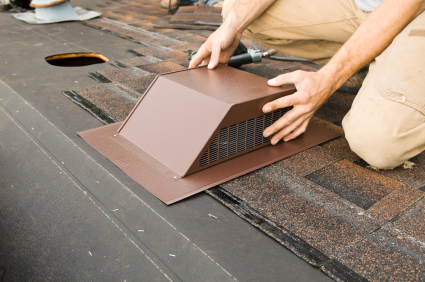
Do you want a more energy efficient and safer house?  Roof ventilators are a good solution.  Roof ventilators or roof vents release moisture from the home that rises to the roof.  They protect the roof from harsh weather to for a longer lasting roof.   Read on for information on how to install a roof ventilator.

1.  Measure the square feet of the attic to determine how many roof vents are needed. (1 vent per 150 square foot area.)

2.  Find a place to put the roof vent and mark by hammering a nail through the attic to stick out.  The roof vents should be at least two feet below the ridge of the roof.

3.  Measure and mark the dimensions ½ thicker on the roof vent with chalk.  Use the nail as a center point for measurement.

4.  Put on safety goggles and cut dimensions with a reciprocating saw.

5.  Remove cut out shingles.

6.  Use a pry bar to remove nailed portions of the shingles and nails where the vent will be installed.

7.  Cut exposed board with a reciprocating saw.

8.  Loosen shingles around the hole.

9.  Apply caulk to the roof vent’s flange and insert beneath the loosen shingles.

10.  Nail the bottom edge of the vent to the roof with a hammer and roofing nails.  Place caulk around and on the nails.

11.  Apply roofing cement to the underside of the shingles around the roofing vent and press them into the flange.

12.  Repeat if you doing multiple roof vents.

After installation, you should experience an instant change.  If you are interested in hiring a professional to install your roof vent for you, use TalkLocal.  This completely free service can connect you to several highly rated roofers in your area within minutes.