Archive for the ‘Roofers’ Category


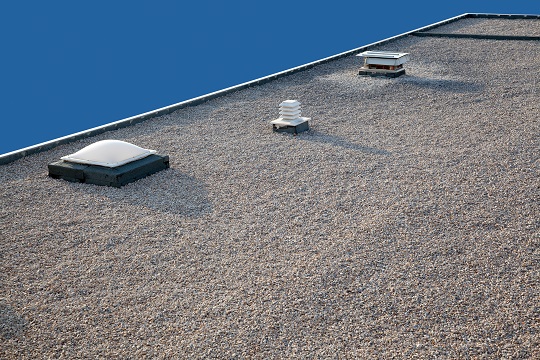
How to Repair Flat Roof

Wednesday, February 26th, 2014

How to Repair Flat Roof - Roofers

Take the time to repair flat roof if you notice that your flat roof is leaking. Leakages in flat roofs are a common problem and can grow the longer that you ignore them. However, don’t assume that the leak on the roof is directly above where it is leaking below. This is because flat roofs have different layers and the watering is seeping through the different layers before it gets to the room below.

No matter how hard you try to waterproof your flat roof, sometimes it will leak.

DIY Kits

There are DIY kits available at your local hardware store that you can use to repair flat roof. Repairs are best made during the summer, when the weather is dry and there is no chance of rain. This is particularly true for flat roofs with a felt covering because they need to dry out.

A New Overlay

If your flat roof has significantly deteriorated, you may need to make a complete overlay of your roof. This is the most advisable route to take when the deck of the roof is still sound but the waterproof membrane has deteriorated. You may need to put new tar in place. A new membrane should be put in place, as well as new insulation.

The best way to deal with a deteriorating flat roof is to replace the deck entirely, including the waterproof membrane and anything else that may be causing the leaks. It’s better to consult a professional regarding this as a new overlay is a task that a single person cannot do, especially one without any experience. This is the time to call in the experts.

Need an Expert Now?

Give us a call today! Seva Call can help you locate a roofer that will help you with flat roof repairs. We are dedicated to giving you the help that you deserve!

Hiring Roofing Repair Contractors

Monday, February 24th, 2014

Hiring Roofing Repair Contractors - Roofers

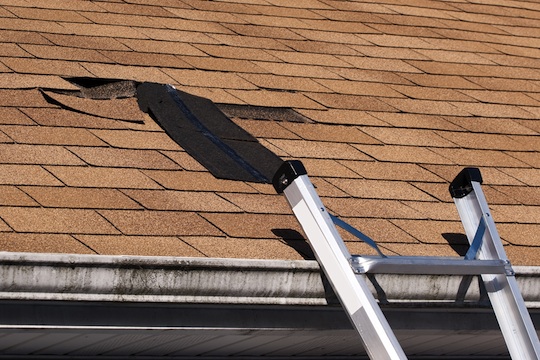
Was your roof damaged by a strong storm? Is it simply time to replace it? Whether roof repair is forced by circumstances or roof replacement is due, you need to consider several important things before hiring roofing repair contractors to ensure a smooth job that will meet your expectations. Here’s what to look for in a professional roofer.

Location

It is best to hire a roofer that has a nearby office. A local contractor is more likely to do a better job, since a huge part of their business relies on maintaining a good local reputation. They would also be able to respond more quickly simply because they are near your home.

Insurance

Reputable roofing repair contractors carry the appropriate insurance coverage for comprehensive liability and workers’ compensation, which will protect you should an accident occur during the job. Ask to see their insurance certificates to verify their coverage. You should request up-to-date certificates from their insurer before starting the job.

License and other Credentials

While a roofing contractor’s license is not required by all states, you want to make sure to choose a contractor with a license if it is required in your state. Do note that a business license is different, is for tax purposes, and has nothing to do with their qualifications or competence. You can also ask for their other credentials that would demonstrate their knowledge and training in the roofing trade.

Length of Being In Business

Obviously, working with established roofing repair contractors is ideal. The fact is, businesses experience a high failure rate within their first three years. However, any business needs to start somewhere, so don’t discriminate blindly. Be reasonable about reviewing qualifications and customer referrals.

Customer Complaint Resolution

Find out from licensing agencies or the Better Business Bureau if any customer complaints have been filed against the roofing repair contractors you’re interviewing. Businesses that have been around for many years may have encountered such problems. What’s also important to look at is how well the contractor resolved the complaints filed against it.

Hire a Reputable Roofer

With Seva Call’s help, you can be sure to hire a qualified and reputable roofer for your roofing project or any roof repair need. Not only that, we’ll connect you with local roofing repair contractors in just a few minutes, and our service is free! Try us now!

How to Use a Vinyl Siding Repair Kit

Thursday, February 20th, 2014

How to Use a Vinyl Siding Repair Kit - Handyman

Quality vinyl siding is a durable material, and it is a beautiful choice that works well with different styles of houses. When properly maintained – which requires minimal effort – it will last a long time. However, siding damage can happen due to a variety of reasons, ranging from severe weather to accidents. When your siding does get holes or cracks, there are simple ways to repair it, such as using a vinyl siding repair kit.

Repairing Small Siding Cracks

You can handle small cracks in your vinyl siding with a basic vinyl siding repair kit from a hardware supplier or home center. To do this, carefully pull up one edge of the cracked area using a toothpick and apply some repair glue inside the edges. Press down the edges to glue them firmly. It is recommended to do this job when it’s warm outside to keep the vinyl pliable.

Repairing Larger Siding Cracks or Holes

First, you need to assemble the necessary tools that are part of a complete vinyl siding repair kit, such as:

– Zip tool

– Pry bar

– Hammer

– PVC cleaner

– PVC cement

– Glue

– Galvanized roofing nails

In addition to the tools above, you will also need to have some scrap vinyl siding that matches the existing one. When you have everything all ready, here’s how to put your vinyl siding repair kit to use:

Step 1: Remove the damaged section. Take the zip tool and insert it underneath the lower edge of the overlapping area of the cracked siding. Press down on the tool and slide it horizontally. Then, use a pry bar or the nail puller of a hammer to remove all the nails.

Step 2: Clean the exposed surface. Using a PVC cleaner, make sure to thoroughly clean the surface behind the siding you just removed.

Step 3: Measure the damaged area that needs to be covered up and cut the scrap vinyl according to size to create a replacement panel. You want to make sure that the panel will be big enough to cover the damaged area completely and then a little bit more around it to prevent the crack from getting any bigger.

Step 4: Glue the panel in place using PVC cement.

Step 5: Nail the replacement panel into place.

First, relock the side. Use the zip tool to pull along the lower edge of the overlapping siding. As you’re working with the zip tool, take the replacement panel and press its top edge up and over the bottom-raised edge of the overlapping siding.

Finding Professional Siding Repair

Some siding damage requires more help than what you can tackle with a vinyl siding repair kit. In such instances, use Seva Call‘s free search service to locate up to three qualified contractors within your area. Then, all you need to do is make the final choice of who to hire. Try us today and get your siding fixed by a pro!

Aluminum Gutter Guard

Tuesday, February 18th, 2014

Aluminum Gutter Guard - Roofers

If you want to prevent your gutter from getting clogged every season and want to invest less time and effort in maintenance work, it is highly recommended to purchase and install the very best gutter guards that you can find on the market. Could an aluminum gutter guard be considered an excellent choice? Let’s find out.

Discover a Plenitude of Appealing Options

Gutter guards protect your gutter system even in the event of a heavy rainfall and prevent buildups. The best types obviously trap the debris and the dead leaves and stop them from going down the gutter. These guards display different design particularities and are manufactured from a wide range of materials, including foam, PVC, plastic, polyethylene, and aluminum. Every option has its fair share of pros and cons.

For instance, plastic and PVC have the shortest life service and thus need to be replaced frequently, simply because they get damaged by the powerful UV rays.

On the other hand, non-ferrous aluminum gutter guards are a much better alternative at hand, since they do not rust and remain in excellent condition for the longest period of time. They look and function flawlessly and represent an excellent investment.

Finding the Right Type of Aluminum Gutter Guards

According to most experts, aluminum gutter guards ensure a superior gutter protection and make you climb less often on your roof. Moreover, they have an aesthetically pleasing design, and the best models display small apertures created to prevent clogs.

Check out different offers from different first-class manufacturers, compare prices, consult online reviews, and make an informed purchase. Aluminum gutter guards will never disappoint you, as long as you don’t forget to inspect them at least every 18 months, or after 2 (or more) consecutive days of heavy rainfall.

Ask an Expert

Don’t know which type of aluminum gutter guard would be more suitable for your property? In this case, just talk to a local roofer and get the best answer to your questions. Find a reliable one with Seva Call, your best connection to the professionals in your area.

Installing Asphalt Shingles

Monday, February 17th, 2014

Installing Asphalt Shingles - Roofers

Asphalt roofing shingles are very durable, and with proper installation, will keep your home protected from water leaks. Installing asphalt shingles may seem to be a difficult task. It does require several steps, but anyone who can follow directions well will be able to complete this job. Here’s how to install asphalt shingles.

Gather Materials

1. Get all materials and tools ready and put them in a utility box so it will be easy to bring them with you when you climb up the roof. Obviously, you will need asphalt shingles, a hammer, and galvanized roofing nails.

Aside from these, you will also need the following: drip edge and underlay (waterproof and self-adhesive), felt roofing underlay (#15), stapler, staples, chalk line, and self-sealing adhesive strip. Also, put on protective gear such as gloves and safety goggles.

Installing Waterproof Protection

2. Install the drip edges along the eaves.

3. Place the waterproof, self-adhesive underlay down over the entire roof to create a barrier that will ensure water will not leak into the home.

4. Next, lay down the felt underlay. There should be a 3-inch overlap between sections so the roof stays completely covered even when some materials become displaced. Install one underlay on top of each other, making sure to put the higher layer on top.

5. At the sides of the roof, put in the rake drip edges. Fasten the felt underlay under the drip edges by stapling it.

Installing Asphalt Shingles

6. Take the chalk line and, from the roof’s top center, snap it towards the edge to create a guide for installing the shingles properly.

7. Use self-sealing adhesive to install the shingles’ starter strip along the edge of the roof. Allow 3/8 of an inch of this strip to extend over the eave so the water will drip instead of seeping in.

8. Nail down the shingles on the first course, using about 4-6 nails for each shingle depending on how windy your area is.

9. Once you’ve laid down the course, make horizontal chalk lines to align the shingles as you install them across your roof and down to the eaves. Let the bottom edges overlay the shingles below it by 5 inches.

Final Steps

10. Don’t forget to clean the area you worked on. Make sure to remove any loose objects to prevent accidents.

Need Roof Installation Help?

Don’t know which roofing company to hire? TalkLocal can help. Contact us with your service request, and we will connect you with local, qualified roofers within a few minutes at no cost to you!

Common Problems of Roof Drains on Flat Roofs

Thursday, February 13th, 2014

Common Problems of Roof Drains on Flat Roofs - Roofers

With a flat roof, being able to drain water from the roof is vital to protect the structure of your home. Having good roof drains on flat roofs is crucial to relieve the roof from the weight of the water collecting on it. However, if there are a few puddles on your roof, those should not pose any concerns with the performance of your roofing system. It’s only normal for flat roofs to have small pools of water after a rain. However, some common problems with flat roof drainage may need to be addressed.

1. The roof is not sloped properly.

If drains are not installed with a sump, the drain ring can create a significant obstruction in the drainage to cause a large pool of water. Consequently, this pool will allow more debris to collect easily on the roof surface, which will only increase the level of water above the roof.

2. The drains were not installed properly.

Primary drains and/or secondary roof drains on flat roofs should be installed at the correct elevation. If the secondary drain is placed at a height that is too low, it will lead to constant water pooling around the drains. Unfortunately, improper installation is quite common, especially if the roofer is not experienced working with roof drains for flat roofs.

3. Some parts are not heavy-duty.

Some flat roof drainage systems have plastic parts, which are not as durable as the rest of the roofing material. When these plastic components deteriorate and fall apart, they end up clogging the drains. Sometimes, they are blown away and the drain is left unprotected from debris.

4. The drainage system is not properly maintained.

In cleaning their roof drains, homeowners usually just drain the water that has backed up the drains without clearing the debris off their roof. When debris is left on the roof, it will only be washed back to the drain when it rains again, causing another blockage to the drain.

Solve Roof Drainage Problems

Let professional roofing contractors eliminate your issues with roof drains, flat roofs, or any roof for that matter. They can check the installation of all roof drains to ensure proper placement and elevation. They can also put in place a regular maintenance program to avoid blockages in your system.

Let Seva Call help you find local reputable roofers now. Send us your service request and we’ll take care of the search for you, for free! Connect with professionals in your area in just minutes!

How to Patch Vinyl Siding

Tuesday, February 11th, 2014

How to Patch Vinyl Siding - Roofers

Have you found a small crack or hole on your vinyl siding? You probably don’t know what caused the damage. Whatever the reason is, what’s important is fixing the damage to make sure moisture, insects, or dust do not enter your home. The good news is you can repair most small vinyl siding damage without hiring a contractor. Here’s how to patch vinyl siding.

How to Patch Vinyl Siding

Step 1: Clean the area of the siding surrounding the hole using a vinyl siding cleaning product or a solution of water and dish detergent. Dry the siding after cleaning.

Step 2: Use a sharp utility knife or shears to cut scrap vinyl siding to the right length, which should allow several inches away from the hole.

Step 3: Again, use a utility knife to cut away the top most section of the scrap vinyl, making sure to cut along the nail hem and not the entire curved edge. Do the same trimming on the bottom edge of the patch vinyl siding, leaving the curved edge intact. After cutting off the top and bottom of the patch, it should be flat with curved top and bottom edges.

Step 4: Press down the patch vinyl siding over the hole. You should be able to fit together the curved edges of the patch with the ridges of the existing siding. However, if the patch will not fit the damaged area, you can make it flat instead by cutting off both curved edges.

Step 5: Fit a vinyl siding caulk of matching color to your siding into a caulk gun. Apply the caulk onto the patch vinyl siding generously and then apply a string of caulk around the hole to be covered.

Step 6: Install the patch vinyl siding over the damaged area, applying some pressure to help the panels adhere together well. Allow the caulk to dry according to manufacturer recommendations. If you want to, you may also apply more sealant along the fringe of the patch. Note: If you ended up using a flat patch vinyl siding, secure it with painter’s tape until the caulk has dried.

When You Need a Pro

If the damage on your siding is large or extensive and requires more than just a quick fix, it is best to hire a professional to assess the damage and handle the repair or replacement of your vinyl siding. Seva Call is just what you need to find a professional contractor right away. Our search and matching service is fast and free. Contact us today!

How to Repair a Leaking Flat Roof

Friday, February 7th, 2014

How to Repair a Leaking Flat Roof - Roofers

If your flat roof is leaking, the first thing you need to do is identify the source of the leak. After you’ve found the source of the leak, you can think about what’s to be done.

Here are some tips that will help you deal with your leaking flat roof.

1. Look for Water Pools, Cracks, and Blisters

Flat roofs are usually made of several layers of tar and felt. Felt might deteriorate over time, as a result of rain, snow, and exposure to sunlight.

If you notice pools of water on the surface of your roof, forming around cracks in the roofing felt, you might have a leak in the room underneath. Also, if you see blisters on your flat roof, it’s a sign that there’s a gap between the top layer and the felt underneath.

2. Repair Your Leaking Flat Roof

If there are water pools on your roof, you need to clean them with a mop or rags, and dry the surface.

If there are cracks, they should be sealed with a roofing sealant to prevent water from infiltrating further.

As for blisters, start by cutting it in the middle to remove the water underneath if there is any. Soak up all the layers and wait until they dry up. You can use a propane torch to dry the layers of the felt. Make sure you use protective equipment and only do it by yourself if you’re comfortable with such a job.

In case you haven’t done it before or you’re not sure what to do, it’s best to get professional help. If water has penetrated the deeper layers of your roof on a larger area, you might need more thorough repairs. In this case, it’s advisable to call a professional roofer and let him inspect your roof.

Need Help?

Have problems with your roof and don’t know who to turn to? Seva Call can help. We can put you in touch with reputable professionals in your area in just minutes.

Great Roofing Restoration

Thursday, February 6th, 2014

Great Roofing Restoration - Roofers

The roof ensures the protection of the overall structure of your home, but it is exposed to weather conditions more than other parts of your house. Just like any other part of your dwelling, it requires periodical maintenance to avoid significant damage. However, over time, problems can appear, and you might even need a great roofing restoration.

There are problems you can detect by simply inspecting your roof from time to time, and do the necessary repairs before things get worse. There can also be more insidious problems, which might require the experienced eye of a professional to be identified. Whatever the case, it’s important to act quickly if you notice that something is wrong with your roof. This will save you money and headaches.

Repairs may range from fixing a leak or broken shingles to great roofing restoration. If you need to restore your roof, it might involve pressure cleaning, sealing, surface treatment, or coating.

Roof Cleaning

Over time, debris and mold may accumulate on your rooftop. If not cleaned at least twice a year, they can deteriorate the tiles, shingles, or other roofing materials your roof may be made of. This may cause roof leaks, and structural damage.

Debris, such as tree leaves and branches are easier to remove, but if mold or mildew has developed on the surface of your roof, you might need some form of professional cleaning. This is best done by a company specializing in roof cleaning and restoration.

Roof Coating

Coating provides a protective layer to your roof, preventing the damaging action of elements, and waterproofing the entire roof surface. When choosing the coating method you need to consider the type of roof you have and the material it is made of. Types of coatings include acrylic, asphalt, metal, and reflective coatings.

Roof restoration provides multiple benefits, including waterproofing, better insulation, as well as corrosion and UV protection. A refurbished roof will increase property value, improving the overall appearance of your house.

Find an Expert

Roof restoration is a major home improvement project, and you might need professional assistance. Seva Call can connect you with experts in your local area to get the job done in the shortest amount of time possible.

Amerimax Gutter Guards

Tuesday, February 4th, 2014

Amerimax Gutter Guards - Roofers

Amerimax has launched on the market a generous selection of accessories that ensure an excellent gutter protection in any given set of circumstances that helps you prevent roofing problems associated with clogged downspouts and gutters. There are several kinds of Amerimax gutter guards that may trigger your complete satisfaction, including the lock-on, snap-in and the hinged models.

The Main Features and Benefits of Amerimax Gutter Guards

Amerimax gutter guards have a few advantages that you may want to consider

a) You can choose from several high-quality materials, including vinyl, aluminum, and steel (painted or unpainted, based on your needs and aesthetic requirements).

b) They look great on any kind of property.

c) They can be installed on existing or brand-new gutter systems.

Reasons Why You Should Consider Purchasing Amerimax Gutter Guards

Amerimax gutter guards are well liked for their reliability, durability, and more than appealing price-quality relationship. According to most client reviews, these products represent a good investment. On www.consumerreports.org, they are listed in the homeowner-installed category and manage to occupy the first position, surpassing numerous popular opponents, like Leaf Pro XL, GutterStuff, or GutterBrush.

Amerimax 85246 ranks third and gets 84 points. It prevents buildups and handles heavy rainfalls in an excellent manner; plus it is fairly easy to install and costs $3.95/foot. Amerimax 85198 ranks second, because it is extremely easy to implement and it costs only $0.30/foot.

Ask an Expert

Don’t know how to identify, purchase, and install the most appropriate Amerimax gutter guards for your property? In this case, just call your local roofer and get the best recommendations from a real pro. Use Seva Call to find reliable specialists in your area fast and hassle-free. The whole process is fun and easy, and will allow you to save time, money, and effort.