Archive for the ‘Roofers’ Category


Flat Roof Materials

Monday, October 14th, 2013

Flat Roof Materials - Roofing

Flat roof materials have a lot of variety. They have their own advantages and disadvantages. Flat roof materials are used for roofs that don’t need to be elevated and are used chiefly for bungalows. These roofs are simple and easy to maintain. They don’t cost a fortune and are economical. If you’re thinking of remodeling your roof, these may be a good idea.

Built-Up Roof

Built-up roofs are also known as tar roofs or tar-paper roofs. These roofs are made chiefly of asphalt felt covered with pitch or liquid asphalt. To provide UV protection, gravel is often added. These kinds of roofs are often found on older buildings. These roofs are very low in cost but have many disadvantages such as not providing enough cooling properties during the summer.

Modified Bitumen

Modified bitumen roofs are also asphalt roofs that have been chemically modified to give them a rubbery consistency. The chemicals most often used to make them rubbery are atactic polypropylene and styrene butadiene styrene. The advantage of these kinds of flat roof materials is that they have a wide variety of surface options. These kinds of roof materials can be heat applied. They are, however, inferior modern materials.

Thermoplastic Polyolefin

This type of flat roof material is highly waterproof and remains waterproof throughout its lifespan. It is non-flammable and is easy to install and repair. It is also very easy to weld and, at low temperatures, remains pliable. This is a very modern roofing material that has many benefits and is fairly new.

PVC Roofs

PVC roofs are by far the most advantageous roofing material. These roofing materials reflect sunlight, making the home cooler in the summer months. They are also easier to install and last longer than other roofs.

Need Help Deciding?

Contact TalkLocal today and we will help you find an expert near you! Roofers can help you find the proper roofing material for your home. Count on Talk Local to connect you with the right professional in just minutes.

How Big Is My Roof

Tuesday, October 1st, 2013

How Big Is My Roof - Roofers

Most homeowners can’t estimate the size of their roof until they are forced to conduct or supervise a roof repair project. When it comes to purchasing materials, they start asking themselves the following question: How big is my roof, and how much should I invest in construction materials? Keep reading to learn how to measure your roof fast and trouble-free. Also find out how you could identify the best roofers in your area, providing professional services designed to simplify your assignment.

1) Draw a roof diagram

Start by drawing a sketch of your roof. This will help you measure every roof section faster and easier. A proper visualization will allow you to come up with correct measurements.

2) Calculate the area of the triangular surfaces of your roof

This process is not as difficult as you might be tempted to think.

Calculate the area of the triangular surfaces, using this simple formula: LxW/2.

In other words, measure the length and the width, multiply the numbers and then divide the result by 2. Don’t forget to write down the final result on your roof diagram.

3) Calculate the area of your rectangle-shaped roof surfaces

Use this basic formula to calculate the area of the rectangular sections of your roof: LxW= SQUARE FEET.

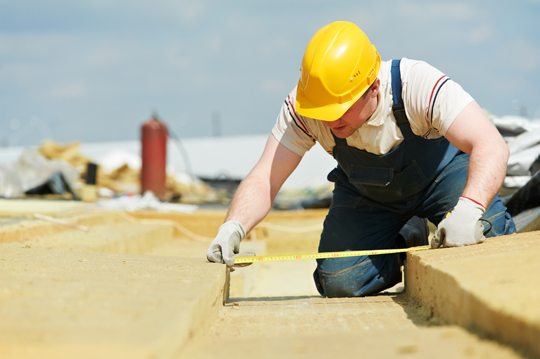
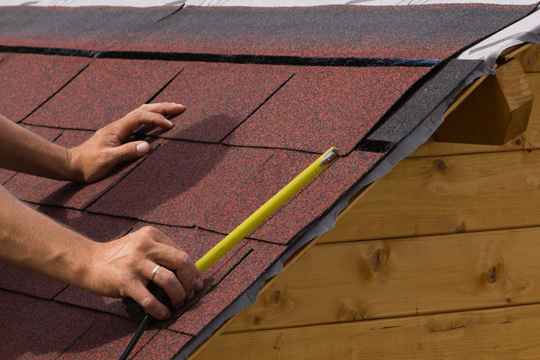
Measure the length and the width of each area using measuring tape and then multiply the numbers to obtain the number square feet of your rectangular surface. Add the numbers obtained for each section to come up with the total number of square feet of your entire roof.

4) Estimate the amount of construction materials required by your project

After putting all of these numbers on paper, you’ll have to figure out the exact amount of materials that you need to purchase for your project. The square of your roof is the total number of square feet divided by 100. Based on the “square” of your roof, you can determine the amount of materials required by this assignment.

Ask for help

You might be wondering: How big is my roof? Hopefully, these tips will offer you an accurate answer to this question. When in doubt, don’t hesitate to contact a skilled roofer who could easily address your needs and concerns. Find the best one with help from TalkLocal, a free service designed to put you in direct contact with trustworthy, dependable professionals who are at your disposal.

What Are Roofing Squares?

Wednesday, September 25th, 2013

What Are Roofing Squares? - Roofers

Most people who are trying to build a new home or to conduct a house renovation process have a hard time trying to understand several technical terms used by professionals operating in this line of work. For instance, one might not be able to understand the exact specifications given by a roofer hired to build or repair the roof area. Keep reading to find out what are roofing squares and how to get accurate answers to all of your roofing problems that might be on your mind at this point.

The term “roofing squares” is frequently used by experts specialized in exterior siding, and refers to 100 square feet of roof shingles. You should also know that 100 square feet is the equivalent of 10 feet by 10 feet (10 feet X 10 feet). Constructors use roofing squares to talk about massive quantities of roofing materials, because it wouldn’t make much sense to count shingles individually.

In other words, shingles are available in bundles and generally speaking, one roofing square is the equivalent of 3 or 4 shingle bundles. For instance, your contractor might tell you that 23 roofing squares would be enough to cover your entire roof area, measuring 2,233 square feet. Use this information to understand exactly how much roofing material you actually need and to be on the same page with your roofer at all times.

Constructing or renovating your roof is a costly, time-consuming assignment. This is precisely why you need to rely on excellent professionals, allowing you to choose the perfect materials and helping you complete this important project in a timely manner.

If you want to find the very best roofers who can address all of your problems, share your vision, and enable you to take pride in an appealing, fully functional roof, rely on TalkLocal. We are your reliable, free service that connects you with first-class roofers in your area, and ensures high-quality services and expert guidance around the clock.

Remodeling to Add Space: Roofing

Monday, September 16th, 2013

Remodeling to Add Space: Roofing - Roofers

You may be remodeling to add space to your house, and you may need to expand your roof to accommodate a new wing. Here, we show you how to add a new roof to your new space.

Roof Extension

This is a roofing option where you add the roof to the gable area located right at the end of the house. It’s a fairly easy solution, because you are simply adding more roof to an existing space. This solution is low-cost and simple, though unusual because it usually occurs at the back or front of the house where your yard space is located, and you have to take into account the average roof size as well.

Shed Roof

Many house owners will find this to be the most simple and most cost-effective solution. It’s a simple roof that is attached to the house at the highest point and slopes down to the addition’s outer wall. However, it is not really that attractive and some neighborhoods have various codes banning this kind of roofing. This kind of roofing can use shingles to make it more attractive, but it doesn’t do much.

Gable Roof

A gable roof is basically made up of two slopes that meet at a higher point in the middle of the roof. This is by far the most attractive option. It will add elegance and sophistication to your house and it will make it look as if the addition that you made was actually part of your house to begin with. The gable roof is preferable to any other type of roofing because of this feature. It is more expensive to build, but the aesthetic value is far more impressive.

Need Help with Roofing?

Want help when remodeling to add space? Contact TalkLocal today and we will help you find a roofing professional near your area!

How to Install Solar Panels on the Roof

Wednesday, September 11th, 2013

How to Install Solar Panels on the Roof - Roofers

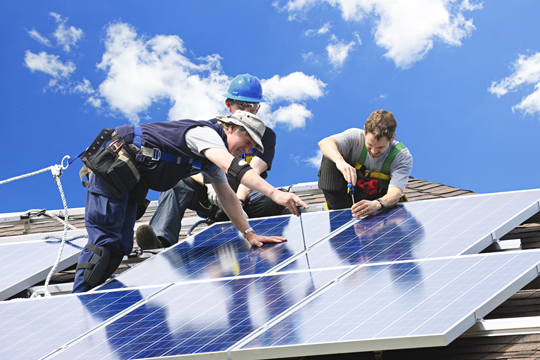
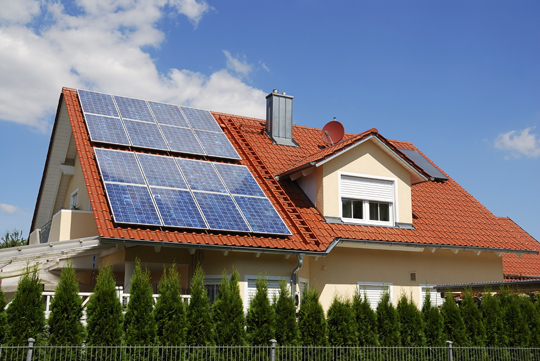
If utility costs have really put a wrench in your ability to pay other bills, it is time to start looking for money-saving alternatives. Those can include a method of saving energy and money at once. That method would be the installation of solar panels on your roof. The average cost of solar panels is not nearly as high as you might think when initially considering this avenue of saving money and energy.

Take Each Step as It Comes in the Installation Process

This task is not as difficult as it may initially seem. It is a significant investment and a challenge of sorts. How challenging it is will depend on the slope of your roof and some other factors, such as nearby trees that shade your home.

How to Install Solar Panels on the Roof

Make sure to check with the local zoning board about all necessary permits and even the benefits of having solar panels installed, if there are any in your area.

Installation of solar panels requires understanding of the best layout for your home. Bringing in the professionals means peace of mind that the job has been done in the best and most efficient way possible.

There is a very organized way to do the installation, regardless of layout for your home. Be sure to carefully follow the best organization so the solar panels are beneficial to your home energy consumption.

Address Technical Issues with Experienced Professionals

Once the project is committed to, other concerns may arise. There may be technical questions or financial considerations. Questions about the technical aspect, like roof valleys, can be easily answered by a professional.

If this project is becoming a bit more than you feel comfortable tackling, make a call to Talklocal. Even if you think you can handle it, but you aren’t willing to put in the time that it will take to do the job right, make the call. Professionals can take the task on while you handle the numerous other things you have on your to-do list.

Roofs for Gazebos

Tuesday, September 10th, 2013

Roofs for Gazebos - Roofers

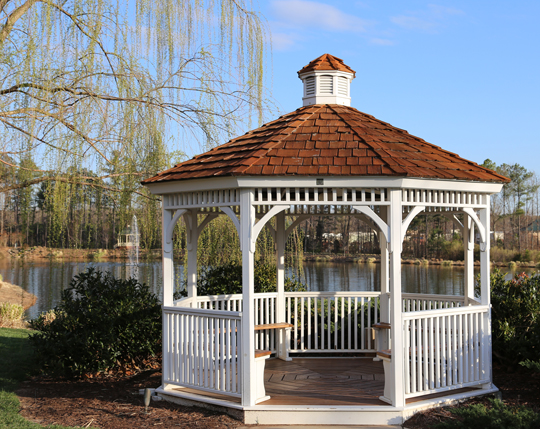
A beautiful, spacious, ingeniously decorated gazebo is an ideal feature for a big backyard or for a park. Perfect for small parties and any other social events, gazebos can easily become an oasis of relaxation, much-appreciated by homeowners and their guests. However, a kiosk can easily turn out to be a bad investment if its roof is not solid enough – and especially if it requires frequent costly repairs. Want to design and build the perfect summerhouse on your property? In this case, keep reading to discover everything there is to know about durable, cost-effective, appealing types of roofs for gazebos.

Types of gazebo roofs that you should consider

If you don’t want to be forced to deal with leaky roofs in the near future, don’t cut corners. Choose to go in favor of high-quality roofing materials.

Canvas: Canvas is the perfect option for temporary gazebos, which you would only use during the hotter seasons. Canvas-based kiosks are easy to assemble, lightweight, and portable, so you can take them with you and install them wherever you see fit.

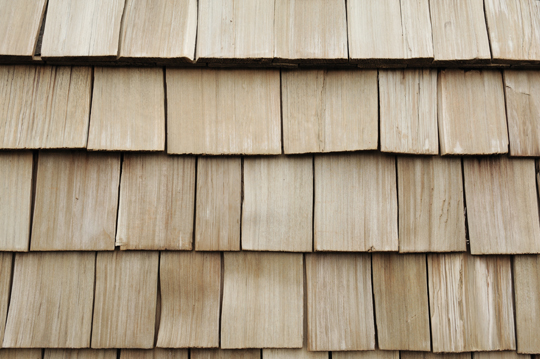
Cedar shingles: Cedar shingles are great for rustic gazebos; you could definitely opt for this design idea, as long as you can rely on a significant budget, as cedar shingles can turn out to be quite expensive. If you can’t afford commercial shingles and you have plenty of time on your hands, you could create your own roofing material by using a cedar log, a froe, a shave horse, and a sharp axe.

Metal: If you’re not a big fan of rustic, wooden gazebos, you could use metal as roofing material. It is very accessible, resistant, and waterproof, as long as it is properly installed. In order to enhance its durability, you could choose to apply a coat of paint over the metal sheets, which will ensure an effective protection against corrosion while also boosting its curb appeal.

Thatch: If you’re looking for a one-of-a-kind design idea for your kiosk and you are willing to invest a significant amount of time and money in this project, layers of dry vegetation could be the best material at hand for you. Remember that it might be difficult to find a skilled thatcher, helping you create an ideal, 100% waterproof roof for your gazebo.

How to find the perfect materials to start your project

Are you worried that you might have a hard time trying to find and analyze the very best roofs for gazebos? In this case, ask for expert guidance and professional services brought to you by competent roofers operating in your own area. Find the most gifted specialists with help from TalkLocal, your free, indispensable source of information, offering simple, inexpensive solutions to all of your daily challenges.

Roof Valley Repair

Friday, September 6th, 2013

Roof Valley Repair - Roofers

Roof valleys are most prone to water damage problems, as most water collects here before being channeled down. Keeping the roof valley clean and in good shape is necessary to keep the house free of water damage. In due course of time, most roof valleys do develop a few cracks or leaks that must be fixed immediately to avoid further problems. Any delay leads to leakage and then problems with water logging, rot, and structural damage following.

Performing the Perfect Roof Valley Repair

Taking care of your roof valley and performing timely repairs and maintenance is easy enough. The trick is to check regularly and fix problems while they are still small. Take a trip to the roof about every six months. Using a broom, brush away all debris like leaves, branches, seeds, etc. Not only will this help avoid problems like sprouting, but also any cracks or damage will become easily visible. This way you can perform quick repair and prevent the problem from growing.

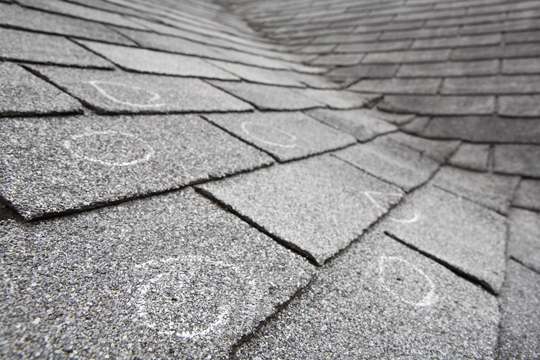
Choose dry weather for performing roof valley repairs. Inspect the roof valley thoroughly for any shrinkage, cracks, gaps, loose shingles, etc. Also take a look at the chimney while you’re up there to see for any problems there.

If you spot any cracks or holes, however small, apply sealant to the affected area using a putty knife. If there are any missing or loosened shingles, carefully replace them. Seal the shingles and flashing firmly using roof tar in a continuous bead. This way, you will have effectively sealed the edges of the roof valley, making sure there is no possibility of a leakage in the future.

Don’t ever use nails for securing shingles or flashing within 6 inches from the valley seam. Doing so can increase the chances of water seepage. Outside the 6-inch radius, however, make sure you securely fasten all shingles using nails or roof cement. Usually, shingles near the valley are less prone to being damaged, unless subjected to extremely heavy winds or rain. However, if you wish to set up an extra layer of safety, try weaving shingles underneath the existing shingles for a closed valley appearance that is much more waterproof and has plenty of aesthetic appeal.

Get a Professional for Your Roof Valley Repairs

If you are looking for professional roofers to perform your roof valley repairs, TalkLocal can help you find the best one. We do the research and connect you to the best professionals in your area so you can have your roofing job done to perfection.

Cost of Installing Solar Panels is Temporary Holdup to Long-Term Benefits

Thursday, September 5th, 2013

Cost of Installing Solar Panels is Temporary Holdup to Long-Term Benefits - Roofers

The installation of solar panels is a method of saving money and becoming energy efficient. Sometimes, the price tag that comes with the initial installation turns potential installers to other options or back to traditional energy means. Like a new water heater or a new furnace, however, the initial cost of installing solar panels is far outweighed by the length of time the equipment will work efficiently and the money that will be saved that way. The immediate cost must be balanced with those long-term benefits and the fact that you rely less on an aging electrical grid and more on power harnessed via the solar panels on your own home.

The installation of solar panels has been progressively decreasing in cost over the years. Recently, it is becoming much more economically feasible to start having more say in the energy costs for your home.

Determine the Best Energy-Efficient Efforts for Your Home

The cost and options for the most energy-efficient roof systems are varied. It is best to spend some effort to research this before committing to one system or another.

The mere fact that there are different methods and options for this type of installation is reassuring in that technology and societal standards are coming together to benefit the environment and the homeowner at the same time.

The solar panels installation guide addresses the many challenges and considerations when attempting to install solar panels. It is reassuring to note, however, that despite the time, effort, and cost of installing solar panels, the outcome is most definitely worth it.

Take Care to Meet All Zoning Board Requirements for Long-Term Success

For residential roof inspections, it is important to recognize and meet all local standards for installation and roof requirements. This allows for a smooth time whenever an inspection is needed. This should not happen often. However, being prepared alleviates stress and additional cost or hassle if a requirement is not met.

If concerns remain, don’t hesitate to make a call to TalkLocal. The professionals that can be reached through Talk Local can alleviate those final concerns and have you well on your way to project completion in no time.

Roof Valley Construction

Monday, September 2nd, 2013

Roof Valley Construction - Roofers

A roof valley is the joint where the two slopes of a roof meet. Proper roof valley construction is the best way to make sure no water collects in the joint and seeps below to damage the shingles of the roofing. The best way to perform a systematic roof valley construction is to use a metal flashing to cover the joints.

Roof Valley Construction Tips

1. Seal the roof valley entirely with tar paper. Start at the bottom near the eaves and place sections of tar paper such that each piece above overlaps the piece below by 6 inches. This will make sure no moisture gets under it.

2. You can now get started with the metal flashing. Always try to get a flashing at least 24 inches wide so that it covers at least 12 inches of roof on both slopes. Bend the flashing right in the middle in such a way that it fits perfectly in the valley. The easiest way to do this bending is using a large tool called a “break.” It can be found in hardware stores, and your best bet would be to take your flashing there and have them do it for you.

3. Now carefully lay the flashing atop the already-placed tar paper in a way that it fits perfectly and adheres to both sections of the roof. Position the flashing and firmly nail it in place. Make sure you press in all nails very close to the edge of the flashing so that it will be covered by the shingles on both sides. Do not have any nails near the crease in the middle.

4. Make sure that you carefully shingle the roof. Choose the right shingles that look good and provide flawless protection from the elements. Place shingles on both the sides and trim the shingles carefully to finish with a neat and tidy look. Performing high quality roof valley construction ensures that your home stays effectively protected from the elements.

Get Professional Roofing Help

Projects like roof valley construction are best left to professional roofers for a complete and infallible job. If you need a roofer, TalkLocal will do the legwork for you and bring the best professionals in your area directly to you. Just give us a call or drop by our website.

Average Roof Size

Thursday, August 29th, 2013

Average Roof Size - Roofers

Estimating the average roof size needed for your home may be a hard task. The proper roof will help you save the energy that you use. The size of the roof determines how much it costs, and depends on the square footage and slope of your house. The materials used for roofs are usually sold in square. A square of roofing material is typically measured to cover 100 square feet of the roof when it is put in place. This per manufacturer’s instructions.

The most convenient way to estimate how big the roof is and how much material is needed is to look at building plans or hire an expert to measure the roof.

Estimating the Average Roof Size

If the house’s design is simple enough, an approximate size of the roof can be made by measuring the ground area and taking into account the roof overhang and considering the slope of the roof. In more complex houses, however, you may need to measure the average size of the roof according to each room or wing of the house. The size will also determine how much the roof will cost. Installation costs such as the materials used and the labor should be taken into account.

How to Determine Costs

The cost of the average roof will also depend on the type of materials used and the number of squares required. Some roofing materials, for example, will let you stay cool in the summer heat. Aside from the general layout of the roof, small spaces such as sky lights and chimneys will also affect the cost of the roof, although they are usually a small deduction.

Getting Help

If you need a professional to determine the size of your roof, contact TalkLocal today! We can help you find a professional near you that will give you an estimate of the roof size.