Replacing Sewer Line Costs

Friday, March 14th, 2014

Replacing Sewer Line Costs - Plumbers

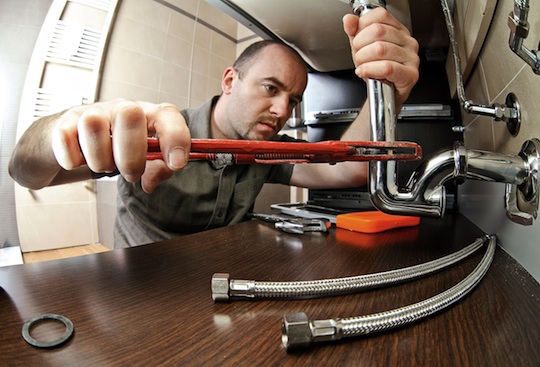
If your sewer line is damaged beyond repair, you need to replace it. This can be a costly and labor-intensive job. However, costs will vary from case to case, depending on the location of the sewer line, the materials that are going to be used, and the length of the pipe. Generally, you can expect to pay at least 2,000 dollars for sewer line replacement, or around 80-100 dollars per foot.

Here are a few tips to help you get an idea about what to expect when it comes to sewer line replacement.

How Bad Is It?

To determine what needs to be done and what costs are involved, you need a professional inspection. A plumber will be able to tell you if you need to replace or just repair your sewer line. One way to diagnose the problem is to insert a camera down the pipe to identify what is wrong. This adds to the cost, but it might save you time and money in the long run. It might not be necessary to dig a trench or to remove the whole pipe. Visual access to the interior of the pipe can save you a lot of trouble.

Ease of Access

The location of the sewer line is a decisive factor for a correct estimation of the replacement costs. Because the sewer line is buried under the ground, you may need to dig a trench in your yard or tear up your driveway to access it. Although you might need to replace just a part of the pipe, the costs will have to cover the excavation and re-landscaping operations.

Replacing Sewer Line by Relining

Replacing sewer line costs may be lower if your circumstances allow it because it doesn’t require that much excavation. Relining is a method, which allows the plumber to install a new pipe into the existing one without digging a trench. This way you will avoid post repair costs.

Need Plumbing Assistance?

Contact Seva Call, today and we will connect you with three local plumbing companies specializing in sewer line replacement. You can ask for an estimate and have the problem solved right away.

Window Screen Repair Tips

Friday, March 14th, 2014

Window Screen Repair Tips - Window Replacement

It’s common for window screens to be torn or damaged. If the window frame is still intact, window screen repair is quick and easy. Here are the steps to fix and restore your window screen to good condition:

Step 1: Remove the old screen spline. Use a pointed tool like an awl or a screwdriver with a narrow tip to pry it out. Discard the old spline because it’s most likely already brittle and cannot be reused.

Step 2: Position the window frame securely. Secure the two longest sides of the window frame to the surface you’re working on by placing blocks of wood all along their inside area. The blocks will prevent the frame from bending inward when you attach the new screen.

Step 3: Arrange the new screen. Take the replacement screen material and position it over the window frame, overlapping it by about ¾ of an inch to a full inch. Make a 45-degree cut on each corner of the screen just a little beyond the groove of the spline to keep the screen from folding up in the corners.

Step 4: Install and trim the new screen.

To install the replacement screen, start by pushing in the new spline at one corner. Push both the spline and replacement screen into the groove using a screen-rolling tool. Continue doing this around the window frame. Take out the spline and roll again if there are wrinkles.

Once window screen repair is done, use a utility knife to cut out any extra screen material. Make sure the blade of the knife is sharp, because a dull one will only pull the screen and damage it instead of cut it. When cutting, the blade should be above the spline and facing out of the frame.

Ensure Adequate Screen Tension

An important part of window screen repair is making sure the screen has proper tension. Too loose and the screen will droop. Too tight and the screen can bow inwards in the aluminum sides, particularly on large windows. To get the right amount of tension or slack, put a heavy object like a brick in the middle of the screen once you’ve rolled it in on the first two connecting sides. Finish installing the new screen and remove the object from the center.

Let a Pro Fix Your Window Screen

If you’re looking for professional window screen repair, Seva Call can help you find qualified professionals in your area. Let us know what service you need and we’ll match you with the best local contractors in no time and at no cost!

Cold Resistant Paint

Thursday, March 13th, 2014

Cold Resistant Paint - Painters

Years ago, paints could not be applied unless temperatures were at least 50 degrees Fahrenheit. Nowadays, things have changed, and the paints have considerably improved. Researchers have come up with a formula that allows you to apply paints even at 35 degrees F.

What’s the Magic Formula?

A cold resistant paint’s formula is based on acrylic, a plastic molecule. The acrylic is a polymer derived from the acrylic acid, of which millions of kilograms are produced each year. Therefore, you have a fast-drying paint, which contains an acrylic emulsion that helps the pigment dry faster, and resist longer.

What Rules Should You Follow?

This type of paint allows you to paint or have your house painted at low temperatures. Nonetheless, you should be very careful if you choose to use it. It is recommended to apply cold resistant paints according to the manufacturer’s specifications, but never under 35 degrees F.

When using this kind of paint you need to consider both the temperature of the air and that of the area, which is being painted. Here are some rules you should follow if you don’t want to get the expected results:

1. Check the label for the “35 degrees F” specification.

2. Check the wall’s temperature with a thermometer.

3. Prim your wall before painting.

4. Apply the painting somewhere around noon.

You should always look thoroughly on the label of the product you plan to buy. Then, when actually starting the work, you must be sure that both the temperature of the air and that of the surface you intend to paint aren’t below 35 degrees F.

For the wall’s temperature, use an infrared thermometer. After doing this, there is another very important step: prim your wall – this will ensure a good spreading and distribution of the product. Finally, paint your walls between 10:00 and 15:00 at the latest, so that there is enough time for them to dry up.

Need Professional Painters?

If you are not sure whether your walls should be painted using this type of product or if you need further explanations from an expert, you can give us a call. Seva Call can find the right professional for you.

Wall Speaker Wiring

Thursday, March 13th, 2014

Wall Speaker Wiring - Electricians

Installing the cables of your audio system speakers in the wall will keep the room tidy, improving its overall appearance. Like with all device installation, if you don’t feel at ease handling various tools and working around electrical wires, it’s best to call a professional electrician who can do the job for you.

Before you start wall speaker wiring, you need to make sure you are aware of all instructions and precautions regarding building construction and fire safety. Prior to drilling or cutting any holes into the walls of your house, you should know exactly how they are made and what’s behind them. You don’t want to hit any electrical cables or drill holes in the wrong place. Also, read and closely follow manufacturer’s instructions for speaker installation.

What Do You Need to Do?

There are several steps to take when installing the speakers of your audio system in the walls of your home. Here are some guidelines.

1. Turn the power off before you start working to avoid being electrocuted.

2. Choose the location of your speakers. Locate wall studs with the help of a stud finder. If your wall does not have a stud frame, you won’t be able to proceed with installation.

It’s important to know what’s behind the wall and how it’s made, to install speakers properly and safely. In case your walls are made of brick or concrete, it is advisable to get a professional to do the job. This will save you the trouble of being stuck at some point during installation, and will allow you to avoid unpleasant surprises.

4. Drill a hole in the spot where you want to place the speakers. Use a wire to check whether there’s plenty of space to install the speakers.

5. Check the sizes specified in the owner’s manual and verify the location of the speakers to make sure they fit.

6.  Install the speakers.

Need an Electrician?

Not sure you can handle this yourself? Seva Call can connect you with a certified electrician in your local area so you can make sure your speakers are installed properly.

How to Create Rock Flower Beds

Thursday, March 13th, 2014

How to Create Rock Flower Beds - Landscapers

Give your landscape a refined look as if it’s done by a pro by simply updating your flowerbeds and adding borders around them. There are several options in material to choose from for your garden edging such as rocks. Creating rock flower beds will create a durable border around your blooms that is beautiful and natural.

You can use stone in your landscape in various ways, and many different types of stones are available as well, so you can be very creative with designing your rock flowerbeds. Here are some ideas:

Planning

Lay out your design for your rock flowerbeds on paper. List all the materials you need, from the decorative stones and rocks to the greenery and plants. Be familiar with all your options so you can choose what will work best together. Plan the amount of materials you will need by measuring the space you’ll be working on.

Cleaning

Clean out the material that your existing flowerbeds are made up of such as wood chips, wood shavings, dead leaves, peat moss, pine straw, or shredded bark. Tidy up the area surrounding the greeneries you want to retain in your rock flowerbeds. If necessary, shovel out weeds and other debris. Take all these unneeded materials to a compost bin.

Planting

Once the flowerbeds are clean, start planting any new plants or greenery you want to add. Shrubs are ideal additions because they require minimal maintenance but you can certainly plant more flowers. You can also add other decorative accents such as clay pots, bird feeders, mini statues and sculptures, lanterns and globes.

At this point, install a weed barrier, or what’s called a landscape fabric, over the flowerbeds. Make the fabric overlap when installing over small areas so the weeds will not creep up the seams. Use small stakes to keep the fabric down in place.

Arranging the Rocks

First, lay decorative border rocks around the edges of the flowerbed. Doing so will help keep small stones to be washed away from the bed and will add more interest and texture to the garden.

As for the actual rock flowerbeds, you can just spill out the rocks in the area and they can be about two-inches deep. Additionally, and this is more fun especially when you have different rock materials, you can arrange the rocks in a particular style or design.

Upgrade Your Home Landscape

Get matched to a professional landscaper in your area with the help of Seva Call. Describe your service needs and we’ll do the search for you – free, convenient, and quick. Try us now.

Flat Roof Restoration

Thursday, March 13th, 2014

Flat Roof Restoration - Roofers

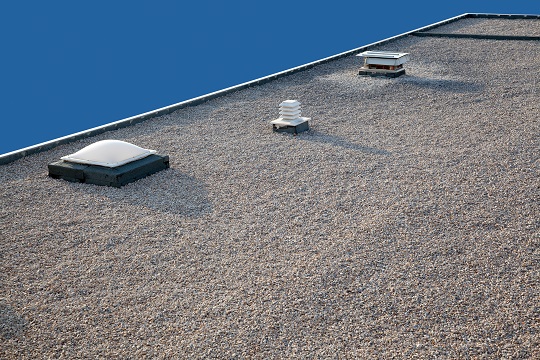
Aging, weather conditions, and climatic variations have an impact on your roof. There comes a point when repairs and even restoration are necessary to ensure the comfort of your home. If you have a flat roof, you need to become familiar with the restoration requirements that apply to flat roofs.

To be sure your flat roof restoration is done properly and with the right methods, it is advisable to entrust this job to experts. Companies specializing in this type of restoration will know exactly what to do, and you will gain the peace of mind that your roof is properly repaired.

Flat roofs can crack over time and can accumulate water in some parts of their surface, which can lead to holes and leaks. The most important factor to consider before initiating flat roof restoration is the material your roof is made of. Older flat roof repairs may require materials such as rubber compounds or sheet membranes, while newer flat roofs may need different types of coatings, such as elastomeric coatings. To be on the safe side, consult a specialist before beginning restoration.

Asphalt Flat Roofs

Asphalt roofs tend to shrink over the years due to exposure to sunlight, which can cause cracks to appear on the surface of your roof. Needless to say, cracks make room for water infiltration, and you end up with unpleasant leaks that are sometimes hard to spot, if the roof substrate has been affected. The solution is to apply an asphalt-based coating to seal the entire roof surface.

Metal Sheet Application

Some homeowners prefer to refurbish their flat roof using metal sheets due to their superior durability. Metal sheets improve the appearance of your roof and increase its resistance to elements. However, if you decide to choose this type of flat roof restoration, you need to know that the process is relatively complex and requires expert training and tools.

Find Help

TalkLocal can connect you with experienced roofers in your area who can get the job done well and quickly. Our service is free and effective.

Five Star Service at Five Star Cleaners

Thursday, March 13th, 2014

Five Star Service at Five Star Cleaners - Tailors

Based in San Antonio, Texas, Five Star Cleaners is the city’s top dry cleaning company, with 18 branches throughout the city. This award-winning company offers a wide range of services to meet all dry cleaning and laundering needs of customers.

An Array of Services

Special Occasions and Luxury Aparel

Five Star Cleaners specializes in cleaning special occasion garments, from couture dresses and dresses to very delicate wedding gowns. As you may know, wedding gowns must be handled with utmost care. This company is highly experienced and trained in handling the most delicate and intricate of wedding gowns, being the only South Texan company to belong to the Association of Wedding Gown Specialists.

Five Star Cleaners can also help preserve any special clothing.

Formal Attire

As with special occasion clothes, formal suits also need specialized cleaning. Bring your tuxedos, shirts, ties, and any formal attire to Five Star Cleaners for expert cleaning.

Leather and Suede

Leather and suede fabrics require special cleaning methods, which this company also specializes in.

Household Items

In addition to clothing, Five Star Cleaners can also clean and freshen up home items such comforters, blankets, pillows, duvets, linens, and drapes.

Alterations

Five Star Cleaners has expert tailoring services to help give your clothes a perfect fit. Their experienced tailors can handle hemming, zipper replacements, size alterations to take in or let out the clothing, and other small garment repairs.

Catering to Customer’s Needs

Five Star Cleaners knows customers have different schedules and time constraints, so they offer the following special services:

Same-Day Service

This is for customers who need quick dry cleaning or laundering services to be done within the same day. This service is available only during weekdays. Just drop off your garments before noon and you can pick them up by 6 pm on the same day.

One-Hour Service

If you need even faster service than same-day, Five Star Cleaners offers this service, which promises to get your items clean and ready within one hour. This is also available only from Monday to Friday. Again, you just have to make sure that you drop off your clothes before 12 noon, and you can return for them in just one hour.

24-Hour Drop Off

Clothes can be dropped off any time in most of their locations.

Need Tailoring Services?

Not sure who to call when you need professional clothing alterations? Get in touch with Seva Call first. We can connect you quickly to the most reliable tailors in your area. Contact us now!

What to Do If Your Water Supply Line House Breaks

Wednesday, March 12th, 2014

What to Do If Your Water Supply Line House Breaks - Plumbers

Your home’s water supply line gives you fresh, clean water every time you turn on a faucet. Whether you use it for cooking, taking a shower or cleaning, you expect the water to run clear and work every time you use it. The water that you use in your home is delivered via a water supply line house that connects to a water supply line in the street.

Most water supply lines work just fine for decades, but as with anything in life, there may come a time your water supply line starts to leak or breaks. There are ways to tell if your water supply line is having an issue. Most commonly you’ll notice:

– A sudden, unexpected drop in your home’s water pressure

– Pooling water or a reccurring wet area in your yard

– A discoloration to your water — such as a yellow or brown tint

If you notice one or all three of these, it’s likely your water supply line has a leak or has broken.

Find the Leak

Look for pooling or ultra-wet areas on your yard. These can help you locate the area where the water supply line has broken. If you don’t see obvious signs of where the broken line is, you can use an electronic device — available at most home improvement stores — to help you determine the exact location of the break or leak.

Turn Off the Water

Contact your city’s water company and notify them of a leak or break in your line. You’re the owner of the water supply line to your house; therefore, they will not fix it for you. They may, however, refer you to a plumber in the area who can help repair or replace the line. They can also turn off the water from the main line. You’ll need to turn off the water supply to your house.

Contact a Repair Professional

Get help with your water line repair from a skilled plumber by calling Seva Call now. We can instantly connect you with a professional plumber in your area who can diagnose your issue and repair your water line often in the same day.

Fix Mailbox Post

Wednesday, March 12th, 2014

Fix Mailbox Post - Handyman

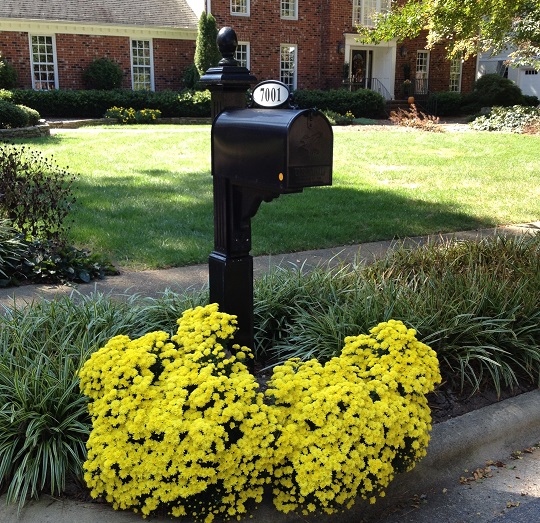
Weather, accidents, or simply time will take a toll on your mailbox post. Sooner or later you’ll have to fix or replace it. Fortunately, this is an easy job that you can do in a couple of hours. Here are the main things you need to know for your fix mailbox post project.

1. Check the Old Mailbox Post

Is your old mailbox post broken or only loose? Is it set in cement or into the ground? If it’s set in cement, you might want to change its location, because it’s difficult to remove the old cement. You can place the new mailbox post nearby or nail the new post into the old spot.

2. Find another Mailbox Post

When you plan to fix a mailbox post, you need to consider the length of the post. According to federal regulations, your mailbox post should be 41-45 inches long, so remember this when you choose a new one.

3. Prepare the Mailbox Post

To prevent rotting, it is advisable to treat the part of the post that will be inserted into the ground with a protective coating. Apply the preservative substance and let the mailbox post soak for a day before installing it.

4. Install the Mailbox Post

Dig a hole in the selected location, with a depth of about 2-3 feet. Put a layer of gravel on the bottom of the hole to allow water drainage. Place the mailbox post into the hole, and then back fill with the spoil that you dug out. Make sure your mailbox post is straight by using a level.

5. Put the Mailbox on Your New Post

The last thing to do to after installing the post is place the mailbox on it. You can use screws or nails to set it in place. Your mailbox is now ready to be used.

Need a Handyman?

Call Seva Call today and we’ll connect you with local professionals that can get your job done. It’s fast and free!

Tipping Pet Groomers

Wednesday, March 12th, 2014

Tipping Pet Groomers - Veterinarians

In the pet services business, tipping pet groomers or other workers is not customary. However, while it is not the norm for some people, there are others who do appreciate the work of a pet groomer and tip accordingly for an excellent service. If you’re confused as to how you should tip your pet groomer, here are some pointers:

– Nail Trim: at least $2

– Bath (no hair cut): at least $5

– Bath (with hair cut): $5-$10

– Tip more if your dog or cat is large, difficult, or needs special care.

– Tip full price for puppy grooming since puppies are difficult to handle.

– Tip extra if you have an old dog because they’re often harder to groom than other dogs.

While the minimum amount listed above would be a great start when tipping pet groomers, there is no limit as to how much you want to tip for an exceptional service. It’s all about how satisfied you are and how much you want to show your appreciation.

Why Tip Your Pet Groomer?

You would probably agree that it is hard to find a good pet groomer. You’ve might have heard of unpleasant stories from other pet owners or have experienced horrible pet service yourself. That’s why when you find a service you are happy with, it’s only fair to tip, especially when your pet requires extra level of care. Remember that the bill you paid for the pet grooming service does not include gratuity, so tips are a big help to groomers and are always appreciated.

Tipping pet groomers may also work for you and your pet if you’re a regular customer. Groomers would be more than willing to do an extra favor for your pet when you tip. Usually, if you’re a regular or generous tipper, you can expect your groomer to always make the time for your pet even at the last minute or on a busy day.

Find a Pet Groomer or Vet Quick!

Do you need to get in touch fast with a good pet groomer or qualified veterinarian in your area? Seva Call can help you. We are expert matchmakers, connecting people with the service professional they need. With our free service, you’ll be speaking with the right professionals in a matter of minutes.