How to Locate Electrical Wiring in Walls

Friday, February 21st, 2014

How to Locate Electrical Wiring in Walls - Electricians

You might want to locate the electrical wiring in the walls of your house for various reasons. These include identifying electrical short circuits, repairing the wiring, planning home improvement projects, and increasing the safety of your home. It also allows you to avoid overloading your electrical system by connecting too many appliances to the same outlet.

To trace the electrical wiring, you need something that doesn’t involve tearing down your walls. Hitting an electrical wire while demolishing a wall can be extremely dangerous, and you want to avoid that. If you have an electrical blueprint of your home, things are simple, but if you don’t, what’s to be done?

What to Do to Locate Electrical Wiring in Walls

First, check the outlets and see where the wire comes from and what it connects to. Do the same for wired appliances. Then, try to understand the link between circuit breakers and the electrical wiring in your house.

Use Special Tools to Locate Wiring in Walls

You can also use several tools to locate the electrical wiring in the walls of your house.

Stud Finder: this tool uses a magnet to trace the nails and the wires in the wall frame.

Voltage Detector: this allows you to locate the wiring in the wall and tells you whether it’s still functional or not. In case you need repairs, this tool is very helpful, as it tells you exactly what’s wrong.

– Wire Tracers: these are specially designed to locate the electrical wiring in walls or even underground.

Professionals Help

However, some of these tools may be expensive, and you may not want to invest in them. If you need help locating electrical wiring in walls because something’s not working, it might be better to get help from a professional. Seva Call can put you in touch with experienced electricians in your area in minutes.

How to Refinish Wooden Floors

Thursday, February 20th, 2014

How to Refinish Wooden Floors - Painters

If your old wooden floor needs refinishing, here’s what you can do.

First, examine it in order to establish if it needs repairs, too. If it is damaged, it’s best to fix it before any starting your refinishing project. It’s not difficult to refinish wooden floors, but you should pay attention to a number of details.

Preparation Works

1. Take your time when preparing the floor for refinishing. That means its surface must be cleaned and sanded. A good preparation starts with the removing of all the objects in the room — not only carpets, but also whatever may hinder the cleaning process.

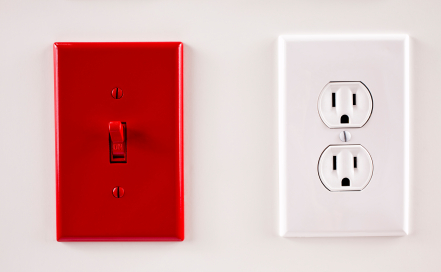
2. Insulate all electrical openings and switches using tape. At the end, vacuum the wooden floor. Now, it is ready for sanding.

Sanding

3. The sanding operation is meant to smoothen and polish the floor. You will sand it down by rubbing its surface with sandpaper. Stains and different scratches need to be sanded away.

A mechanical sander can be of great help, but it won’t be able to touch certain small areas. You can use sandpaper for these spots to make sure you remove all stains.

4. Once you’re done sanding, clean the floor thoroughly.

Refinishing

5. At this stage, you can start refinishing your wooden floor. If you have vacuumed the floor and there isn’t any debris left, you can start applying the finish. Your floor should be dry and your windows opened, in order to ensure the circulation of fresh air around the room.

6. Apply the finish carefully, so that the whole surface of the floor is covered with the same amount of finishing agent. Stain your wooden floor using a pad, and then let it dry. If necessary, apply another layer of stain for a deeper color.

Need Help?

If you find this process difficult, Seva Call can put you in touch with professionals who can do it for you. Just give us a call and we’ll find the right painters in your area who can refinish your wooden floor.

Types of Patio Pavers

Thursday, February 20th, 2014

Types of Patio Pavers - Landscapers

Who wouldn’t want to spend quality time with family and friends in a beautiful, relaxing outdoor space? Fortunately, gorgeous patios are now easier to build and maintain, because homeowners can profit from a large selection of premium patio pavers. Several types of patio pavers may meet your unique needs, in terms of design and functionality.

Factors That Should Influence Your Purchase

Not all types of patio pavers are actually right for your project. Find the most suitable materials based on several selection criteria

Inspect Some of the Most Popular Choices

You can always get inspired by consulting some of the most influential outdoor design magazines. Note that the most adequate materials for your project will always be the ones which are durable, timelessly elegant, easy to install, and cost-effective. Some of the most popular choices are:

Poured concrete: this is an ideal alternative for do-it-yourselfers. It can also be used to ensure a cheap extreme makeover for old concrete surfaces.

Bricks: this paving material is versatile, solid, and it comes in different shapes and colors.

Concrete pavers: can be used to create a beautiful interlocking surface; they are much more resistant then brick and can replicate the rustic look of natural stone

Gravel: even though it may require extra layers and constant smoothing to preserve its appeal, gravel is a fantastic option for price-conscious homeowners.

Stone: this material ensures a rugged, rustic charm and gives your outdoor space a much-needed personalized touch; it is available in different sizes and colors.

Ask an Expert

Looking for the most appealing, inexpensive types of patio pavers? In this case, just discuss your options with a competent landscaper. Use Seva Call to find the most respectable professionals in your area. This is the simplest way to find hardworking talents who live and work near you, and it’s free!

Install Silent Panels

Thursday, February 20th, 2014

Install Silent Panels - Handyman

Some spaces, such as gyms, schools, offices, garages, restaurants, or manufacturing plants, where noise or spatial division are a concern, require a sound proofing solution to increase comfort and allow people to perform their tasks. These days, silent panels are one of the most convenient options to optimize the acoustics of your home, business premises, or public areas.

You can install silent panels in your home or work space to keep sound from getting inside, or out.

The Advantages of Silent Panels

There are many advantages to using silent panels. Here are some of the most important:

– They block sound, ensuring a soundproof environment where you can focus on your work, enjoy playing or recording music, or watching a movie in your home theater without worrying about disturbing your neighbors.

– They can divide a space according to your wish and needs. For instance, in an open-space office, you can use them to ensure privacy and increase productivity.

– They are made of light materials, and can be easily installed on walls and ceilings with the help of an adhesive.

– They are suitable for various types of spaces, both residential and commercial.

– They are resistant to impact and moisture.

– They are versatile and flexible, and can be reinstalled in a different place if you wish.

How to Install Silent Panels

Installing silent panels is easy, and involves several steps.

1. Define Your Needs

Look at the space you want to sound proof and make a sketch if necessary to see how many silent panels would fit your purpose.

2. Establish Silent Panel Location

Measure the walls and ceiling and think about silent panel size to get an accurate idea about the installation.

3. Install Silent Panels According to Manufacturer Instructions

Usually, silent panels come with impaling clips onto which you apply a special adhesive, and then screw the clips on the wall. It’s recommended to use four or more clips per silent panel to make sure it stays attached to the wall.

Need Help?

If you need assistance with silent panel installation, look no further. Seva Call can connect you with a local handyman who can soundproof your space in no time.

How to Replace Sewer Lines

Thursday, February 20th, 2014

How to Replace Sewer Lines - Plumbers

The sewer line is an essential part of your plumbing system, and plays a major role in ensuring the proper functioning of your home. Unfortunately, sewer lines can break down at any time because of wear and tear, clogs, tree roots, or other factors.

Because they are located underground, it’s difficult to predict sewer line problems. However, when you are confronted with such an issue, it’s important to know what to do. If your sewer line is beyond repair, you will have to replace it.

How Do You Replace Sewer Lines?

Replacing your sewer line is a complex operation, which requires the assistance of a licensed plumber. There are several ways to replace a sewer line, depending on various factors, including sewer line location, access, and deterioration stage.

The Conventional Way to Replace Sewer Lines

The traditional way to replace a sewer line is to dig a trench, remove the old, damaged pipe, and replace it with a new one. Although it sounds simple, it’s a time-consuming, labor-intensive, and costly method to change a sewer line. That’s because you might need to tear up your driveway and dig up your yard. Besides the cost of replacing the line itself, you will have to pay for re-landscaping as well.

Sewer Line Leak Detection

If your sewer line leaks, the leaking point can be detected by a plumber with the help of a video camera. This non-invasive method allows you to repair the problem without having to dig a trench to access the sewer line.

Trenchless Sewer Line Replacement

This technique consists of inserting the new sewer line through the old one. To do this, the plumber will only dig two access holes, not an entire trench, to extract the broken pipe. It’s not only a less messy method, but also a more cost-effective one.

Professional Sewer Line Replacement

Having trouble with your sewer line? Let Seva Call connect you with experienced local professionals who can help you replace or repair it right away.

How to Use a Vinyl Siding Repair Kit

Thursday, February 20th, 2014

How to Use a Vinyl Siding Repair Kit - Handyman

Quality vinyl siding is a durable material, and it is a beautiful choice that works well with different styles of houses. When properly maintained – which requires minimal effort – it will last a long time. However, siding damage can happen due to a variety of reasons, ranging from severe weather to accidents. When your siding does get holes or cracks, there are simple ways to repair it, such as using a vinyl siding repair kit.

Repairing Small Siding Cracks

You can handle small cracks in your vinyl siding with a basic vinyl siding repair kit from a hardware supplier or home center. To do this, carefully pull up one edge of the cracked area using a toothpick and apply some repair glue inside the edges. Press down the edges to glue them firmly. It is recommended to do this job when it’s warm outside to keep the vinyl pliable.

Repairing Larger Siding Cracks or Holes

First, you need to assemble the necessary tools that are part of a complete vinyl siding repair kit, such as:

– Zip tool

– Pry bar

– Hammer

– PVC cleaner

– PVC cement

– Glue

– Galvanized roofing nails

In addition to the tools above, you will also need to have some scrap vinyl siding that matches the existing one. When you have everything all ready, here’s how to put your vinyl siding repair kit to use:

Step 1: Remove the damaged section. Take the zip tool and insert it underneath the lower edge of the overlapping area of the cracked siding. Press down on the tool and slide it horizontally. Then, use a pry bar or the nail puller of a hammer to remove all the nails.

Step 2: Clean the exposed surface. Using a PVC cleaner, make sure to thoroughly clean the surface behind the siding you just removed.

Step 3: Measure the damaged area that needs to be covered up and cut the scrap vinyl according to size to create a replacement panel. You want to make sure that the panel will be big enough to cover the damaged area completely and then a little bit more around it to prevent the crack from getting any bigger.

Step 4: Glue the panel in place using PVC cement.

Step 5: Nail the replacement panel into place.

First, relock the side. Use the zip tool to pull along the lower edge of the overlapping siding. As you’re working with the zip tool, take the replacement panel and press its top edge up and over the bottom-raised edge of the overlapping siding.

Finding Professional Siding Repair

Some siding damage requires more help than what you can tackle with a vinyl siding repair kit. In such instances, use Seva Call‘s free search service to locate up to three qualified contractors within your area. Then, all you need to do is make the final choice of who to hire. Try us today and get your siding fixed by a pro!

Why Choose Zips Dry Cleaners

Wednesday, February 19th, 2014

Why Choose Zips Dry Cleaners - Tailors

Zips Dry Cleaners started in 1996 in the Baltimore-Washington area. In the beginning, the company consisted of just eight dry cleaners, but it has grown over the years to be one of the biggest retail dry cleaning chains in the region. Currently, there are 30 Zips Dry Cleaners operating. Recently, they have been recognized as the best dry cleaner in Howard County, MD three years in a row.

What Makes Them Different?

Pricing: Zips Dry Cleaners is known for quality dry cleaning at affordable prices, which they describe as unbeatable in their slogan. How affordable are their prices? They charge just $1.99 for any type of clothing. Obviously, this pricing scheme is not only affordable, but it’s quite unique and very appealing to customers. You can use their online savings calculator to find out how much you will save by using their service.

Same-day service: Wile many dry cleaners already offer this, Zips Dry Cleaners made their offering a little better by preparing laundered items to be ready at 5pm, an hour earlier than most other dry cleaners. You just have to drop your items off by their store by 9 am.

Eco-friendly methods: Zips Dry Cleaners was a green cleaner even before being environmentally-friendly was popular. They use their own green standards in doing their business. Every one of their locations utilizes hanger recycling. All of the plastic bags they use are 100 per cent biodegradable. In addition, they continually work to minimize their waste and their annual water consumption.

Need Professional Clothes Alteration?

If you require more than just laundering or dry cleaning, and you’re looking for expert tailoring services for your clothes, TalkLocal can help. We will connect you with the right professionals in your area. So, contact us and we’ll get you connect to local expert tailors and dry cleaners in just minutes.

Tapeworm Medicine Dogs May Need

Wednesday, February 19th, 2014

Tapeworm Medicine for Dogs - Veterinarians

Tapeworms can compromise your dog’s digestive system and lead to a series of complications that may worsen the situation. To avoid this worst-case scenario, make sure you schedule an appointment with a competent local veterinarian. An expert will be able to diagnose the problem in a timely manner and prescribe the very best tapeworm medicine dogs may need that could save the life of your pet and improve its condition fast.

Identifying the Best Natural Remedies

If, for some reason you can’t reach your vet, try to eliminate tapeworms with centuries-old cures that seem to do the trick almost every time. Here are a few popular homemade, all-natural remedies:

– Garlic (for easier administrations, chop it into tiny pieces and mix it with water or use garlic powder, which can be easily combined with your dog’s favorite food)

– Wheat germ oil (1 tablespoon per day, after each meal)

– Pumpkin seeds (grind 1 teaspoon of pumpkin seeds and give it to your dog after each meal)

– Oregon grape juice (6 drops served twice a day, for each 4.5 kilos, the equivalent of 10 pounds)

Tapeworm Medicine for Dogs

The good news is that you don’t need a prescription to buy the best tapeworm medicine for dogs. Most of the pills recommended in this case are based on an active ingredient called praziquantel, which manages to eliminate both types of tapeworms: D. caninumn and T. pisiformis. These pills are suitable for oral administration and can also be minced and mixed with the dog’s food.

Ask an Expert

Don’t know which type of tapeworm medicine for dogs would be more effective? In this case, ask your vet for advice. If you don’t have one, identify the most competent veterinarians who work in your area with Seva Call, your reliable connection to the best professionals.

Heating Cooling System New

Wednesday, February 19th, 2014

Heating Cooling System New - Heating and Cooling

Heating, ventilation, and air conditioning (HVAC) units are systems, which provide both the heating and cooling you need in your home. New technologies make HVAC systems more energy efficient these days, but some homeowners can have problems with their newly installed heating and cooling system.

Here are some tips to keep in mind in case you’re having trouble with your new HVAC system.

Strange Noises

If your heating cooling system is new, but starts making strange noises, it’s a sign that something is wrong. To prevent damage and protect your investment, it is recommended to address the problem immediately.

Check your HVAC system, and see if you notice anything unusual about its parts. Sometimes, improper installation can be the cause of a noisy HVAC. Tighten any loose parts and make sure there’s no air in your radiators.

If you cannot identify what’s causing the noises, or if you don’t know what to do about them, call a professional to take a look at your HVAC system. Most of the time, the company which handled the installation also offers maintenance services, so you can give them a call and ask for an inspection.

Not Enough Heating

Another common indication that your new heating and cooling system is not in tip-top condition is temperature. If your radiators don’t heat up and your house remains cold, then your HVAC system doesn’t work properly.

To diagnose the problem, check the pilot light first. If it’s not lit or if it’s flickering, it may need some cleaning.

If the pilot light seems to be fine, move on to the piping. Leaking or clogged pipes are another cause of insufficient heating.

Finally, check the thermostat. Your HVAC system may not work as it should because the thermostat doesn’t activate.

Need Assistance with Your HVAC System?

If you keep having issues with your new heating and cooling system, you may need the help of a professional. Seva Call can put you in touch with local experts in a matter of clicks. Our service is effective and free.

Tips for Cleaning Heating Ducts

Wednesday, February 19th, 2014

Tips for Cleaning Heating Ducts - Maid Services

Those air ducts in your home have a simple, but very important job: they need to move the air throughout your house using a cooling or heating system. As they do their job, however, they can easily become soiled, contaminated, and full of dirt. As your heating ducts fill up, you might notice more dust being distributed about your home. Cleaning heating ducts is a good spring cleaning project and is a vital part of your maintenance routine for your home

Check for Mold First

Mold can develop anywhere there is moisture. If your heating ducts don’t have adequate ventilation, there might be mold spores developing inside the ducts. While these are harmless for most, people with allergies or asthma may have a difficult time breathing while the mold is present. Check for any mold in your ducts and sanitize them if mold is present.

Look for Clogs or Debris Blockages

Your unit might be energy-efficient, but if you have excessive debris or clogs in your ducts, you’re not going to save a lot of money on heating and cooling. Check the ducts for excessive debris or clogs and quickly remove them. This will keep your unit running efficiently and might even lower your heating/cooling costs.

Get a Cleaning Estimate

Cleaning heating ducts is messy and requires special equipment. If you don’t feel like doing it yourself, get a few estimates from heating and cooling specialists in your area. There’s nothing wrong with getting two or three estimates from different companies so that you can compare the costs and their cleaning methods.

Try Seva Call

Seva Call can put you in touch with a professional in your area skilled in cleaning heating ducts. Using a professional service that is recommended by Seva Call can help save you time on researching and interviewing HVAC specialists in your area too.