Posts Tagged ‘repair’


Broken Fence Post Repair

Friday, March 28th, 2014

Broken Fence Post Repair - Handyman

A straight, solid fence protects property and enhances the curb appeal of a home at the same time. What happens when a fence post snaps or starts to rot? Powerful thunderstorms, heavy snows, extreme temperatures, auto accidents, and elevated levels of humidity are all important factors impacting the aesthetics and the functionality of wooden fences.

In this particular situation, you have two options at hand: you could either repair your broken fence post on your own, or you could rely on professional services brought to you by a great handyman. Here are a few steps that you should follow in case you want to conduct a simple, cost-efficient, DIY broken fence post repair project.

1)  Analyze Your Alternatives

Does your fence require a simple, quick fix, or do you need to invest in a large-scale repair project? You can discover the answer to this question by contacting a contractor and obtaining a free estimate, or you could just analyze every fence post on your own.

If more than 20% of your wooden or iron fence posts are in bad condition, it is advisable to opt for a total replacement to avoid unpredictable expenses in the long term.

Rotten or broken wood posts can be easily replaced with new ones; just make sure the color of the new element matches the shade of the old one.

If you own a wrought iron fence that is now visibly affected by rust, clean or replace the damaged posts and always try to eliminate and control rust by applying an effective anti-corrosion product suitable for various metal surfaces.

2)  The Do’s and Don’ts of Your Broken Fence Post Repair Project

If your fence post is severely damaged at ground level, it is advisable to replace it in a timely manner. Don’t try to fix it, as this method would never manage to make the old fence post stand the test of time.

Installing a solid reinforcing patch is a valid alternative only if there are approximately 7 inches between the ground level and the damaged surface. Afterward, the job can be easily completed by following 4 simple steps: get the fence panels and rails out of the way, install the fence post cup and the fence post cap, and then reassemble the boards, rails, and wires.

3)  Ask an Expert 

You could easily get the job done in less than one day, as long as you have enough time, patience, and a set of basic tools, including a hammer, safety gloves, metal flashing, tape measure, and tin snips.

If you don’t have what it takes to complete a broken fence post repair project on your own, choose to hire a skilled handyman operating in your area. Find the best one with help from TalkLocal, a free service designed to connect you with the right professionals.

How to Fix Leaning Mailbox Posts

Thursday, February 13th, 2014

How to Fix Leaning Mailbox Posts - Handyman

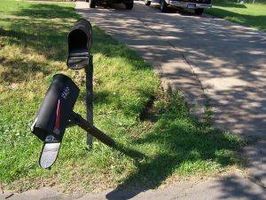
If your mailbox is leaning for various reasons, such as severe weather or improper installation, sooner or later you’ll have to fix it. That’s a must-do, especially if you consider selling your house. Here’s what you should know about how to fix leaning mailbox posts.

1. Remove the Leaning Mailbox Post from the Ground

If your mailbox is installed on a wooden or metal post and it’s leaning, the best way to fix it is to dig it out of the ground. This may be an easy job if the post was simply stuck into the ground without having a foundation. If the initial hole was not deep enough, the cause of the leaning is obvious. If the ground around the post is packed very hard, is stony, or has a thin layer of concrete, you might need to use a mattock to break up the surface.

2. Prepare the Hole for the Mailbox Post

To make sure your mailbox will withstand the test of time, you need to dig a hole which is about two feet deep and about half of that in diameter. After digging the hole, insert a layer of gravel into it to minimize the effect of water infiltration. If you use a metal mailbox pole, the gravel on the bottom of the hole will help prevent rusting.

3. Insert the Mailbox Post into the Ground

Insert the post into the hole and add soil to keep it in place. Level the mailbox post and fill the hole with dirt. Make sure the mailbox post stands up straight, and tread on the dirt to pack it down. Don’t forget that the ideal length of a mailbox pole is 41-45 inches above ground level.

How Can You Fix Leaning Mailbox Posts with Cement Bases?

If your leaning mailbox is set in cement, it will be more difficult to fix it, but you can do so by enlarging the base. Repeat the first step by removing the mailbox, make the hole wider, reinsert the mailbox post, and add cement to make the post stand upright.

Get Professional Help

If you don’t want to repair your mailbox yourself, Seva Call can get you professional help by putting you in touch with local handymen who can get the job done in no time. Our service is fast and free of charge.

Refinish Wooden Deck

Thursday, January 9th, 2014

Refinish Wooden Deck - Painters

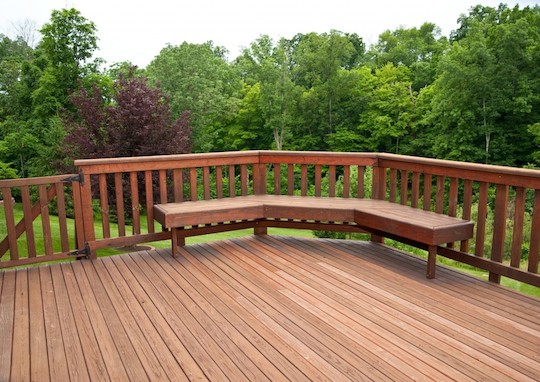
The wooden deck behind your home is a place where many memories are made. Be sure to protect and extend the life of the wood by refinishing the deck. Doing this will make your deck look fantastic as well as improve your home’s resale value.

Here are a few basic steps to help you refinish wooden decks.

Inspect the State of Your Deck

To start the refinishing process, begin by inspecting the wood deck for any structural problems. A wood deck endures many environmental challenges. There may be loose boards, as well as rotting or severely split wood. It’s best to fix those issues before beginning the actual process of restoring the deck.

Power Wash the Deck

The critical component of deep cleaning a wooden deck is to power wash it.  To do this, use a power washer with a water pressure that is as low as possible while still being effective. Cedar, pine, and other softwoods should have a water pressure around 500-600 psi. Increase water pressure for harder woods, but do not go higher then 1200-1500 psi.

Sand the Wood

After the power washing is complete, it is time to move on to sanding the wooden deck. The reason behind this is due to wood fibers that could have risen during power washing. These fibers do not go down and could cause splinters, so sanding the wood gives it a smooth, even finish.

Apply the Wood Stain

Once you have completed the preceding steps, it is time to get your tools and begin staining the deck!

Start with the handrails, and work your way down to the deck boards. Use a smaller brush for areas such as handrails and trim boards. Flat paint pad applicators can help cover large areas while providing a nice even coverage of the stain

Seek Professional Help

There are many stages of this process that you may not know how to do or possess the necessary tools to complete. For help, use Seva Call. We will connect you with professionals who can fit into your schedule. Contact Seva Call now, so you can begin preparing your deck for a wonderful spring!

Fence Repair Cost

Wednesday, December 25th, 2013

Fence Repair Cost - Handyman

If your fence is severely damaged, you should fix it as soon as possible to avoid safety risks and to boost the curb appeal of your property. After all, who would want to live in house surrounded by an ugly, broken, rotten fence?

If you’re trying to determine the average fence repair cost, you should know that most homeowners invest anywhere from $475 to $675 in this type of project; those who won’t settle for less than first-class professional services and premium materials might take up to $1,100 out of their pockets, while the minimum cost is estimated at approximately $175.

Keep in mind that the fence repair cost will always be influenced by numerous factors, including the following.

1) Fencing Materials

Different construction materials carry different price tags. Those who have designed and installed sophisticated, luxurious fences to protect their property will now have to come up with a significant amount of money to repair it and make it look like new.

For instance, if you have a vinyl fence, you will invest less in this repair project; at the same time, fixing a thick brick wall built around your home will cost you a lot more. Moreover, a repair project usually involves many additional materials, like paint, new locks, anti-corrosion products and so on, which obviously drive up the fence repair cost.

2) Level of Damage

Do you need to pay for a quick fix or for much more laborious repairs? If you only need to replace one or two damaged fence posts, this should be considered a simple repair that shouldn’t cost a fortune.

On the other hand, if you own a very tall, long fence that has been severely deteriorated by a storm or by a vehicle, a repair project might not be your most cost-efficient alternative. In this case, it is advisable to purchase and install a new, solid substitute.

3) Labor

Are you asking for a simple, rapid fix, or does your project involve more than a couple of hours of hard work? Do you plan to conduct a DIY project or would you be willing to hire a carpenter or a skilled handyman?

You should know that most professionals operating in this sector charge by the hour. If you want to determine the fence repair cost, start by calling a few candidates for this assignment and ask for an up-front estimate.

Ask an Expert

It might be difficult for you to repair your fence by yourself, especially if you don’t have any experience and zero skills when it comes to basic home improvement projects. Take this weight off your shoulders and opt for first-class services ensured by competent handymen.

Identify the best ones by relying on TalkLocal, a great, free service enabling you to get connected with the right professionals in your area in just minutes.

Four Questions about Trenchless Sewer Repair

Thursday, November 28th, 2013

Four Questions about Trenchless Sewer Repair - Plumbers

Say no to digging. If you are having issues with your sewer lines, know that destructively excavating those problematic pipes is not the only solution.

Why go for trenchless sewer repair?

Trenchless sewer repair can keep things in order without destroying your landscape. This means sewer repair only requires holes for exit and entrance, and that’s about it.

What about the cost?

Although the service is more expensive than a sewer line replacement method that involves digging, you will end up saving more money because you don’t have to restore your beautiful lawn. Expect to pay $100 and $200 per foot for trenchless sewer repair. This is just an estimate. The real cost will also depend on your landscaping. Before you make a decision, you can ask for a free estimate.

How does trenchless sewer repair work?

After the entry and exit holes have been created, a steel cable is inserted at the entrance point and moved through the old sewer pipeline. A hard steel bursting head is attached at the end. With the help of a hydraulic system, the cable is pulled to the other end (at the exit point). In this process, the old pipe bursts, and the new pipe is pulled in until it reaches the exit. It is the less messy option for homeowners.

Is the pipe quality decent?

The best pipe to use is High Density Polyethylene Pipe (HDPP) as the replacement pipe. Compared to old clay, cast iron, or PVC plastic pipes, HDPE pipe is tougher against corrosion. The joints are also stronger so they are leak proof. How long does this type of material last? Manufactures claim that the service life of HDPE is about 200 years. It should be your pipe of choice.

Need Sewer Repairs?

For a project of this undertaking, count on a professional to get the job done right. Use TalkLocal to find the best professionals in your area. Talk Local will connect you with up to three professionals in just minutes, for free.

Repair Metal Roof Problems

Tuesday, November 26th, 2013

Repair Metal Roof Problems - Roofers

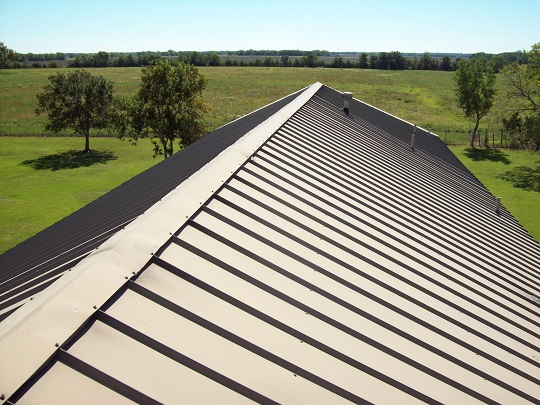
Metal roofs ensure the highest level of protection for your property. However, a virtually endless list of common problems, most of them triggered by poor upkeep, can impact their aesthetics and functionality.

These issues require simple, inexpensive repairs that could be easily performed by homeowners who have moderate skills, a basic set of tools, and some spare time on their hands. Check out the following guidelines to repair metal roof problems.

Identifying Some of the Most Common Problems Associated with Metal Roofs

Metal roofs are durable and represent a fantastic long-term investment. Nonetheless, lack of maintenance, harsh weather conditions, and low-quality materials can trigger various problems that should be addressed in a timely manner, including water leaks, loose seams, and corrosion.

How to Address and Repair Metal Roof Problems

1. Water penetration through your roof will inevitably lead to water leaks in your home. To eliminate this frustrating issue, clean your drains and see if they’re functioning properly. Tighten fasteners and make sure you replace all the missing ones.

2. Remove powdery rust by applying an agent that dissolves corrosion and keeps the whole roof surface clean.

3. Afterwards, power-wash your metal roof and fill all gaps with an all rubber roof cement.

4. Last but not least, apply a quality, sealing base coat and let it dry for a few minutes.

Rusty roofs can be easily corrected by simply dispensing a powerful anti-corrosion agent on the affected areas. Gaps can be prevented by tightening the fasteners and screws on a regular basis.

Ask an expert

If you don’t have the time on your hands to repair metal roof problems yourself, you can always contact a skilled roofer and let them do the heavy lifting.

After performing a thorough inspection, a real professional will be able to diagnose your problem, come up with different solutions, and ensure timely, premium repairs. Use TalkLocal to meet the most reliable roofer in your area, who could restore your metal roof in no time.

How to Replace a Door Frame

Tuesday, February 19th, 2013

How to Replace a Door Frame - Handyman

If your door frame has been damaged, you will need to replace it. If you wish to replace the door yourself, but do not know how, this article will help you learn how to replace a door frame. You will need a tape measure, 2×4 studs, a reciprocating saw, a hand saw (or circular saw), a hammer (or nail gun), 10d framing nails, a level, and a square.

How to Replace a Door Frame

1. Remove the casing, or trim, around the door frame. If you take it off carefully, you may be able to use it again.

2. Saw off the nails that are connecting the door and door frame to the wall.

3. Saw off the framing studs.

4. If you cannot reach the wall frame, take off some drywall/paneling on each side of the wall until you can.

5. Measure the new door you are putting in.

6. Make marks indicating the width of the new door you are putting in on the wall frame.

7. Measure the following distance from each of your marks (going out) and mark them as well: 3/8 inches, 1-7/8 inches, 3-3/8 inches.

8. Measure the height of your new door.

9. Make marks on the wall studs indicating the height of the door.

10. Saw a pair of studs so that they will fit between your width marks.

11. Place the studs on your 3-3/8 inch marks.

12. Use a hammer or nail gun to put framing nails through each side of your studs diagonally, so that they are attached to two boards.

13. Measure the space in between the studs.

14. Saw another stud, so that it is the same width as what you just measured.

15. Nail this stud to both of your previous studs.

16. Measure the space between the wall frame and the header.

17. Saw another stud to be the height that you just measured.

18. Put the stud in the middle of your header, vertically oriented.

19. Nail the stud to the header, and through the wall frame diagonally.

20. Saw off anything that is blocking your doorway.

Additional Help

If you need help replacing your door frame, you can contact a professional handyman to do it for you. With the help of TalkLocal, you can be on the phone in minutes with up to three high quality handymen in your area who will be available to be help you when you need them!

Tips on How to Repair a Dryer

Friday, February 1st, 2013

Tips on How to Repair a Dryer - Appliances Repair

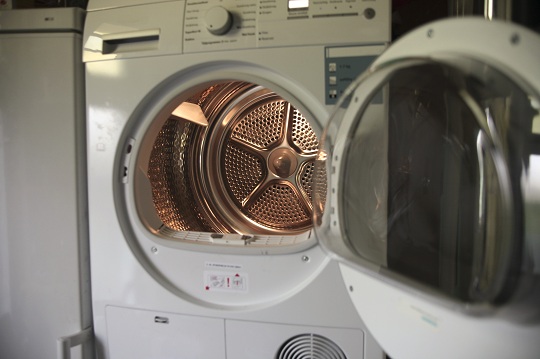
Like many appliances, your clothes dryer may develop problems over its life that cause it to work improperly or not at all. A lot of these problems are preventable with some consistent maintenance, while others can be repaired when caught early. Here are some tips on how to repair a dryer.

No Heat

If the dryer tumbles but won’t heat, there’s likely a problem with the heat source.

1. Make sure the dryer is set properly.

2. If so, make sure that it’s plugged in.

3. If it’s an electric dryer, you may need to replace a fuse or reset the breaker.

4. If it’s a gas dryer, make sure the supply valve is open and the pilot is lit.

Clothes Won’t Dry

The most likely cause of this problem is clogged vents. Although there is a lint trap in your dryer, it won’t catch everything. Over time, lint can build up inside of your dryer vent. Similarly, birds and other critters might make a nest in the vent opening in your home’s exterior, so check on that, too. There’s also the possibility that your dryer’s timer may not be working correctly. Another cause could be that the dryer is pinching the ducting against the wall, restricting airflow. You should never use flexible ducting of any kind. Its inability to support itself and resist crimping can present a fire hazard.

Dryer Won’t Turn On

The main culprit here is usually the power supply.

1. Check the connection with the outlet. If it’s plugged in, inspect the cord to be sure it’s not damaged and test the outlet with another appliance.

2. If all of that checks out, inspect the door switch. It may be stuck or broken. If it fails to make a clicking sound, you might need to have it replaced.

Additional Help

Clothes dryers are among the most convenient modern appliances anyone can own. However, they often fail to work as they’re supposed to. When this happens, if you’re not able to solve the problem yourself, you should check out TalkLocal to find a reputable local handyman. We will connect you with up to three professionals in your area who will be available to help you when you need them.

Repair Roof on Mobile Home

Friday, October 19th, 2012

Repair Roof on Mobile Home Roofers

There are a few signs that suggest when it is time to repair the roof on your mobile home. Consider the following symptoms to know when to take action:

– The silver coating material of your roof start to appear thin and accumulate cracks.

– You might see some gaps where there is metal folded over itself.

– At worse, you may start to notice leaks inside your mobile home, signaling holes in the roofing materials.

If you consider yourself a handyman or woman, you might try to attempt repairing the roof yourself. It is extremely important to take precautionary safety measures when completing a task like this. You want to make sure to be stepping on the stable beams of the roof, not between them. Make sure to use a ladder that is tall enough and don’t try to pull yourself up by the materials or pipes on top of the roof.

It is also important to note the specific roofing material that you will need, acquire the correct tools, and maybe even get some help with the project to make everything easier.

If you don’t have any experience with roofing or don’t feel comfortable completing a project like this on your own, contact a roofing specialist. Check out TalkLocal, a free service that will help you locate roofing repair specialists in your area, within minutes. All you need to do is enter your specific problem, your location, and your availability, and TalkLocal will contact top-quality, reliable roofers who will then call YOU directly, ready to help.